# Chromatic docs
> Chromatic is a cloud-based toolchain for visual testing, reviewing, and documenting Storybook components.
Site: https://chromatic.com/docs
---
## Why Chromatic?
URL: https://chromatic.com/docs
> Chromatic is a cloud-based toolchain that integrates with Storybook, Playwright, and Cypress to help teams test and review UIs.
# Why Chromatic?
Chromatic is a testing platform that scans every possible UI state across browsers to catch bugs in appearance, functionality, and accessibility. It enables you to assign reviewers and resolve discussions to streamline team sign-off.
Chromatic is made by the [team](https://www.chromatic.com/company/about) behind Storybook and integrates with Storybook, Playwright, and Cypress.
## Test how UIs look & function
Every time you push code, Chromatic runs the suite of UI Tests on your code to pinpoint bugs instantly. All tests run in parallel, including testing across your chosen combinations of viewports and browsers.
- [**Visual tests**](/docs/visual): Pinpoint changes in appearance, layout, fonts, and colors.
- [**Interaction tests**](/docs/interactions): Simulate user actions such as clicking, typing, hovering, dragging, etc., to confirm your app behaves as expected.
- [**Accessibility tests**](/docs/accessibility): run axe on each component to identify accessibility violations and get remediation tips.

## Benefits of testing with Chromatic
Chromatic’s UI Tests lets you gain full confidence in your UIs on every commit and code change.
🎛️ **Test the real UI**: Chromatic takes pixel-perfect snapshots of real code, styling, and assets. Your tests reflect exactly what your users see.
✅ **No test flake**: Chromatic uses [SteadySnap](https://www.chromatic.com/features/steadysnap) to eliminate test flake by stabilizing frontend rendering. It tracks browser activity, freezes dynamic content, and uses burst capture to ensure consistent results every time. Tests that still render inconsistently are flagged as [unstable](/docs/flake-filter) and won't block your build.
🏎️ **Run tests in parallel by default**: Chromatic tests run on as many machines as required to deliver results in the least time possible. Parallelization is automatic with no extra configuration or cost required.
🌐 **Cross-browser testing**: Chromatic test coverage extends to Chrome, Firefox, Safari, and Edge. All browser tests run in parallel so your test suite stays fast.
📲 **Responsive viewport testing**: Chromatic allows testing at all viewport sizes. You can adjust both width and height, and configure viewports globally or for individual tests.
⚡ **Test only what's changed**: Chromatic’s [TurboSnap](https://www.chromatic.com/features/turbosnap) feature speeds up test runs and reduces usage costs by up to 80%. It works by analyzing your project’s Git history and bundler dependency graph to identify component files and dependencies with changes, then it snapshots only the tests related to those changes.
🤖 **Higher codegen quality**: [Storybook MCP](/docs/mcp) improves AI agent output by providing it with better context about your components. Chromatic simplifies the process hosting your Storybook MCP server with proper authentication and access control.
## Powered by your existing tests
Chromatic's UI Tests build on the Storybook, Playwright, and Cypress tests you’ve already written. This dramatically reduces maintenance burden and setup.
### Storybook
Storybook lets you capture every component state and variation as stories. Chromatic then automatically converts them into tests, catching any unexpected changes and guaranteeing a flawless UX for your users.
Why use Storybook?
[Storybook](https://storybook.js.org/) is an open-source tool for developing UI components in isolation and creating living, interactive component documentation. It makes it trivial to reproduce hard-to-reach component states and ensures those states are documented in code. When you adopt Storybook, you also unlock automation for UI components and libraries via Chromatic.
New to Storybook? Check out our hands-on tutorials at [storybook.js.org/tutorials](https://storybook.js.org/tutorials/).
[Stories](https://storybook.js.org/docs/get-started/whats-a-story) capture all states and variations of a component. They’re a pragmatic, reproducible way to keep track of UI test cases. Using [play functions](https://storybook.js.org/docs/writing-stories/play-function), stories allow you to simulate user interactions to run functional tests on components. Chromatic uses these stories to power visual tests.
Chromatic manages the entire testing process for you. Everything from building and publishing your Storybook to running tests in cloud browsers.

[**Zero-config interaction tests:**](/docs/interactions#how-to-write-interaction-tests) If you use Storybook's [play functions](https://storybook.js.org/docs/writing-stories/play-function) for functional testing, Chromatic intelligently waits for their completion before capturing snapshots.
[**Effortless variant testing:**](/docs/modes/) Chromatic harnesses the power of [Storybook Globals](https://storybook.js.org/docs/essentials/toolbars-and-globals#globals) to comprehensively test UI variations across themes, viewports, locales, and media features.
### Playwright and Cypress
Run your E2E tests as usual. While those tests run, Chromatic collects a complete archive of your UI (DOM, styles, and assets). It then renders that archived UI in cloud browsers, captures visual snapshots, and identifies visual regressions through pixel diffing.

## Get started
Experience the power of Chromatic firsthand! Setup takes just two minutes. Pick your testing tool of choice and get started.
---
## Quickstart
URL: https://chromatic.com/docs/quickstart
> Learn how to setup Chromatic for Storybook and run tests
# Chromatic for Storybook
Chromatic, created by the team behind Storybook, seamlessly integrates visual testing into your UI development workflow. Storybook lets you capture every component state and variation as [stories](https://storybook.js.org/docs/get-started/whats-a-story). Then, Chromatic automatically executes visual, interaction and accessibility tests on those stories.
ℹ️ Not using Storybook? Chromatic integrates with [Playwright](/docs/playwright) and
[Cypress](/docs/cypress) to transform your E2E tests into visual regression tests.
## Set up Chromatic for Storybook
The Chromatic CLI builds and uploads your Storybook to the Chromatic cloud infrastructure and triggers UI tests without requiring any additional configuration.
### 1. Sign up and create a new project
Generate a unique project token for your app by signing in to [Chromatic](https://www.chromatic.com/start) and creating a project. Sign in with your GitHub, GitLab, Bitbucket, or email.

### 2. Install
Install the [chromatic](https://www.npmjs.com/package/chromatic) package from npm.
{/* prettier-ignore-start */}
```shell
$ npm install --save-dev chromatic
```
```shell
$ yarn add --dev chromatic
```
```shell
$ pnpm add --save-dev chromatic
```
{/* prettier-ignore-end */}
Storybook 6.5 or later is required. We also guarantee support for officially maintained version of
Node, currently 18, 20 & 21. Other Node releases may encounter errors. To switch between Node
versions, we recommend using nvm,{' '}
n, or another version manager.
Learn how to add chromatic to your package.json
The `chromatic` command will also give you the option of adding an npm script to your `package.json` so you can run future builds with `npm run chromatic/yarn chromatic`. If you want to add it manually, it should look something like:
```json
{
"scripts": {
"chromatic": "chromatic"
}
}
```
The above script command will pick up your project token by reading the `CHROMATIC_PROJECT_TOKEN` environment variable. After adding the above, ensure you set `CHROMATIC_PROJECT_TOKEN` when you run builds - such as in your CI config.
If you allowed `chromatic` to add the above line, it will also have written the environment variable to your `package.json`. This environment variable can also be set via your CI config for extra privacy.
Setup .gitignore to ignore certain files in your Git repository
Running the Chromatic command may generate certain files for logging and debugging purposes. Exactly which files it generates depends on your configuration, but these entries should likely be added to your `.gitignore` file:
```
build-storybook.log
chromatic.log
chromatic-build-*.xml
chromatic-diagnostics.json
```
### 3. Run your first build to establish baselines
Once you installed the `chromatic` package and have a project token, you can establish baselines by running a Chromatic build in a new project. This captures a snapshot of each test in a cloud browser and sets it as the baseline.
Subsequent builds will generate new snapshots that are compared against existing baselines to detect UI changes.
{/* prettier-ignore-start */}
```shell
$ npx chromatic --project-token
```
```shell
$ yarn chromatic --project-token
```
```shell
$ pnpm chromatic --project-token
```
{/* prettier-ignore-end */}
We use the build-storybook script from your package.json by default. If
you have customized the storybook script (for example, adding a static directory with{' '}
-s), check that you've done the same for build-storybook.
### 4. Review changes
On each build, Chromatic compares new snapshots to existing baselines from previous builds. Try modifying the UI a bit and running another Chromatic build.
When tests are complete, you’ll see the build status and a link to review the changes. Click on that link to open Chromatic.
```shell
Build 1 published.
View it online at https://www.chromatic.com/build?appId=...&number=1.
```

The build will be marked “unreviewed” and the changes will be listed in the “Tests” table. Go through each snapshot to review the diff and approve or reject the change.
✅ **Accept change**: This updates the story baseline, ensuring future snapshots are compared against the latest approved version. Once a snapshot is accepted, it won't need re-acceptance until it changes, even across git branches or merges.
❌ **Deny change**: This marks the change as “denied”, indicating a regression and immediately failing the build. You can deny multiple changes per build. Denying a change will force a re-capture on the next build, even if [TurboSnap](/docs/turbosnap) would otherwise skip it.

### 5. Discussions
Reviewers can create discussions to point out bugs or ask questions. Discussions are shown within the same interface as Chromatic’s detected UI changes, so all collaborators have the same reference point.
Alternatively, you can click on a snapshot to create a discussion pinned to a specific change and provide precise feedback on the issue. Pair discussions with denying a change to block merging until bugs are resolved.
### 6. Merge
If you accept all the changes, the build will **🟢 Pass**. Future builds whose stories have the same appearance will pass.
If you deny any of the changes, the build will **🔴 Fail**. You will need to make code changes (and thus start a new build) to get the build to pass.
When your build is passed (all changes accepted), you’re ready to merge with confidence, knowing that your UI is bug-free. Chromatic will update the PR check for “UI Tests” to reflect the build status.
After you merge your code, Chromatic will also apply accepted baselines to stories on the target branch. That means you’ll only need to accept baselines a single time.

### 7. PR check for “UI Tests”

Chromatic adds a ‘UI Tests’ badge to the list of status checks for your pull/merge requests. The badge shows errors or changes that need to be reviewed. Require the check in [GitHub](https://help.github.com/en/github/administering-a-repository/enabling-required-status-checks), [GitLab](https://docs.gitlab.com/ee/api/commits.html#post-the-build-status-to-a-commit), or [Bitbucket](https://confluence.atlassian.com/bitbucket/suggest-or-require-checks-before-a-merge-856691474.html) to prevent accidental UI bugs from being merged.
[**Integrate Chromatic into your CI pipeline**](/docs/ci) to get notified about any visual changes introduced by a pull request. Chromatic will run tests when you push code and report changes via the “UI Tests” badge for your pull request.
---
## Next: enhance your UI Testing workflow
You can further refine your testing process and guarantee polished UIs in all scenarios with these strategies:
- [**Test component functionality with the play function:**](/docs/interactions#how-to-write-interaction-tests) Simulate clicks, hovers, and more to simultaneously test how components look & function.
- [**Test dark mode and other component variations:**](/docs/modes/) Make sure your UI adapts perfectly to different themes, locales and viewport sizes.
- [**Test for flexible user preferences:**](/docs/media-features/) Guarantee your components adapt seamlessly to media features like `forced-colors` and `prefers-reduced-motion`.
- [**Speed up tests & optimize usage:**](/docs/turbosnap/) Learn how to use Chromatic’s TurboSnap to only test stories that have code changes associated with them.
---
## Frequently asked questions
Can I disable UI Tests if I prefer not to use them?
Yes. Go to your project's manage page, where you can disable UI Tests. Once disabled, Chromatic will no longer add status checks to your PRs for UI Tests.
Can I rerun a build without running my whole CI workflow?
Yes, you can [rerun the latest build on any branch](/docs/rerun-builds) outside your CI workflow. Go to the build page to kick off a new build that uses settings and configurations identical to your old build.
What’s the difference between denied and unreviewed changes?
The purpose of denying is to mark changes you’ve looked at but not accepted. After reviewing the build, the list of denied changes helps you track what needs fixing.
When it comes to baselines, denying and leaving unreviewed have the same effect. In both cases, the original baseline is used for comparisons. This means in subsequent builds, Chromatic compares the latest build to the original baseline (not the previously denied snapshot).
Denied changes will be marked as unreviewed in subsequent builds for you to review again.
Speed up review with keyboard shortcuts
Use keyboard shortcuts to verify UI changes faster. Protip: Pressing 1 multiple times switches between the baseline and the new snapshot in the 1up view.

What about baselines on other branches?
Chromatic automatically changes the baseline snapshots used for each build, depending on your branch. Each branch has a separate set of baselines.
This means you can update UI components on multiple feature branches in parallel without conflicts. When you merge branches, the most recent baseline takes precedence. [Learn about branching and baselines »](/docs/branching-and-baselines)
How do I reproduce the snapshot?
Sometimes, you need to look closer to determine why a snapshot is rendering as it does. Along with pixel and DOM diffs, Chromatic displays the interactive page just as it appears in your app and E2E tests.
Click “Inspect snapshot” to open the Inspector. Switch between the “Canvas” and “Snapshot” tabs to compare the live component to the snapshot. Learn more about snapshots [here](/docs/snapshots).

Can I retake a snapshot?
Yes, [rerun the latest build](/docs/rerun-builds) on your branch to retake snapshots of unreviewed or denied changes.

How are changes on builds different from those listed in the UI Review ‘Changeset’ tab?
UI tests (shown on the build screen) detect changes between builds, specifically between the last accepted baseline and the latest build. This is useful for detecting defects during development and when merging to the main branch to ship.
In contrast, [UI Review](/docs/review) shows the changeset between the latest commit on the PR branch (head) and the ‘merge base’ (base). Think of it as a code review but for UI.
Why is review disabled on the build page?
Reviewing is only enabled for the latest build on a branch to ensure that only the most up-to-date UI is accepted as a baseline.
Why is commenting disabled on old builds?
Comments are turned off on old builds to ensure that discussions are always on topic and up to date with the latest UI. This prevents the situation where different reviewers comment on different versions of the code.
Can I review the same commit on separate branches?
Yes, but it‘s not a best practice.
Every branch has independent baselines for each test until the branch gets merged. If two builds reference the same commit hash but are on _different branches_ it will be possible to review those builds separately so long as they're the latest build on their respective branches. We don't recommend this because you'll have to review the same change multiple times.
Instead, we recommend regularly reviewing builds to keep feature branches 🟢 passing.
---
## Troubleshooting
Why do I see "Didn't find any commits in this Git repository in the last X builds"?
If you run into this situation, it is likely because across the number of unique commits across all builds connected to your project, Chromatic could not find a single one that exists in the repository. This can happen for various reasons (i.e., rebasing, squash merging). However, something has likely gone wrong if all previous X builds' commits are missing.
If you see this message and can't resolve the issue, please get in touch with us via our in-app chat or email us at support@chromatic.com.
Why do I see "Failed to find common ancestors with most recent builds within X commits"?
This is an uncommon issue that may happen only in specific cases due to some unusual configuration in your repository. If you see this message, it means that although we found a recent build connected to your repository history (see the item [above](#chromatic-build-no-commits)), we couldn't find any common history between your checked-out build and any other build in the latest number of commits.
We recommend contacting us via our in-app chat or email us at support@chromatic.com for further assistance.
Why do I see "Build X is based on a commit without ancestor builds"?
Unless you're creating the first build to establish baselines, when you generate a new build, Chromatic searches your repository history for the most recent build based on an ancestor commit (i.e., commits that are part of the history of the current commit). If it can't find any, it will show this message. However, this is an uncommon issue that may happen due to the following reasons:
1. You switched between branches and re-ran Chromatic without checking out the changes that installed Chromatic in the first place. In this situation, you can safely ignore the message and continue your workflow.
2. Your repository's Git history was rewritten via a rebase or squash merge (e.g., via GitHub's "Squash and Merge" or "Rebase and Merge" options), which you can quickly solve by referring to our CI documentation based on your CI provider.
3. You're working with a shallow clone of your repository to generate builds. Chromatic needs access to the entire Git history to establish baselines (or at least the history until the previous build), which you can address via our [baselines documentation](/docs/branching-and-baselines).
4. Some other unusual configuration in your repository is causing the issue, or there is an issue (e.g., an outage) on our end.
If you are in this situation and having trouble resolving the issue, contact us via our in-app chat or email us at support@chromatic.com.
Chromatic doesn't work with my custom Storybook script
We do our best to interpret your Storybook script in package.json, but you might need to pass additional options to the `chromatic` command. [Check out all the options »](/docs/cli)
Why do I get errored builds randomly?
Chromatic builds and runs Storybook flawlessly _most of the time_, but we're not perfect (we wish). Sometimes builds don't run due to rare infrastructure issues. If this happens, try to re-run the build via your CI provider. We keep track of these errors to improve the service.
Why is my build failing with the message Cannot run a build with no stories?
This happens if certain stories were disabled via the [`chromatic: { disableSnapshot: true }`](/docs/disable-snapshots#with-storybook) option at a higher level.
To solve this you can:
1. Remove the top-level [`chromatic: { disableSnapshot: true }`](/docs/disable-snapshots#with-storybook) option
1. Enable snapshots for specific stories
1. Run `yarn storybook-build` locally and fix the issues in your stories
How can I troubleshoot issues in Storybook?
From **Storybook 7.6** onwards, you can use the storybook doctor command to run checks and identify issues in Storybook: npx storybook@latest doctor
This tool helps detect problems like mismatched Storybook versions, duplicated dependencies, and incompatible add-ons.
For each detected issue, it offers detailed descriptions, references, and suggestions for follow-up actions. Learn more [here](https://storybook.js.org/docs/api/cli-options#doctor).
How can I debug syntax issues in my Storybook project?
You can add the Storybook [ESlint plugin](https://www.npmjs.com/package/eslint-plugin-storybook) to help you debug Storybook syntax issues and comply with best practices.
Why is my build failing with the message ✖ Failed to build Storybook?
To debug an issue with your Storybook project, run the commands below locally and confirm all stories are loading correctly without console log errors and warnings.
```shell
npm run build-storybook
npx http-server storybook-static -o
```
Use the same method to debug the following errors:
`✖ Failed to verify your Storybook`
`✖ Failed to publish your built Storybook`
`✖ Failed to publish build - Failed to extract stories from your Storybook`
Why are styles not applied correctly in stories?
If styles are not rendering correctly, there could be several reasons behind that:
1. **The order in which stylesheets are loaded.**
- In development mode, styles from the preview might be imported earlier than component styles, while in production mode, this order could be reversed. This affects the specificity and, ultimately, the rendering of styles. If this is the case, the styles render but are overwritten by others.
- In Storybook 6 and earlier, stylesheets were loaded upfront, while from Storybook 7 onwards, stylesheets are loaded on-demand when the story is viewed. This affects how styles load.
2. **Browser compatibility.** If the browser version does not support certain CSS features, styles may not apply correctly. Find browser versions supported by our Capture Infrastructure [here](/docs/infrastructure-release-notes).
If you have additional questions, use our **in-app chat** to contact or email us at [support@chromatic.com](mailto:support@chromatic.com).
---
## Diff Inspector
URL: https://chromatic.com/docs/diff-inspector
> Learn how to analyze visual changes with Chromatic's Diff Inspector
# Analyzing visual changes with Chromatic's Diff Inspector
Diff Inspector is a tool in the Chromatic web app that helps you see what visually changed between the test baseline and the new snapshot. Changed areas are automatically highlighted in neon green for immediate visibility.

## Diff view options
Chromatic offers flexible ways to analyze visual changes:
- **Unified view (1 Up):** See changes directly overlaid on top of your baseline for a focused comparison.
- **Split view (2 Up):** Compare your baseline and new snapshot side-by-side, with changes clearly highlighted in the new version.
## Emphasize subtle changes
Sometimes it can be tough to see subtle UI differences. For example, you might miss tweaks to properties like border-radius and font rendering. Chromatic offers two additional modes to help you pinpoint small UI changes faster.
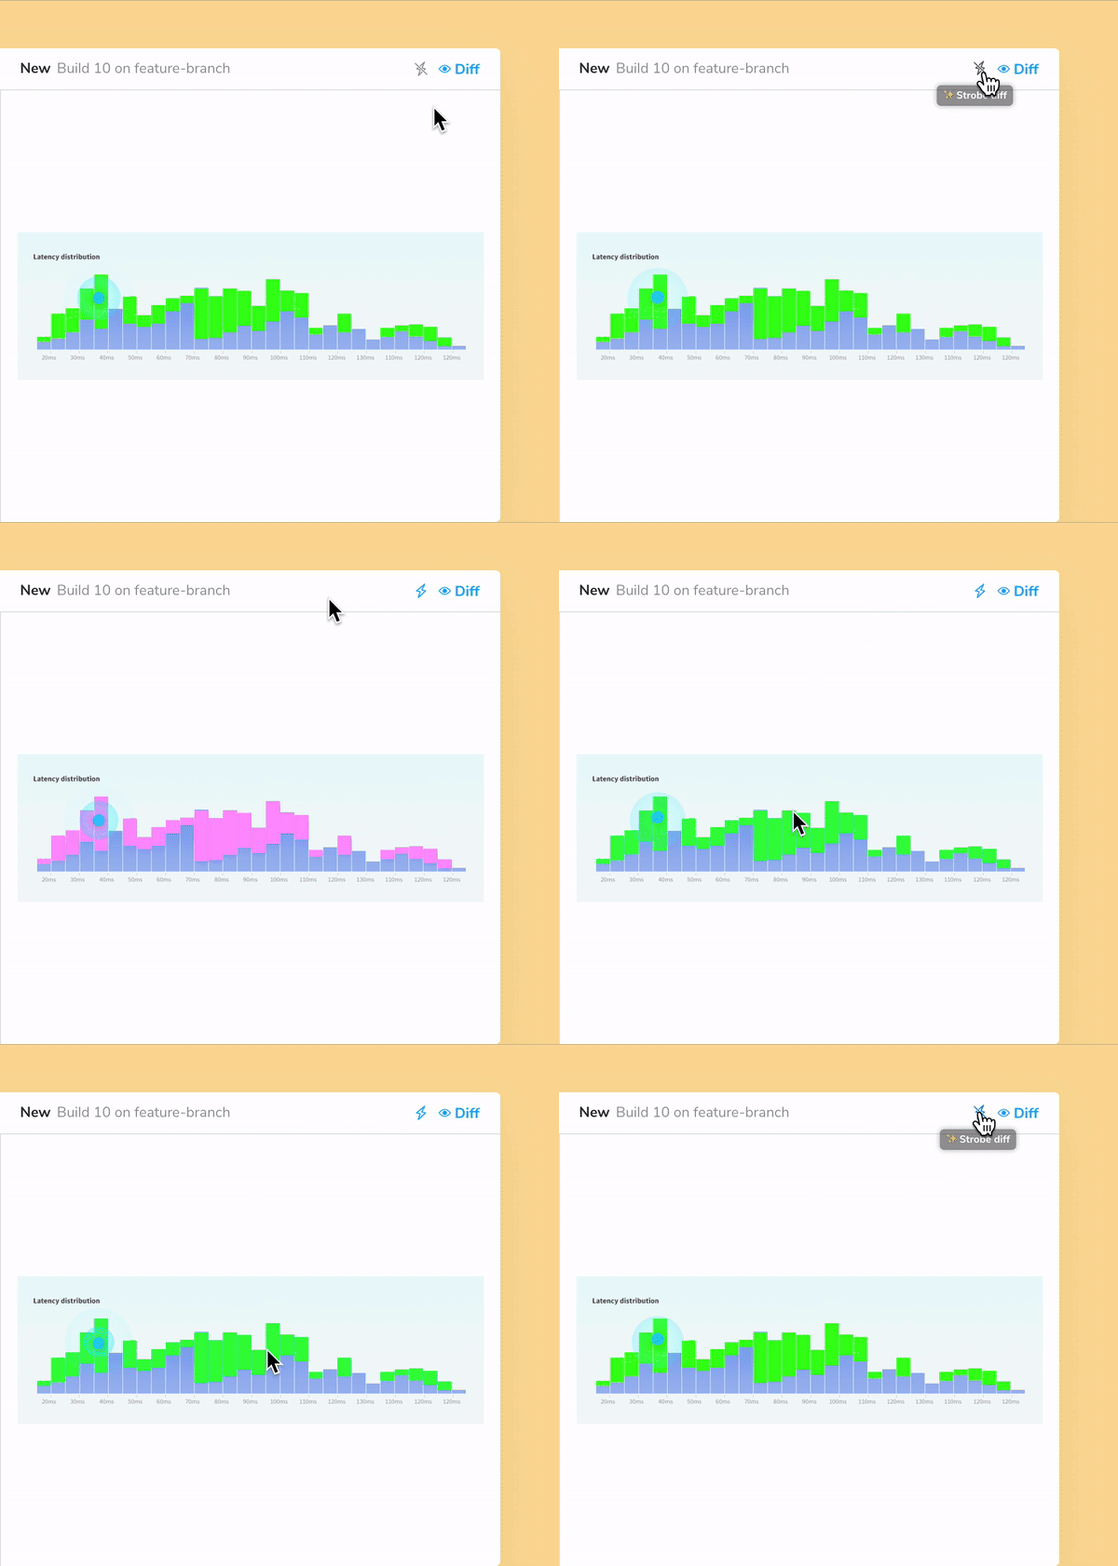
### Diff strobing
Diff strobing, a.k.a, _party mode_, emphasizes the highlight even more by quickly toggling between the baseline and the new snapshot.
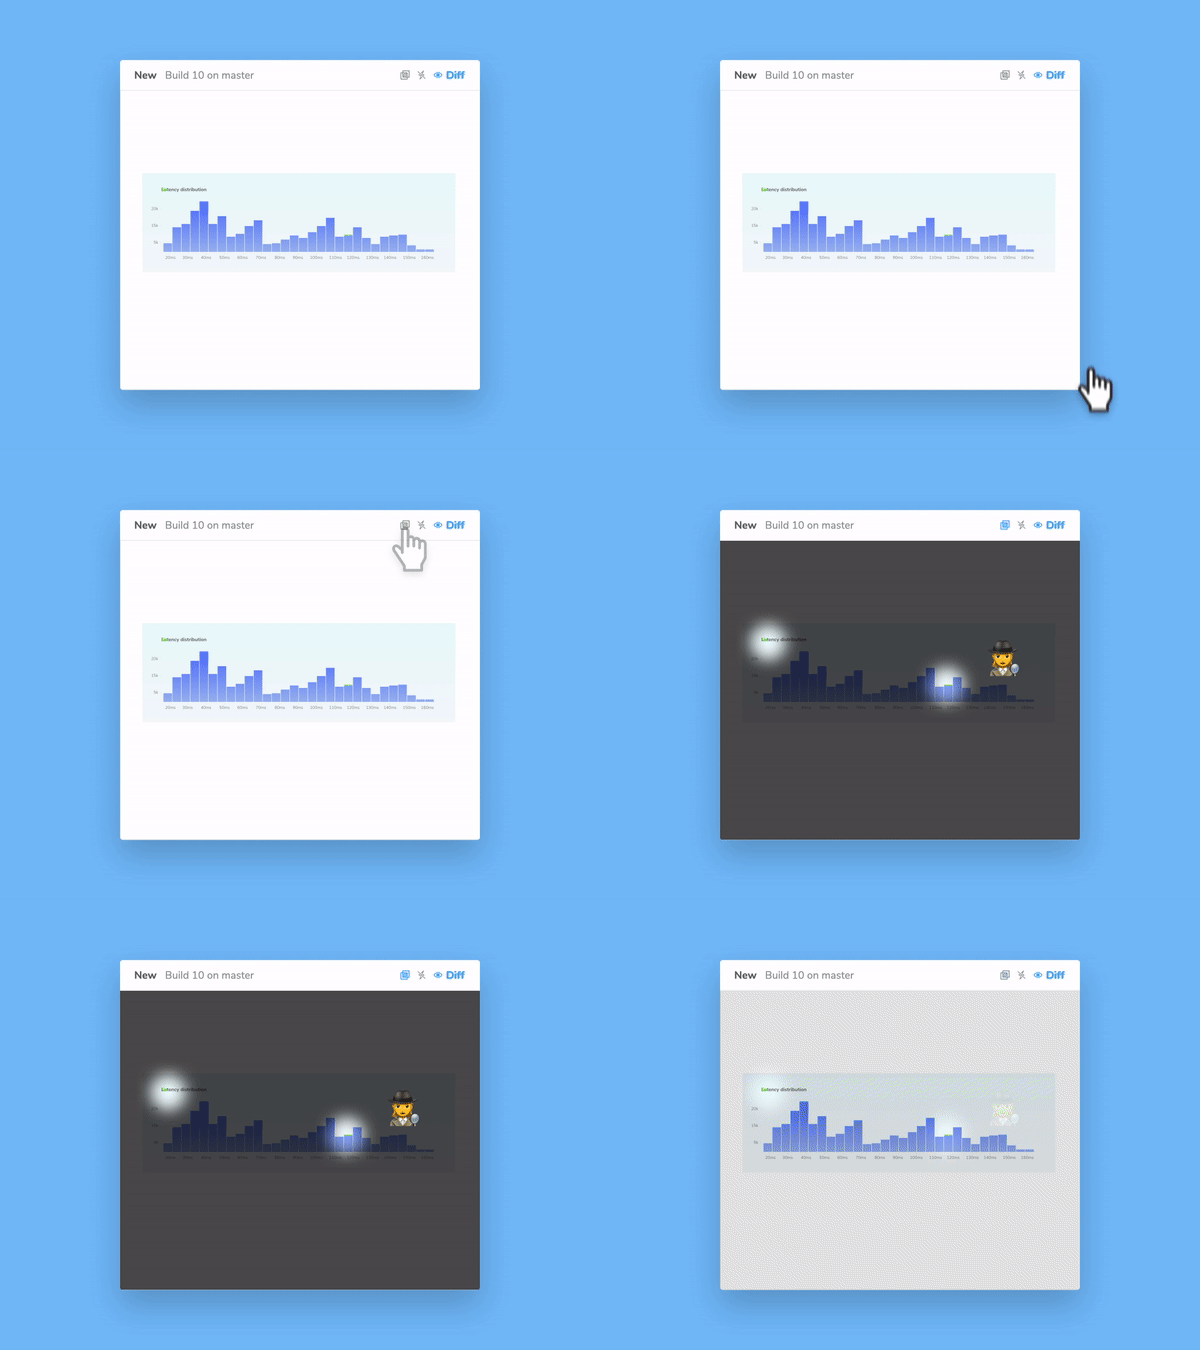
### Autofocus
Focus mode is designed to save you valuable time by spotlighting minor changes. For maximum convenience, focus mode activates automatically when it senses minimal pixel variations.
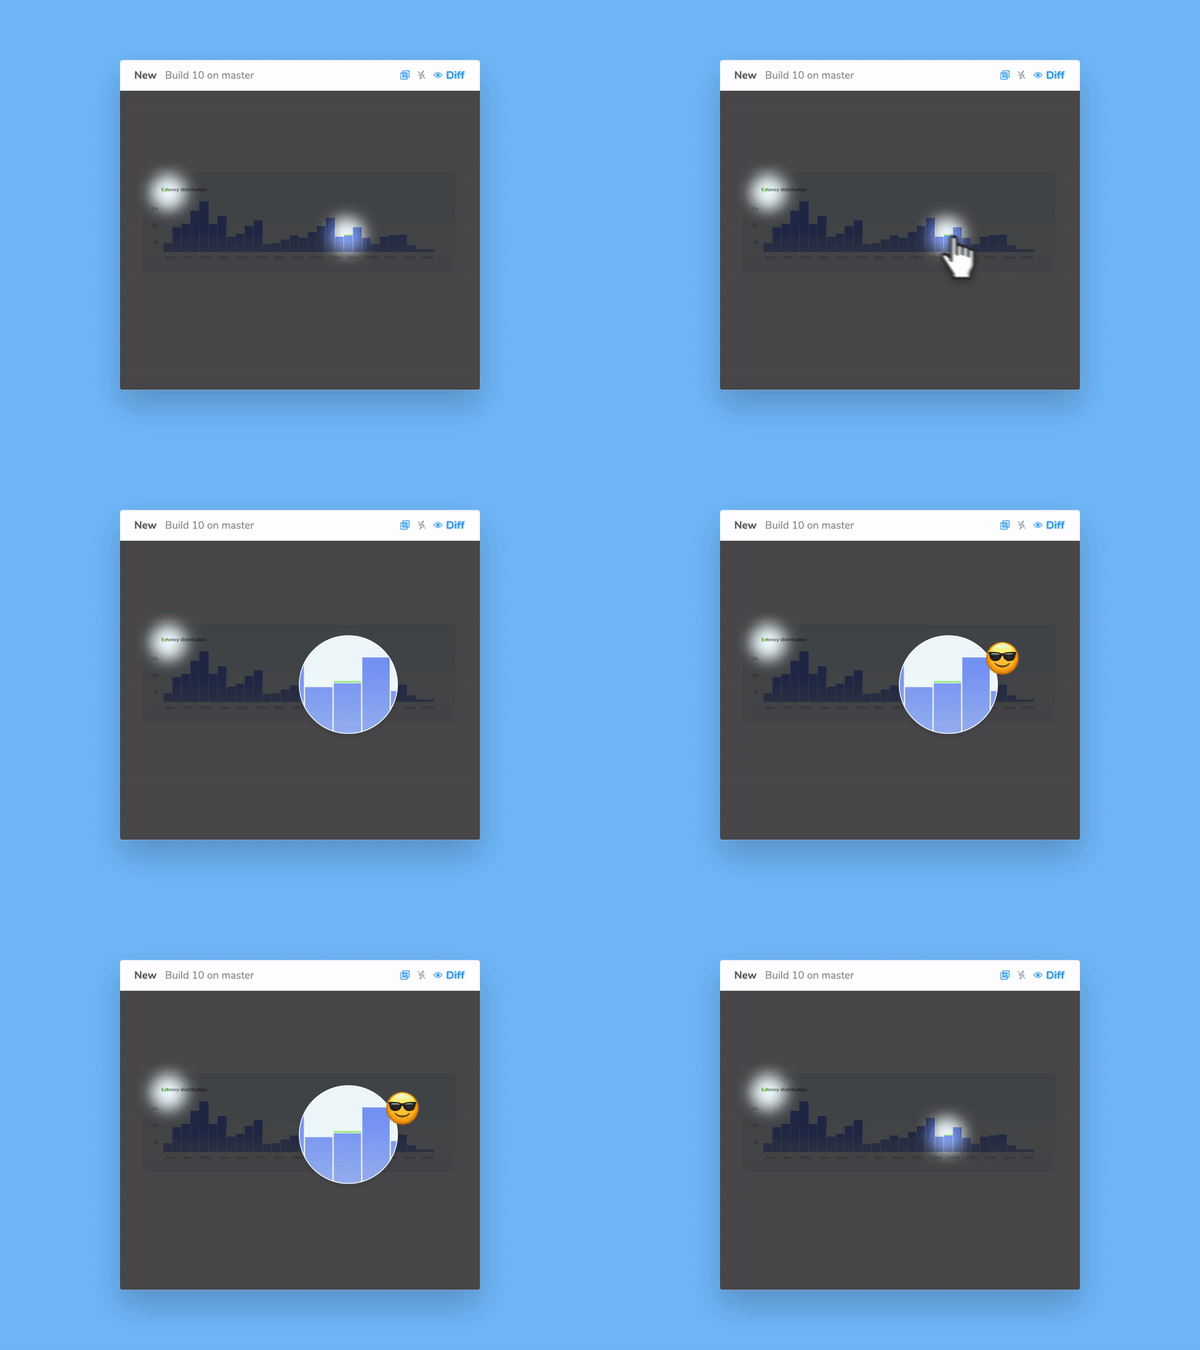
### Zoom-in
When in focus mode, hover over the new snapshot to activate a magnifying glass. This zooms into the snapshot diff to help you see the change in greater detail.
## Configure diffing behavior
### Adjust threshold for changes
Customize how Chromatic identifies visual changes by adjusting the `diffThreshold` configuration option. The default setting strikes a balance between accuracy and minimizing false positives caused by minor rendering variations. Tailor this threshold to your specific component or library's needs.
[Learn more about diff threshold »](/docs/threshold)
{/* prettier-ignore-start */}
```ts title="MyComponent.stories.ts|tsx"
// Replace your-framework with the framework you are using (e.g., nextjs, vue3-vite)
import type { Meta, StoryObj } from "@storybook/your-framework";
import { MyComponent } from "./MyComponent";
const meta = {
component: MyComponent,
title: "MyComponent",
} satisfies Meta;
export default meta;
type Story = StoryObj;
export const StoryName: Story = {
args: {
with: "props",
},
parameters: {
// Sets the diffThreshold for 0.2 for a specific story.
chromatic: { diffThreshold: 0.2 },
},
};
```
```js title="tests/mytest.spec.js"
test.describe("some block", () => {
// 👇 your option overrides
test.use({ diffThreshold: 0.2 });
test("some test", async ({ page }) => {
await page.goto("https://some-url.com");
// ... your test code
});
});
```
```js title="cypress/e2e/some-test.cy.js|ts"
it("A test that does something", {
env: { diffThreshold: 0.2 }
}, () => {
cy.visit("https://some-url.com");
// ... your test code
});
```
{/* prettier-ignore-end */}
### Ignored regions
You can configure Chromatic to ignore changes in certain parts of a snapshot by attaching the `chromatic-ignore` as a class or a data attribute to DOM elements. These ignored regions can then be easily highlighted within the Diff Inspector.
[Learn more about ignoring elements »](/docs/ignoring-elements)
---
## Visual tests
URL: https://chromatic.com/docs/visual
> Chromatic is a cloud-based toolchain that integrates with Storybook, Playwright, and Cypress to help teams test and review UI components.
# Visual testing with Chromatic
Visual Tests are a powerful tool for catching visual regressions and ensuring your app functions as expected. They work by capturing [snapshots](/docs/snapshots) of every test within a cloud browser environment. Then, whenever you push code, Chromatic compares your new snapshots to [baseline versions](/docs/branching-and-baselines#whats-a-baseline) to identify visual changes. If changes are detected, you will be prompted to verify that they are intentional or fix any errors.
## Why use visual testing?
Functional UI tests excel at ensuring your app _works_, but they often fail to catch bugs in UI appearance. This is because functional tests don’t validate the pixels rendered by your application UI. Instead, they only verify the logic and behavior of components and pages.
For instance, buggy CSS might hide your app's “checkout” button behind a notification banner. Your [functional test](https://www.chromatic.com/blog/functional-testing/) might indicate that the button is clickable—because, technically, it is, even though it’s now inaccessible to your users. Visual testing catches such bugs and safeguards your app’s user experience.
## How does visual testing work?
You can think of Chromatic’s visual testing as "before-and-after" [snapshots](/docs/snapshots) of your app's interface. You begin by capturing a perfect "before" image—this becomes your [baseline](/docs/branching-and-baselines#whats-a-baseline). After any code changes, Chromatic compares a new "after" snapshot pixel-by-pixel against the baseline, revealing any visual differences.
Chromatic's streamlined workflow involves four steps:
1. **Cloud Rendering:** Chromatic renders your UI components in a cloud-based browser.
2. **Snapshot Capture:** Chromatic takes a snapshot for each test, with all tests running simultaneously to save you time.
3. **Automated diffing:** Whenever you update your code, Chromatic generates new snapshots and compares them to the baselines.
4. **Review and Verification:** When Chromatic detects changes, you’re prompted to review them to ensure they're intentional. Any unexpected changes trigger notifications so you can fix them quickly.
## How does Chromatic fit into my stack?
Chromatic leverages your existing setup—configuration, mocking, and tests—to enable visual testing of your application's UI. That means you can verify how UIs look and function simultaneously.
### Visual testing with Storybook
[Storybook](https://storybook.js.org) is an open source workshop for developing components and pages in isolation. Chromatic is built and maintained by the team behind Storybook, ensuring a seamless integration.
Storybook lets you define the different states and variations of components as [stories](https://storybook.js.org/docs/get-started/whats-a-story). This gives you an ideal setup for functional testing. Attach a [play function](https://storybook.js.org/docs/writing-stories/play-function) to mimic how users interact with your components and include assertions to verify the expected behavior. Chromatic uses these stories to power visual tests.

Chromatic integrates with Storybook via an [addon](https://www.chromatic.com/storybook) to unlock on-demand visual testing right from within your familiar Storybook environment. With a single click, you can run visual checks on all your stories simultaneously. Chromatic runs the tests in the cloud, notifying you directly in Storybook if any component's appearance deviates from expectations. In addition to this local workflow, you can also run these tests in CI.
[**Get started with Storybook & Chromatic »**](/docs/quickstart)
### Visual testing with Playwright
[Playwright](https://playwright.dev/) is an open source end-to-end (E2E) test runner developed by Microsoft. It verifies key app flows like "sign up" and "add to cart" by driving the browser to simulate user interactions.
Chromatic integrates with Playwright by extending its test and expect utilities. While your Playwright tests run, Chromatic captures an archive of the page (including DOM, styling, and assets) and uploads it to the cloud. There, Chromatic generates snapshots and performs pixel diffing to identify any unintended visual changes.
Playwright offers native visual testing capabilities, but Chromatic's unique snapshot approach and powerful diffing tools provide a more comprehensive testing experience.
[**Get started with Playwright & Chromatic »**](/docs/playwright)

### Visual testing with Cypress
[Cypress](https://www.cypress.io/) is another popular E2E test runner like Playwright, but it lacks built-in visual testing features. While Cypress tests can verify your app's functionality, they won't detect visual regressions in the interface. This is where Chromatic becomes an essential tool for Cypress users.
Chromatic integrates with Cypress via a plugin. While your Cypress tests execute, Chromatic captures complete archives of your test cases (DOM, styling, and assets) and uploads them to the cloud. There, Chromatic generates snapshots and performs pixel diffing, enabling you to catch any unintended visual changes in your application.
[**Get started with Cypress & Chromatic »**](/docs/cypress)
---
## Visual Tests addon for Storybook
URL: https://chromatic.com/docs/visual-tests-addon
> Configure Storybook to test UIs with the Visual Tests Addon
# Visual Tests addon for Storybook
Pinpoint visual bugs in local development without leaving Storybook.
## Set up Visual Tests Addon for Storybook
Visual Tests Addon ensures that the dev-to-test feedback loop is as fast as possible by allowing you to run visual tests on demand. It lets you uncover visual bugs in local development without leaving Storybook.
### 1. Install the addon
Add visual tests to your project by installing `@chromatic-com/storybook`:
{/* prettier-ignore-start */}
```shell
$ npx storybook@latest add @chromatic-com/storybook
```
```shell
$ yarn dlx storybook@latest add @chromatic-com/storybook
```
```shell
$ pnpm dlx storybook@latest add @chromatic-com/storybook
```
{/* prettier-ignore-end */}
Storybook 7.6 and higher required. Read the [migration guide](https://storybook.js.org/docs/releases/migration-guide) for help migrating Storybook versions.
When you start Storybook, you'll see a new addon panel for Visual Tests where you can run tests and view results.

🤖 **Need help or more customization?**
If you're experiencing issues with the `storybook@latest add` command or want to explore advanced configuration for the Visual Tests addon, be sure to check the [Storybook documentation »](https://storybook.js.org/docs/writing-tests/visual-testing)
### 2. Authenticate
Sign in to Chromatic to create a new project or link an existing project.
You’ll see a list of available projects that you have access to. Select a project to finish the setup. The addon will automatically adjust the configuration file, add the necessary project identifiers, and retrieve any existing baselines if available.
Select a project from your project list to finish setup. If you're setting up the addon for the first time, the configuration files and necessary project identifiers will be added for you automatically.

### 3. Run tests
Click the ▶️ Play button in the Storybook sidebar to run visual tests. This will send your stories to the cloud to take snapshots and detect visual changes.

### 4. Review changes
If there are visual changes in your stories, they will be 🟡 highlighted in the sidebar. Click the story and go to the Visual Tests addon panel to see which pixels changed.
If the changes are intentional, ✅ accept them as baselines locally. If the changes aren't intentional, fix the story and rerun the tests using the ▶️ Play button.

### 5. Chromatic automatically syncs baselines to the cloud
When you accept changes in the addon, your baselines automatically sync to the cloud. Your local-only baselines will graduate to standard baselines.
What that means:
- These baselines will be available for anyone who checks out your branch.
- [TurboSnap](/docs/turbosnap) will skip the stories that haven’t changed.
- Tests with accepted baselines don't need to be rerun or reviewed again, speeding up your pull request process.

---
## Addon configuration options
Chromatic is configured using the [`./chromatic.config.json`](/docs/cli#chromatic-config-file) file. By default, the recommended configuration for most projects is already applied. You can also customize the default behavior and provide additional options for full control.
The shortlist of options that are addon-specific are below. View the full list of [options](/docs/configure#options).
| Option | Description |
| ----------------- | ---------------------------------------------------------------------------------------------------------------------------- |
| `projectId` | Automatically configured. Sets the value for the project identifier `"projectId": "Project:64cbcde96f99841e8b007d75"` |
| `buildScriptName` | Defines the custom Storybook build script `"buildScriptName": "deploy-storybook"` |
| `debug` | Output verbose debugging information to the console `"debug": true` |
| `zip` | Recommended for large projects. Configures the addon to deploy your Storybook to Chromatic as a zip file `"zip": true` |
```json title="./chromatic.config.json"
{
"projectId": "Project:64cbcde96f99841e8b007d75",
"buildScriptName": "deploy-storybook",
"debug": true,
"zip": true
}
```
Custom addon config files & environments
If you have separate config for different environments, use `configFile` to specify which file to load. Here's how you'd apply one config for `development` and another for `production`.
```ts title=".storybook/main.ts"
// Replace your-framework with the framework you are using (e.g., react-webpack5, vue3-vite)
import type { StorybookConfig } from '@storybook/your-framework';
const config: StorybookConfig = {
stories: ['../src/**/*.mdx', '../src/**/*.stories.@(js|jsx|mjs|ts|tsx)'],
addons: [
// Other Storybook addons
{
name: '@chromatic-com/storybook',
options: {
//👇 Loads the configuration file based on the current environment
configFile:
process.env.NODE_ENV === 'development'
? 'chromatic.config.json'
: 'production.config.json',
},
},
],
};
export default config;
```
---
## Frequently asked questions
What are "local" builds and how are they different from builds?
A build is an automated visual test run. When you set up Chromatic in CI, a build runs every time you push a commit to your repository.
With the addon, you're able to visually test uncommitted code. This is useful when you want to quickly check your work in progress for visual changes. The addon creates local builds to designate ephemeral uncommitted code from normal builds which use committed code. "Local" just means local to you.
Updating baselines in local builds only affects your other local builds on a given branch. This allows you to iterate quickly in development without affecting teammates. When you want to update the baselines with teammates, you commit and push your work, which triggers a normal build via CI.
If the code is the same between your last local build and the normal build triggered by CI, Chromatic will automatically auto-accept baselines in the normal build so that you don't need to review twice. If you have TurboSnap, Chromatic will intelligently test only the stories that changed and copy over snapshots from stories that were unchanged.
What’s the difference between testing with the addon vs. CI?
The addon allows running tests on-demand to detect bugs earlier in development. It saves time because you don’t have to wait for CI jobs to finish running. But the addon doesn't replace CI, Chromatic still requires CI to do its job.
Why are Doc pages missing in the published Storybook generated by my "local" build?
By default, [Docs](https://storybook.js.org/docs/writing-docs) are disabled in local builds created by Visual Tests addon.
You can enable Docs by setting the following flags: `disableBlocks`, `disableAutoDocs`, `disableMDXEntries`, and `disableDocgen` to `false` in your `.storybook/main.ts`. Learn more about these flags [here](https://storybook.js.org/docs/api/main-config/main-config-build#test).
```ts title=".storybook/main.ts"
// Replace your-framework with the framework you are using (e.g., react-webpack5, vue3-vite)
import type { StorybookConfig } from '@storybook/your-framework';
const config: StorybookConfig = {
// ...
build: {
test: {
disableBlocks: false,
disableAutoDocs: false,
disableMDXEntries: false,
disableDocgen: false,
},
},
};
export default config;
```
That said, we don't recommend turning Docs on for local builds because this will cause the build time to increase considerably.
Can I use the addon with a monorepo?
Yes, but you must have a separate `chromatic.config.json` file for each subproject (e.g., `design-system-A/chromatic.config.json` and `design-system-B/chromatic.config.json`).
You cannot use the same file to run builds for multiple Chromatic projects.
Ensure that flags like like `storybookBaseDir`, `storybookBuildDir` and `storybookConfigDir` are set correctly for each subproject.
---
## Troubleshooting
Running Storybook with the addon enabled throws an error
When running Storybook with the addon enabled, you may encounter the following error:
```shell
const stringWidth = require('string-width');
Error [ERR_REQUIRE_ESM]: require() of ES Module /my-project/node_modules/string-width/index.js is not supported.
```
This is a [known issue](https://github.com/storybookjs/storybook/issues/22431#issuecomment-1630086092) when using an older version of the Yarn package manager (e.g., version 1.x). To solve this issue, you can upgrade to the latest stable version. However, if you cannot upgrade, adjust your `package.json` file and provide a resolution field to enable the Yarn package manager to install the correct dependencies. In doing so, you may be required to delete your `node_modules` directory and `yarn.lock` file before installing the dependencies again.
```json title="package.json"
{
"resolutions": {
"jackspeak": "2.1.1"
}
}
```
Why am I seeing the "Login Error: Failed to fetch initial project list" error?
This error typically means Chromatic's Visual Tests Addon cannot retrieve your list of projects during the login or authentication step. Here are the most common causes and how to resolve them:
#### 1. Missing or invalid `chromatic.config.json` file
Ensure your project has a `chromatic.config.json file` in the root directory with a valid `projectId`. Example:
```json title="chromatic.config.json"
{
"$schema": "https://www.chromatic.com/config-file.schema.json",
"projectId": "Project:your_project_id_here"
}
```
- This file must be committed to your repository.
- The `projectId` is different from your `projectToken`. It's the number from the Chromatic link.
#### 2. Insufficient GitHub permissions
If Chromatic cannot retrieve your projects, your git provider account may not have the necessary access. Check:
- You granted access to the correctgit provider organization when authorizing Chromatic.
- You're logged in with the same git provider account with access to the target project.
- Try signing in via an incognito or private browser window to avoid caching or token issues.
#### 3. Blocked network requests
If your network blocks requests to Chromatic’s API, the Visual Tests Addon may not work properly. Check your network:
- Confirm you can access `https://www.chromatic.com/api` and `https://index.chromatic.com/graphql` from your browser.
- If you use a corporate proxy, VPN, firewall, or SSL inspection, they might be interfering with the request.
Does the addon affect snapshot usage?
Snapshots taken by the Visual Tests addon count toward the snapshots included in your Chromatic plan. If you have any questions about snapshot costs or billing, please contact us via in-app chat.
Does the addon support TurboSnap?
Yes. Visual Tests addon supports TurboSnap via the [`./chromatic.config.json`](/docs/cli#chromatic-config-file) file.
Can I deny a change with the addon?
No. Denying changes is only available when running builds from CI or the CLI. If you need to, you can revert changes by clicking the ”Unaccept” button in the addon panel.
Do I need Git to run the addon?
Yes, Visual Tests addon requires Git to track baselines for each story. To use Chromatic, you need to have git initialized in your project repository and have at least one commit.
---
## Accessibility Tests
URL: https://chromatic.com/docs/accessibility
> Catch accessibility issues early with automated testing for your components
# Accessibility testing with Chromatic
Chromatic builds on Storybook and [axe](https://github.com/dequelabs/axe-core) to seamlessly integrate accessibility testing into your development workflow. You write stories to create test cases for your components and run accessibility checks locally within Storybook.
Then when you're ready to merge, Chromatic automatically runs accessibility regression tests on all your stories through CI. It also provides a dashboard that offers a bird's-eye view of [WCAG](#what-are-web-content-accessibility-guidelines-wcag) issues across all your components.
## Why component-level accessibility tests?
Traditional page-level tests fail to address accessibility at its source. For decades, the best practice was to navigate page by page and run accessibility scans along the way to compile an audit report. This method is too noisy. When issues are identified at the page level, the root cause often lies deep within a component. You have to sift through thousands of violations to determine which component caused the problem.
What’s more, page-level tests occur too late in the development cycle. Developers first build components and then assemble them into pages. One flawed component can spread issues throughout your app, making problems harder to identify and more time-consuming to fix.
Chromatic runs accessibility tests at the component-level, where issues are easier to identify and fix. By integrating accessibility testing into your development workflow, Chromatic helps you catch violations early, before they multiply across pages.
## Why use regression-based accessibility testing?
Axe has long been the industry standard for running automated accessibility tests on HTML-based interfaces. These tests audit the rendered DOM against a set of heuristics based on [WCAG](https://www.w3.org/WAI/standards-guidelines/wcag/) rules and widely accepted best practices. They act as the first line of QA to catch blatant accessibility violations.
When you run axe, it gives you a list of _all_ violations detected across the UI being tested. While this is incredibly helpful, it's unlikely you'll address all issues immediately. Teams often inherit accessibility debt that can't be resolved overnight. They want to address these issues incrementally while releasing new features without adding more debt.
By tracking violations against a story's baseline, Chromatic helps prevent regressions in pull requests while tracking debt so you can fix it separately at your own pace.
## Accessibility testing workflow
By combining Chromatic and Storybook, you get instant accessibility feedback at every phase, from development to running checks on CI. Here’s how it works:
### During development: Fast feedback in Storybook
Storybook’s [Accessibility addon](https://storybook.js.org/docs/writing-tests/accessibility-testing) simplifies running axe on individual components. You can run accessibility tests for all your stories in the background. If there are any violations, the test will fail, and you will see a summary in the sidebar. Violating elements are highlighted in Storybook’s canvas, allowing you to pinpoint the exact problem areas. You also get detailed error descriptions and guidance to help resolve issues quickly.

### In CI: Regression-checks with Chromatic
When you run Chromatic, it creates a static build of your Storybook and uploads it to our Capture Cloud. From there, Chromatic spins up a fleet of standardized browsers to load all your stories in parallel and run accessibility tests.
Chromatic tracks accessibility violations over time, establishing a baseline for each story. This helps separate pre-existing issues from new ones.
What is an accessibility baseline?
In [Visual testing](/docs/visual), a baseline is the last known “good” state of the story. Subsequent snapshots are compared to this baseline to identify visual changes.

In Accessibility testing, a baseline is a set of [accessibility violations](#what-is-an-accessibility-violation) detected for a story. Subsequent snapshots are compared to this baseline to identify new violations or to confirm resolved issues. Here's an example:
Build #1 identifies several violations for this story. By accepting the baseline, 17 violations (across 3 rules) are added to the story's baseline.

After making code changes, you run Build #2. Chromatic finds 10 additional violations across 2 rules. This difference is shown on the test page. You can also view violations from previous builds by expanding the table.
If you accept this snapshot, these 10 new violations will be added to the baseline.

In subsequent builds, Chromatic takes a new snapshot of accessibility violations for each story and compares them against the baselines. If there are new or altered violations, Chromatic flags them for your review.

## Why run accessibility tests in both Storybook and Chromatic?
### Complementary testing approaches
**Storybook** provides developers with a fast feedback loop. You can test components—that you're working on—during development and receive instant feedback on accessibility issues. This enables you to fix problems locally before committing code and to identify and address violations in real time as you work.
**Chromatic** provides ultimate coverage for teams by testing across all viewports, modes, and user preferences. It runs tests consistently in CI environments, tracks violations over time, and ensures no regressions slip through the cracks. This comprehensive approach safeguards your entire project's accessibility standards.
### Single run vs Regression tracking
**Single run (Storybook)** shows all violations at a specific point in time, offering a comprehensive view of your component's current state. However, reviewing these results can be overwhelming, especially in large codebases with accessibility debt.
**Regression tracking (Chromatic)** [tracks violations from commit to commit](/docs/accessibility#how-does-chromatic-track-each-unique-violation) and only flags new or changed violations. This makes it easier to fix issues incrementally and visualizes progress over time.

For a complete example of regression tracking, see the [What is an accessibility baseline](/docs/accessibility#what-is-an-accessibility-baseline) section above.
### Accountability and team workflow
The regression approach allows teams to distinguish between legacy accessibility debt and new issues, making the work more manageable. Progress becomes visible and measurable, which helps maintain momentum in your accessibility improvement efforts.
With regression tracking, you can easily identify which violations were introduced in a specific pull request. Much like adding tests to meet coverage thresholds, this ensures developers address accessibility issues in their pull requests to avoid adding to the accessibility debt.
---
## Frequently asked questions
What are Web Content Accessibility Guidelines (WCAG)?
The [Web Content Accessibility Guidelines](https://www.w3.org/WAI/standards-guidelines/wcag/) are a set of internationally recognized standards developed by the World Wide Web Consortium (W3C) through their Web Accessibility Initiative (WAI). These guidelines provide a comprehensive framework for making web content more accessible to people with disabilities.
What is an accessibility violation?
Accessibility violation refers to an issue detected within a story where an element fails to meet accessibility standards or guidelines (such as WCAG). These violations indicate barriers that might prevent people with disabilities from using the website or application effectively.
Why might you want to accept accessibility violations?
TL;DR: You’ll want to accept violations if they're part of necessary structural changes leading to an eventual fix.
When you run axe, it lists all accessibility violations found in the story. However in some cases, addressing all issues immediately may not be feasible. In that case, you’d accept the violations and fix them incrementally.
Baselines help track accessibility issues from commit to commit as you make code changes, showing what was fixed and identifying any new issues introduced.
How does Chromatic track each unique violation?
Chromatic identifies unique violations using three characteristics:
1. Type of violation (see [full classification](https://github.com/dequelabs/axe-core/blob/develop/doc/rule-descriptions.md))
2. Specific DOM node (e.g., ``, `Which web-safe fonts do you recommend for Chromatic?
- Sans-serif: Arial, Verdana, Trebuchet MS
- Serif: Georgia, Times New Roman
- Monospace: Courier New, Courier
- Non-Latin scripts: use a web-safe font that covers your target language (e.g., `Noto Sans JP` for Japanese)
## Solution A: Preload fonts
We recommend that you always ensure fonts are loaded before your tests are executed. With Storybook, you can preload fonts by specifying them in [`./storybook/preview-head.html`](https://storybook.js.org/docs/configure/story-rendering#adding-to-head).
```js title="./storybook/preview-head.html"
```
If you’re loading fonts from an external CDN service (like Google Fonts or Adobe Fonts), be careful that the font files you’re preloading match the fonts called for in your CSS.
## Solution B: Point font-face declarations at static files
If your CSS has global `@font-face` declarations that point to a CDN, you may need to override them to ensure that your snapshots always use assets loaded locally.
For example, you might reference a font CDN in your stylesheets like this:
```css title="src/index.css"
@font-face {
font-display: optional;
font-family: 'YourFont';
font-style: normal;
font-weight: normal;
src: url('https://cdn.yoursite.com/yourfont.woff2') format('woff2');
}
```
To serve the fonts statically, you first need to put your fonts in a static directory for Storybook. We recommend the `../public` directory.
Next, create a `yourfontface.css` file inside your Storybook configuration directory (that is, `.storybook`). Use it to reference the local path for your font in the `../public` directory.
```css title="./storybook/yourfontface.css"
@font-face {
font-display: optional;
font-family: 'YourFont';
font-style: normal;
font-weight: normal;
/* 👇 Change this to point at the local font path */
src: url('/yourfont.woff2') format('woff2');
}
```
Reference the stylesheet in Storybook's [`preview-head.html`](https://storybook.js.org/docs/configure/story-rendering#adding-to-head) configuration file to load the font from the local path.
```js title="./storybook/preview-head.html"
```
This technique loads a local font file during development and testing in Storybook. Meanwhile, your users are still loading the font from the CDN in production.
## Solution C: Check that fonts have loaded in a loader
This alternate solution uses the browser's font load API and the [`isChromatic()`](/docs/ischromatic) helper function to verify that fonts load when in the Chromatic environment.
```js title="./storybook/preview.js|ts"
import isChromatic from 'chromatic/isChromatic';
// Use the document.fonts API to check if fonts have loaded
// https://developer.mozilla.org/en-US/docs/Web/API/Document/fonts
const fontLoader = async () => ({
fonts: await Promise.all([document.fonts.load('400 1em Font Name')]),
// or
// fonts: await document.fonts.ready,
});
/* 👇 It's configured as a global loader
* See https://storybook.js.org/docs/writing-stories/loaders
* to learn more about loaders
*/
export const loaders = isChromatic() && document.fonts ? [fontLoader] : [];
```
## Solution D: Don't load fonts
As a last resort, you can also disable custom fonts by setting `font-display: optional` in your CSS when running in Chromatic.
---
## Hover and focus states
URL: https://chromatic.com/docs/hoverfocus
> Learn how to capture hover and focus states
# Hover and focus states
Components can respond differently to hover or focus events. Here are a few techniques for capturing the result of these user events in Chromatic.
## JavaScript-triggered hover states
If you're working with a component that relies on JavaScript to trigger hover states (e.g., tooltips, dropdowns), you can adjust your tests and include Storybook's [play](https://storybook.js.org/docs/writing-stories/play-function) function or [Playwright's](https://playwright.dev/docs/api/class-locator#locator-hover) and [Cypress's](https://docs.cypress.io/api/commands/hover) APIs to simulate the state and verify the component's behavior.
{/* prettier-ignore-start */}
```ts title="src/components/Auth.stories.ts|tsx"
// Adjust this import to match your framework (e.g., nextjs, vue3-vite)
import type { Meta, StoryObj } from "@storybook/your-framework";
/*
* Replace the storybook/test import with `@storybook/test` and adjust the stories accordingly if you're not using Storybook 9.0.
* Refer to the Storybook documentation for the correct package and imports for earlier versions.
*/
import { expect, waitFor } from "storybook/test";
import { LoginForm } from "./LoginForm";
const meta = {
component: LoginForm,
title: "LoginForm",
} satisfies Meta;
export default meta;
type Story = StoryObj;
export const Default: Story = {
play: async ({ canvas, userEvent }) => {
await userEvent.type(canvas.getByLabelText("email"), "test@email.com");
await userEvent.type(canvas.getByLabelText('password'), "password");
// Triggers the hover state
await userEvent.hover(canvas.getByLabelText("password"));
await waitFor(async () => {
await expect(canvas.getByText("Must be at least 16 characters long")).toBeVisible();
};
},
};
```
```ts title="tests/Auth.spec.js|ts"
import { expect, test } from "@chromatic-com/playwright";
test.describe("Authentication", () => {
test("Attempts to authenticate the user with invalid credentials", async ({ page }) => {
await page.goto("/auth");
await page.locator('input[name="email"]').fill("test@email.com");
await page.locator('input[name="password"]').fill("password");
await page.locator('input[name="password"]').hover();
await expect(page.getByText("Must be at least 16 characters long")).toBeVisible();
});
});
```
```ts title="cypress/e2e/Auth.cy.js|ts"
describe("Authentication", () => {
it("Attempts to authenticate the user with invalid credentials", () => {
cy.visit("/auth");
cy.get('input[type="email"]').type("test@email.com");
cy.get('input[name="password"]').type("password");
cy.get('input[name="password"]').trigger("mouseover");
cy.get('span').contains("Enter a valid email address").should("be.visible");
});
});
```
{/* prettier-ignore-end */}
## CSS :hover state
The [`:hover`](https://developer.mozilla.org/en-US/docs/Web/CSS/:hover) pseudo-class in CSS allows precise styling on cursor hover. It's considered a "trusted event" for web browsers mainly because it's directly initiated by the user's interaction, making it difficult to simulate programmatically in a testing environment. Listed below are some recommendations for testing this state with Chromatic.
### With the Pseudo States addon
The [`@storybook/addon-pseudo-states`](https://storybook.js.org/addons/storybook-addon-pseudo-states) addon allows you to emulate different pseudo-classes (e.g., `hover`, `active`) by overriding the existing styles and applying a custom class selector to every element that contains any pseudo-classes. You can adjust your Storybook tests and include the `hover` option to test the component's hover state.
```ts title="src/components/Auth.stories.ts|tsx"
// Adjust this import to match your framework (e.g., nextjs, vue3-vite)
import type { Meta, StoryObj } from '@storybook/your-framework';
import { LoginForm } from './LoginForm';
const meta = {
component: LoginForm,
title: 'LoginForm',
} satisfies Meta;
export default meta;
type Story = StoryObj;
export const Default: Story = {
parameters: {
pseudo: {
// The hover option can be toggled for selected elements. For more information see the addon's documentation.
hover: true,
},
},
};
```
### Using CSS class names
If you're working with a component that relies on CSS classes to apply hover styles, you can adjust the component's styles to include class names that mirror the states you're trying to test. To do so, change your CSS file to include the required class names as follows:
```css title="src/components/MyComponent.css"
MyComponent:hover,
MyComponent.hover {
background: purple;
}
MyComponent:active,
MyComponent.active {
background: green;
}
```
Then, add a test that toggles the class name to simulate the hover state.
```ts title="src/components/MyComponent.stories.ts|tsx"
// Adjust this import to match your framework (e.g., nextjs, vue3-vite)
import type { Meta, StoryObj } from '@storybook/your-framework';
import { MyComponent } from './MyComponent';
const meta = {
component: MyComponent,
title: 'MyComponent',
} satisfies Meta;
export default meta;
type Story = StoryObj;
export const HoverStatewithClass: Story = {
args: {
className: 'hover',
},
};
export const ActiveStatewithClass: Story = {
args: {
className: 'active',
},
};
```
ℹ️ This approach requires manually toggling the class names in your component's test to simulate
the necessary states. If you're using a CSS-in-JS framework, you can
[automate](https://github.com/Workday/canvas-kit/pull/377/files) this process by creating a
JavaScript wrapper that adds the class names programmatically.
## Focusing DOM elements
Interacting with components often involves focusing on specific elements, such as form fields, buttons, or links. This state is essential in providing visual feedback to the user, primarily when relying on keyboard navigation. Chromatic allows you to verify how components react when a specific element receives focus, ensuring that your UI is accessible and provides a seamless user experience across different devices and browsers.
### With Storybook
If you're working with a component that provides a visual response to the user focusing on a specific element, whether with CSS or JavaScript, you can simulate this behavior by adjusting your tests to include a [`play`](https://storybook.js.org/docs/writing-stories/play-function) function that mirrors the user's interaction. For example:
```ts title="src/components/Auth.stories.ts|tsx"
// Adjust this import to match your framework (e.g., nextjs, vue3-vite)
import type { Meta, StoryObj } from '@storybook/your-framework';
/*
* Replace the storybook/test import with `@storybook/test` and adjust the stories accordingly if you're not using Storybook 9.0.
* Refer to the Storybook documentation for the correct package and imports for earlier versions.
*/
import { expect } from 'storybook/test';
import { LoginForm } from './LoginForm';
const meta = {
component: LoginForm,
title: 'LoginForm',
} satisfies Meta;
export default meta;
type Story = StoryObj;
export const Default: Story = {
play: async ({ canvas, userEvent }) => {
await userEvent.type(canvas.getByLabelText('email'), 'test@email.com');
await userEvent.type(canvas.getByLabelText('password'), 'KC@2N6^?vsV+)w1t');
const SubmitButton = canvas.getByRole('button', { name: 'Login' });
await SubmitButton.focus();
await expect(SubmitButton).toHaveFocus();
},
};
```
### With Playwright or Cypress
If you're running tests with Playwright or Cypress, you can simulate JavaScript-based focus events using Playwright's `focus` [locator](https://playwright.dev/docs/next/api/class-locator#locator-focus) or Cypress's `focus` [command](https://docs.cypress.io/api/commands/focus) to verify how the UI responds when a specific element receives focus. For example:
{/* prettier-ignore-start */}
```ts title="tests/Auth.spec.js|ts"
import { test, expect } from "@chromatic-com/playwright";
test.describe("Authentication", () => {
test("Verifies the authentication works with keyboard navigation", async ({ page }) => {
await page.goto("/auth");
await page.locator('input[name="email"]').fill("test@email.com");
await page.locator('input[name="password"]').fill("KC@2N6^?vsV+)w1t");
await page.getByRole("button", {name: "Login"}).focus();
await expect(page.getByRole("button")).toBeFocused();
});
});
```
```ts title="cypress/e2e/Auth.cy.js|ts"
describe("Authentication", () => {
it("Verifies the authentication works with keyboard navigation", () => {
cy.visit("/auth");
cy.get('input[name="email"]').type("test@email.com");
cy.get('input[name="password"]').type("KC@2N6^?vsV+)w1t");
cy.get('button[type="submit"]').focus();
cy.get('button[type="submit"]').should("have.focus");
});
});
```
{/* prettier-ignore-end */}
---
## Frequently asked questions
Why are focus states visible in Storybook but not captured in a snapshot?
By default, when Chromatic snapshots a Storybook story, it trims the snapshot to the dimensions of the story's root node. However, this behavior can lead to inconsistencies, such as excluding outlined elements and other focus styles from the snapshot.
To solve it, you can adjust your story and provide a [decorator](https://storybook.js.org/docs/writing-stories/decorators#component-decorators) that introduces some padding to the story, enabling it to be snapshotted correctly.
```ts title="src/components/Login.stories.ts|tsx"
// Adjust this import to match your framework (e.g., nextjs, vue3-vite)
import type { Meta, StoryObj } from "@storybook/your-framework";
import { LoginForm } from "./LoginForm";
const meta = {
component: LoginForm,
title: "LoginForm",
decorators: [
(Story) => (
),
],
} satisfies Meta;
export default meta;
```
---
## Ignore tests
URL: https://chromatic.com/docs/ignore-tests
> Manually ignore a test to unblock a build without accepting unexpected changes.
# Ignore tests
Sometimes a test shows a change you're not ready to address, such as an unexpected diff from an unrelated commit or a new story that isn't ready for review. Ignoring the test lets the build pass while you address the change later.
Looking for a different kind of ignore? [Flake Filter](/docs/flake-filter) automatically ignores unstable tests. You can also [ignore specific elements](/docs/ignoring-elements) within a snapshot, or [disable snapshots](/docs/disable-snapshots) for tests you never want captured.
To ignore a test, open the context menu on the test's page and select **Ignore test on this build**.

If you change your mind, you can un-ignore the test to return it to the unreviewed state on the same build.

**Ignoring is scoped to a single build:** an ignored test is captured and compared as usual on future builds. Ignoring a test also doesn't affect your [baselines](/docs/branching-and-baselines) unless you take action to accept or deny it.
---
## Ignore elements
URL: https://chromatic.com/docs/ignoring-elements
> Learn how you can tell Chromatic to ignore changes for certain elements
# Ignore DOM elements
Sometimes a component's appearance changes every render or contains content like video and [animation](/docs/animations) that is impossible to test consistently. This will trigger visual changes even when the component code hasn't changed. Ignore tests or DOM elements to tell Chromatic to skip them when looking for changes.
## Ignoring elements inline
To ignore specific elements in your UI, add the `.chromatic-ignore` class or `data-chromatic="ignore"` attributes to the elements you want Chromatic to skip. Enabling these attributes notifies Chromatic's diffing algorithm to disregard the pixels when running your UI tests and comparing snapshots for visual changes, including the element's bounding box and position (e.g., width, height, and relative positioning).
```tsx title="src/components/VideoComponent.ts|tsx"
import React from 'react';
interface VideoPlayerProps {
src: string;
datePublished?: string;
}
export const VideoPlayer: React.FC = ({
src,
datePublished = new Date().toLocaleString(),
}) => {
return (
Published on: {datePublished}
);
};
```
## Ignoring elements via test configuration
You can specify a list of CSS selectors with the `ignoreSelectors` option to ignore multiple elements simultaneously. This option supports valid CSS selectors, such as `.any-selector-the-browser-supports`, `#even-really-weird-ones`, or `a[href$=".zip" i]:after`.
{/* prettier-ignore-start */}
```ts title="src/components/Product.stories.ts|tsx"
// Adjust this import to match your framework (e.g., nextjs, vue3-vite)
import type { Meta, StoryObj } from "@storybook/your-framework";
/*
* Replace the storybook/test import with `@storybook/test` and adjust the stories accordingly if you're not using Storybook 9.0.
* Refer to the Storybook documentation for the correct package and imports for earlier versions.
*/
import { expect } from "storybook/test";
import { Product } from "./Product";
const meta = {
component: Product,
title: "Product",
parameters: {
// Ignores the diff for elements targeted by the specified list of selectors
chromatic: { ignoreSelectors: ['.product-price'] },
},
} satisfies Meta;
export default meta;
type Story = StoryObj;
export const Default: Story = {
play: async ({ canvas }) => {
await expect(canvas.getByText("Product details")).toBeInTheDocument();
},
};
```
```ts title="tests/Product.spec.js|ts"
import { test, expect } from "@chromatic-com/playwright";
test.describe("Products Page", () => {
// Ignores the diff for elements targeted by the specified list of selectors
test.use({ ignoreSelectors: ['.product-price'] });
test("Successfully loads the page", async ({ page }) => {
await page.goto("/products");
await expect(page.getByText("Product details")).toBeVisible();
});
});
```
```ts title="cypress/e2e/Product.cy.js|ts"
describe("Products Page", () => {
it("Successfully loads the page", { env: {
// Ignores the diff for elements targeted by the specified list of selectors
ignoreSelectors: ['.product-price']
}}, () => {
cy.visit("/products");
cy.get("h3").should("contain", "Product details");
});
});
```
{/* prettier-ignore-end */}
## Dimension changes in ignored elements still trigger diffs
Adding the `data-chromatic="ignore"` attribute or specifying a selector with the `ignoreSelectors` option instructs the diffing algorithm to disregard pixels within the bounding box of the ignored element. However, dimension changes of this element still trigger a change.
Ensure that both the baseline and new snapshots maintain the exact dimensions, such as width, height, and relative positioning.


---
## Media features
URL: https://chromatic.com/docs/media-features
> Learn how to use media features in Chromatic Capture
# Media features
CSS media features enable developers to create responsive designs and adapt layouts based on device characteristics, enhancing user experiences. With Chromatic, developers can test and refine CSS media features to ensure consistent and visually appealing designs across different devices and screen sizes.
## Test high-contrast color schemes
The [`forced-colors`](https://developer.mozilla.org/en-US/docs/Web/CSS/@media/forced-colors) CSS media feature enables developers to create accessible websites for visually impaired users. It detects high-contrast mode and color preferences, ensuring that websites and applications are legible and accessible. To test it in Chromatic, add the `forcedColors` configuration option to your tests:
{/* prettier-ignore-start */}
```ts title="src/components/Auth.stories.ts|tsx"
// Adjust this import to match your framework (e.g., nextjs, vue3-vite)
import type { Meta, StoryObj } from "@storybook/your-framework";
/*
* Replace the storybook/test import with `@storybook/test` and adjust the stories accordingly if you're not using Storybook 9.0.
* Refer to the Storybook documentation for the correct package and imports for earlier versions.
*/
import { userEvent } from "storybook/test";
import { LoginForm } from "./LoginForm";
const meta = {
component: LoginForm,
title: "LoginForm",
parameters: {
// Enables the forcedColors option at the component level for all stories.
chromatic: { forcedColors: "active" },
},
} satisfies Meta;
export default meta;
type Story = StoryObj;
export const WithForcedColors: Story = {
play: async ({ canvas }) => {
await userEvent.type(canvas.getByLabelText("email"), "test@email.com");
await userEvent.type(canvas.getByLabelText("password"), "KC@2N6^?vsV+)w1t");
await canvas.getByRole("button", { name: "Login" }).click();
},
};
```
```ts title="tests/Auth.spec.js|ts"
import { test } from "@chromatic-com/playwright";
test.describe("Authentication", () => {
// Enables the forcedColors option for this test.
test.use({ forcedColors: "active" });
test("Authenticates a user with high contrast mode enabled", async ({ page }) => {
await page.goto("/auth");
await page.locator('input[name="email"]').fill("test@email.com");
await page.locator('input[name="password"]').fill("KC@2N6^?vsV+)w1t");
await page.getByRole("button", { name: "Login" }).click();
});
});
```
```ts title="cypress/e2e/Auth.cy.js|ts"
describe("Authentication", () => {
// Enables the forcedColors option for this test.
it("Authenticates a user with high contrast mode enabled", { env: { forcedColors: "active" } }, () => {
cy.visit("/auth");
cy.get('input[name="email"]').type("test@email.com");
cy.get('input[name="password"]').type("KC@2N6^?vsV+)w1t");
cy.get("button[type=submit]").click();
});
});
```
{/* prettier-ignore-end */}
The `forcedColors` configuration option supports the following values:
- `none` - Indicating that the user has not enabled a forced color mode or does not have a preference for high-contrast colors.
- `active` - Indicating that the user has enabled a forced color mode or prefers high-contrast colors.
## Verify reduced motion animations
The [`prefers-reduced-motion`](https://developer.mozilla.org/en-US/docs/Web/CSS/@media/prefers-reduced-motion) CSS media feature enables developers to check whether the user enabled a preference for reduced motion animations. Primarily used to create a more inclusive user experience for people who may experience discomfort or nausea when viewing animations that involve rapid movement. To test it in Chromatic, add the `prefersReducedMotion` configuration option to your tests:
{/* prettier-ignore-start */}
```ts title="src/components/Auth.stories.ts|tsx"
// Adjust this import to match your framework (e.g., nextjs, vue3-vite)
import type { Meta, StoryObj } from "@storybook/your-framework";
/*
* Replace the storybook/test import with `@storybook/test` and adjust the stories accordingly if you're not using Storybook 9.0.
* Refer to the Storybook documentation for the correct package and imports for earlier versions.
*/
import { userEvent } from "storybook/test";
import { LoginForm } from "./LoginForm";
const meta = {
component: LoginForm,
title: "LoginForm",
parameters: {
// Enables the prefersReducedMotion option at the component level for all stories.
chromatic: { prefersReducedMotion: "reduce" },
},
} satisfies Meta;
export default meta;
type Story = StoryObj;
export const WithReducedMotion: Story = {
play: async ({ canvas }) => {
await userEvent.type(canvas.getByLabelText("email"), "test@email.com");
await userEvent.type(canvas.getByLabelText("password"), "KC@2N6^?vsV+)w1t");
await canvas.getByRole('button', { name: "Login" }).click();
},
};
```
```ts title="tests/Auth.spec.js|ts"
import { test } from "@chromatic-com/playwright";
test.describe("Authentication", () => {
// Enables the prefersReducedMotion option for this test.
test.use({ prefersReducedMotion: "reduce" });
test("Authenticates a user with reduced motion mode enabled", async ({ page }) => {
await page.goto("/auth");
await page.locator('input[name="email"]').fill("test@email.com");
await page.locator('input[name="password"]').fill("KC@2N6^?vsV+)w1t");
await page.getByRole('button', { name: 'Login' }).click();
});
});
```
```ts title="cypress/e2e/Auth.cy.js|ts"
describe("Authentication", () => {
// Enables the prefersReducedMotion option for this test.
it("Authenticates a user with reduced motion mode enabled", { env: { prefersReducedMotion: "reduce" } }, () => {
cy.visit("/auth");
cy.get('input[name="email"]').type("test@email.com");
cy.get('input[name="password"]').type("KC@2N6^?vsV+)w1t");
cy.get("button[type=submit]").click();
});
});
```
{/* prettier-ignore-end */}
The `prefersReducedMotion` configuration option supports the following values:
- `reduce` - Indicating that the user has defined a preference for reduced motion,
- `no-preference` - This indicates that the user does not prefer reduced motion, and animations display normally.
## Test print styles
The [`print`](https://developer.mozilla.org/en-US/docs/Web/CSS/CSS_media_queries/Printing) CSS media feature enables developers to create print styles for web pages. If you're running tests with Storybook, you can set the `media` configuration option to `print`, allowing Chromatic to test print styles defined in your UI components.
```ts title="src/components/UserAccount.stories.ts|tsx"
// Adjust this import to match your framework (e.g., nextjs, vue3-vite)
import type { Meta, StoryObj } from '@storybook/your-framework';
import { UserAccount } from './UserAccount';
const meta = {
component: UserAccount,
title: 'UserAccount',
parameters: {
chromatic: {
// Sets the print media feature at the component level for all stories.
media: 'print',
},
},
} satisfies Meta;
export default meta;
type Story = StoryObj;
export const Default: Story = {};
```
## Combine media features with Modes
You can add media features to existing [Modes](/docs/modes) but can't define media features in the Mode itself.
For example, if you have existing Modes for German and American English locales, you can write a test combining those modes with the `media` configuration option like so:
```js title=".storybook/modes.js|ts"
// Define modes
export const allModes = {
german: {
locale: 'de',
},
american: {
locale: 'en-us',
},
// {... Other modes}
};
```
Then, apply the Modes and the media feature to your tests.
```ts title="src/components/UserAccount.stories.ts|tsx"
// Adjust this import to match your framework (e.g., nextjs, vue3-vite)
import type { Meta, StoryObj } from '@storybook/your-framework';
import { allModes } from '../../.storybook/modes';
import { UserAccount } from './UserAccount';
const meta = {
component: UserAccount,
title: 'UserAccount',
} satisfies Meta;
export default meta;
type Story = StoryObj;
/*
* Combines modes with print media styles
* 1️⃣ Set the `media` option to `print`
* 2️⃣ Set the `modes` to use the desired locales
* 👀 Note: These modes keys (e.g., "german print") will be used in the Chromatic UI
*/
export const WithPrintStyles: Story = {
parameters: {
chromatic: {
// 1️⃣
media: 'print',
// 2️⃣
modes: {
'german print': allModes['de'],
'en-us print': allModes['en-us'],
},
},
},
};
```
This would create two Chromatic snapshots, one with German locale mode and print styles and another with American English locale mode and print styles.
---
## Troubleshooting
Can I define a media feature in Modes?
No, setting media features in [Modes](/docs/modes/) is not supported.
```js title=".storybook/modes.js|ts"
export const allModes = {
// 🚨 THESE WILL NOT WORK 🚨
mode: {
media: 'print',
forcedColors: 'active',
prefersReducedMotion: 'reduce',
},
// {... Other modes}
};
```
---
## Page Shift Detection
URL: https://chromatic.com/docs/page-shift-detection
> Learn how to use media features in Chromatic Capture
# Page Shift Detection (beta)
When elements are added to the UI, the surrounding content shifts vertically. This shift is detected by Chromatic's capture system as a visual difference. Since the rest of the content remains unchanged, it becomes challenging to pinpoint what exactly was altered. Moreover, if there's a genuine change further down the page, this vertical shift makes it difficult for you to identify the actual diff.
Page Shift Detection enhances the visual diff review process by detecting vertical content shifts and excluding them from the diff. This makes it easier to see what has been added to the UI.
In the example below, a banner is added to the page, causing the content beneath it to shift down. With Page Shift Detection enabled, the banner is highlighted as the only change in the visual diff.

Page Shift Detection is triggered when all of the following conditions are met:
- There is an addition from the baseline image to the head image (i.e., head image is taller than the baseline image).
- There is _a max of two_ blocks of added content between the baseline and head image.
- The added content is at least 30px tall.
---
## Position sticky & fixed
URL: https://chromatic.com/docs/position-sticky
> Learn how to snapshot position sticky and fixed elements
# Position sticky & fixed
Chromatic captures `position:sticky` and `position:fixed` elements in their initial positions once per snapshot.
We do this because sticky and fixed elements can persist in the viewport even when content extends beyond it. Since these elements can change with scroll, we use the element's initial position when the browser loads to anchor it where it appears in your snapshot.
For example, if your UI has a bottom positioned element the sticky element will appear in the bottom position when the browser loads, the remaining content will flow under it.
```css
position: sticky;
bottom: 0;
```

---
## Troubleshooting
I set an element to use sticky positioning, but it's not working. What could be the issue?
If the parent of your sticky element uses `display: grid;`, `display: flex;`, or similar styles, the layout might behave differently when rendering a story by itself. In such cases, we recommend wrapping the story with a [decorator](https://storybook.js.org/docs/writing-stories/decorators#wrap-stories-with-extra-markup) `div` and setting `display: initial;` to it.
---
## Rerun builds
URL: https://chromatic.com/docs/rerun-builds
> Double-check whether a visual change is real or caused by an unstable test by retaking snapshots with identical settings.
# Rerun builds to identify unstable tests
Double-check whether a visual change is real or caused by test instability by retaking snapshots. Click the **Rerun** button to kick off a build with the same settings as the original build. Chromatic only captures snapshots for denied, unreviewed, or errored changes. It doesn't recapture snapshots for accepted changes in a rerun build.

Compare the changes in the original and rerun builds. You might encounter these common scenarios:
- **Identical changes between builds:** The snapshots show bona fide UI changes that need your verification. Continue the [UI Tests workflow](/docs/quickstart#4-review-changes) as usual.
- **Different changes between builds:** The tests might be unstable and introducing false positives. Use the [trace viewer](/docs/trace-viewer) to identify the root cause, then [improve test stability](/docs/unstable-tests#improve-test-stability).
When Chromatic detects potential test instability in a rerun build, it displays a message.

---
## Resource loading
URL: https://chromatic.com/docs/resource-loading
> Learn how Chromatic loads resources and waits to screenshot.
# Resource loading
Chromatic waits for resources like images and fonts to load before capturing a snapshot. When resources fail to load, this can lead to unintended UI changes.
Chromatic has a multistage timeout for capturing a snapshot: 15 seconds to render a story and an additional 15 seconds to execute interaction tests, if present. If the resources fail to load in time, Chromatic will retry. After several retries, the snapshot will be captured, and a warning message will be displayed.
## Avoid external resources
External resources depend on network stability and third-party hosting, so they may not load predictably. Whenever possible, serve resources alongside the UI you're testing to make builds faster and more stable.
| Integration | Recommendation |
| ----------- | ----------------------------------------------------------------------------------------------------------------------------------------------------------------------------------------------------------------------------------------------------------------------------------------------------------------------------------------------------------------------------------------------------- |
| Storybook | [Serve static files with Storybook](https://storybook.js.org/docs/configure/integration/images-and-assets#serving-static-files-via-storybook-configuration). If you can't include an image locally, use a reliable [placeholder service](https://placehold.co/). For more recommendations, see the [Storybook image loading guide](https://github.com/yannbf/storybook-image-loading-best-practices). |
| Playwright | Serve resources from your local application server. If resources must come from another domain, add the domain to `assetDomains` in your [Chromatic configuration for Playwright](/docs/playwright/configure). |
| Cypress | Serve resources from your local application server. If resources must come from another domain, add the domain to `assetDomains` in your [Chromatic configuration for Cypress](/docs/cypress/configure). |
## Asynchronous rendering
Our browsers monitor network activity while your tests are rendered. If your test renders after a delay (i.e., asynchronously), we cannot tell what happened. Thus, we can't reliably wait for subsequent resources to be loaded asynchronously.
If you know how long async rendering takes, you can add a [delay](/docs/delay) to avoid snapshotting until after that happens. However, it can be difficult to reliably set a time that network resources will load within, so you may have to add/subtract seconds to the delay.
We are investigating ways to add first-class support for asynchronous rendering to Storybook and Chromatic. Let us know if you need this feature by chat or [email](mailto:support@chromatic.com?Subject=Asynchronous%20Rendering).
## Resources could not be loaded
When Chromatic captures a story, it sometimes blocks or fails to load assets (e.g. images, fonts, stylesheets) that work fine locally. If this happens, you will see a warning on the comparison page:
Resources requested by the story could not be loaded. Snapshots may be affected. **Huh?**
Hovering over the **Huh?** link reveals a tooltip containing the specific URLs that failed to load. Use that list as your starting debugging point and try these suggestions:
1. Confirm the assets load locally when running Storybook.
2. Ensure all URLs are well‑formed and use valid public paths.
3. Confirm the assets are publicly available using `curl` (or `wget`) to fetch them directly.
4. If you use a VPN or a corporate network, try fetching them from outside that network to rule out access restrictions.
5. Ensure the URL uses `https://`. Using `http://` may result in a mixed‑content block.
6. Verify your server sends valid `Access-Control-Allow-Origin` headers.
If these suggestions don't help, please reach out to [us](mailto:support@chromatic.com) and share a link to the comparison page.
---
## Troubleshooting
Why does my story fail with an URL reload loop error?
The URL reload loop error is a safeguard that prevents **excessive network calls** to the same URL within a single story. It helps avoid performance issues during snapshot capture. If you are doing multiple calls to the same URL, try consolidating those calls.
Why does my story only time out during capture but works locally?
Too many steps in a play function (especially with programmatic delays), large re-renders of big components, or loading large data files/static assets can all cause the timeout to be exceeded. Storybook addons or unnecessary assets (that don't have any effect in your current test) may still be loaded with a story and cause performance issues and timeouts. We suggest conditionally disabling these addons or assets for Chromatic builds. For example:
```js title="./storybook/preview.js|ts"
export default {
addons: [
// ... your other addons
!isChromatic && 'storybook-addon-pseudo-states',
].filter(Boolean),
};
```
---
## Snapshots
URL: https://chromatic.com/docs/snapshots
> What is a Snapshot in Chromatic
# Snapshots
A **snapshot** is the unit of work executed by Chromatic to run a [UI Test](/docs#test-how-uis-look--function). This work can be taking a screenshot, capturing accessibility data, copying such information from one test to another, or even bypassing such work completely if it is found to be unnecessary.
Looking for information on snapshot billing? [Go to billing docs](/docs/billing)
The type of work performed by Chromatic is determined by the following factors:
- **Visual vs. Accessibility:** A [visual test](/docs/visual) captures the rendered state of the UI, whereas an [accessibility test](/docs/accessibility) captures accessibility information about the UI. Both types of tests take a snapshot and compare it to a baseline snapshot to detect changes.
- **Capture vs. TurboSnap:** A captured snapshot performs the full suite of work, including taking screenshots or capturing accessibility data, and running diffs. A [TurboSnap](/docs/turbosnap) snapshot avoids unnecessary work if it is determined that the associated code has not changed, speeding up the testing process.
These dimensions stack to create a snapshot. For example, you can have a "captured visual snapshot" or a "turbo visual snapshot". The short forms are "visual snapshot" and "visual turbosnap", respectively.
## Snapshot-compatible tests
A **test** represents a piece of UI rendered in a specific state that Chromatic can capture as a snapshot. Chromatic supports the following types of tests:
- Storybook Stories
- Playwright & Cypress End-to-End (E2E) tests
- Vitest browser mode tests
Each test can generate multiple snapshots, varying by [browser](/docs/browsers#browser-support) (or mobile simulators and emulators), [theme](/docs/themes), [viewport size](/docs/viewports), and other configurations you define.
With [Playwright](/docs/playwright/targeted-snapshots), [Cypress](/docs/cypress/targeted-snapshots), and [Vitest](/docs/vitest/targeted-snapshots), you can even capture multiple visual snapshots within a single test for even more granular analysis.
## How are snapshots captured?
Chromatic captures snapshots by following these steps:
1. Load each test in the designated device and viewport
Chromatic's Capture Cloud leverages a fleet of standardized [browsers](/docs/browsers) and mobile emulators to load all of your tests (either stories or archives) in parallel, at the specified [viewport size](/docs/viewports).
2. Wait for the test to render
Capture Cloud uses underlying browser APIs combined with our own set of [heuristics](/features/steadysnap) to determine when the UI has "loaded" and is ready to be captured.
3. Capture screenshot and/or accessibility data
For visual tests, Chromatic takes a screenshot and crops it to the dimensions of the UI.
For accessibility tests, Chromatic runs accessibility audits and collects information about the rendered UI.
4. Save snapshot and diff between baseline and new snapshot
Each snapshot is associated with a test and tagged with commit, branch, and other relevant metadata. Chromatic then runs pixel diffs between the new snapshot and the previous baseline snapshot for that test, highlighting any visual changes. For accessibility tests, Chromatic compares the new accessibility data with the previous baseline data to identify any changes.
## Visual snapshots
### When is a visual web snapshot captured?
Various factors can influence the waiting period, for [**step 2**](/docs/snapshots#2-wait-for-the-test-to-render), before the snapshot is captured.
One of the primary heuristics Chromatic uses is **network quiesence**, a period of network inactivity which signals that all resources have loaded. This loading analysis is our best approximation for determining when the UI has finished rendering.

Other factors that impact when a snapshot is captured include:
#### Animations and videos
Chromatic [proactively pauses](/docs/animations) CSS animations/transitions, videos and GIFs to prevent false positives. However, Chromatic cannot disable JavaScript-driven animations, so you are responsible for [pausing them](/docs/animations#javascript-animations).
If not paused during testing, the snapshot will be captured mid-animation and trigger false positives.
#### Interaction tests
If you are using [Storybook interaction tests](/docs/interactions/), Chromatic waits for the play function to complete before capturing the snapshot. That includes any interactions, assertions or delays defined within the play function.

#### Delays
[Delays](/docs/delay#delay-snapshots) ensure that a minimum amount of time (in milliseconds) has passed before Chromatic takes a screenshot. The delay is applied after the network quiescent phase.

If you apply a delay to a story that has interactions, the delay is applied after the interactions have completed.

### View visual snapshot for a test
The component screen allows you to switch between 'Canvas' and 'Snapshot'. Under the Snapshot tab, you'll find the image captured by Chromatic's cloud browser. This is exactly what the browser _saw_ when it rendered the test. This could be the component's _initial_ or _intermediate_ state.

Tip: Click the arrow icon in the top right to open the test. Stories open in your published Storybook.
### View live rendered test using the Canvas
**Canvas** is an interactive environment that renders your test code live in the browser. These are fully inspectable, enabling you to troubleshoot changes and errors effectively.
With Storybook, it displays the story. With Playwright, Cypress and Vitest, it shows the [archive](/docs/faq/what-is-archive) of your test. In all cases, you see the _final state_ of the test UI.

### Differences in visual snapshot vs Canvas
The visual snapshot might differ from the `Canvas` for various reasons, such as JavaScript execution being blocked during capture, which can prevent certain elements from being captured. Or the use of the `isChromatic()` function to alter rendering on Chromatic.
---
## Threshold
URL: https://chromatic.com/docs/threshold
> Learn how to fine-tune the amount of visual change between snapshots before they get marked as changes
# Threshold for changes
The `diffThreshold` configuration option allows you to fine-tune the threshold for visual change between snapshots before Chromatic flags them. Sometimes, you need assurance to the sub-pixel; other times, you want to skip visual noise generated by non-deterministic rendering, such as anti-aliasing.
## Setting the threshold
Diff threshold values closer to `0` are more sensitive, but more likely to have false positives, while values closer to `1` are less sensitive, but less likely to have false positives. Chromatic's default threshold is `.063`, which balances high visual accuracy with low false positives (for example, from artifacts like anti-aliasing).
If you need to customize how Chromatic identifies visual changes in your UI, add the `diffThreshold` configuration option to your tests. For example:
{/* prettier-ignore-start */}
```ts title="src/components/UserAccount.stories.ts|tsx"
// Adjust this import to match your framework (e.g., nextjs, vue3-vite)
import type { Meta, StoryObj } from "@storybook/your-framework";
/*
* Replace the storybook/test import with `@storybook/test` and adjust the stories accordingly if you're not using Storybook 9.0.
* Refer to the Storybook documentation for the correct package and imports for earlier versions.
*/
import { expect } from "storybook/test";
import { UserAccount } from "./UserAccount";
const meta = {
component: UserAccount,
title: "UserAccount",
parameters: {
// Sets the threshold for 0.2 at the component level for all stories.
chromatic: { diffThreshold: 0.2 },
},
} satisfies Meta;
export default meta;
type Story = StoryObj;
export const Default: Story = {
play: async ({ canvas }) => {
await expect(canvas.getByText("Welcome, username")).toBeInTheDocument();
},
};
```
```ts title="tests/UserProfile.spec.js|ts"
import { test, expect } from "@chromatic-com/playwright";
test.describe("User Profile Page", () => {
// Sets the threshold for 0.2 for this test.
test.use({ diffThreshold: 0.2 });
test("Successfully loads the user information ", async ({ page }) => {
await page.goto("/profile");
await expect(page.getByText("Welcome, username")).toBeVisible();
});
});
```
```ts title="cypress/e2e/UserProfile.cy.js|ts"
describe("User Profile Page", () => {
// Sets the threshold for 0.2 for this test.
it("Successfully authenticates user", { env: { diffThreshold: 0.2 } }, () => {
cy.visit("/profile");
cy.get("span").contains("Welcome, username");
});
});
```
{/* prettier-ignore-end */}
Choose the lowest threshold that filters out expected visual noise without hiding meaningful changes. For example, a threshold of `0.8` may prevent Chromatic from detecting positioning changes.
Use the [**interactive diff tool**](https://tools.chromatic.support/threshold/) to preview how different values affect your UI tests.
### Anti-aliasing
By default, Chromatic detects anti-aliased pixels and ignores them to prevent false positives. The `diffIncludeAntiAliasing` configuration option allows you to override this behavior when Chromatic does not flag a single pixel change but should.
To enable this feature and allow Chromatic to automatically detect anti-aliased pixels, adjust your tests to include the `diffIncludeAntiAliasing` option. For example:
{/* prettier-ignore-start */}
```ts title="src/components/UserAccount.stories.ts|tsx"
// Adjust this import to match your framework (e.g., nextjs, vue3-vite)
import type { Meta, StoryObj } from "@storybook/your-framework";
/*
* Replace the storybook/test import with `@storybook/test` and adjust the stories accordingly if you're not using Storybook 9.0.
* Refer to the Storybook documentation for the correct package and imports for earlier versions.
*/
import { expect } from "storybook/test";
import { UserAccount } from "./UserAccount";
const meta = {
component: UserAccount,
title: "UserAccount",
parameters: {
// Configures the component to include anti-aliasing in the diff calculation.
chromatic: { diffIncludeAntiAliasing: true },
},
} satisfies Meta;
export default meta;
type Story = StoryObj;
export const Default: Story = {
play: async ({ canvas }) => {
await expect(canvas.getByText("Welcome, username")).toBeInTheDocument();
},
};
```
```ts title="tests/UserProfile.spec.js|ts"
import { test, expect } from "@chromatic-com/playwright";
test.describe("User Profile Page", () => {
// Configures this to include anti-aliasing in the diff calculation.
test.use({ diffIncludeAntiAliasing: true });
test("Successfully loads the user information ", async ({ page }) => {
await page.goto("/profile");
await expect(page.getByText("Welcome, username")).toBeVisible();
});
});
```
```ts title="cypress/e2e/UserProfile.cy.js|ts"
describe("User Profile Page", () => {
// Configures this to include anti-aliasing in the diff calculation.
it("Successfully loads the user information", { env: { diffIncludeAntiAliasing: true } }, () => {
cy.visit("/profile");
cy.get("span").contains("Welcome, username");
});
});
```
{/* prettier-ignore-end */}
## Troubleshooting
Why weren't diffs found when a color or background changed?
Chromatic uses a threshold to determine how much must change between snapshots before they get flagged as visual changes. This prevents false positives due to anti-aliasing and other non-deterministic rendering artifacts.
However, our default threshold may miss subtle changes, such as nuanced changes to a background's shade of gray. In this case, you may want to adjust the `diffThreshold` to be more accurate (lower value).
Find the suitable threshold for your UI using our [**interactive diff tool**](https://tools.chromatic.support/threshold/).
What is the threshold?
The threshold measures how much color difference Chromatic will tolerate before flagging two snapshots as “different. It measures the color distance in a 3D color space (YIQ).
Chromatic compares the color at the same (x, y) position in both snapshots and checks how far apart they are in color space. Think of it like this:
A **low threshold** (e.g., `0.0005`) means almost identical colors will still be flagged as changed. This is great for pixel-perfect checks.
A **high threshold** (e.g., `0.63`) means Chromatic tolerates larger color differences — it’ll only flag major visual changes.
Every screen has a different pixel density (DPI/PPI) and color gamut, so there’s no **“1 pixel = 1 threshold”** relationship.
---
## Trace viewer
URL: https://chromatic.com/docs/trace-viewer
> Explore traces recorded while Chromatic captures snapshots to identify the root cause of rendering issues.
# Trace viewer to debug snapshots
Trace viewer lets you explore network requests, console logs, and other debugging information captured during the snapshot process. It helps you pinpoint the root cause of rendering issues, such as missing fonts, incorrect styles, or unexpected layout changes.
Chromatic records traces automatically. When a test is [unstable](/docs/unstable-tests#what-is-an-unstable-test), Chromatic flags it and attaches a trace of the capture session. Builds containing unstable tests include a **Traces** column with one trace link per enabled browser. Click a browser to open its trace.

## How to use a snapshot trace
Chromatic uses Playwright to render and capture snapshots in Capture Cloud, even if your tests are written using Cypress or Storybook. This lets Chromatic use Playwright's [trace viewer features](https://playwright.dev/docs/trace-viewer#trace-viewer-features) to record network activity, console logs, DOM snapshots, and other debugging information.

Below are some common scenarios where the trace viewer can help you debug snapshot issues:
### Network tab analysis
The network tab displays the resources loaded during capture, including fonts, stylesheets, scripts, and other assets. Check for resources that failed to load or took a long time. For example, if fonts are incorrect or styles are missing, ensure that the font or CSS files loaded successfully with the correct MIME type. Learn how to make [resource loading](/docs/resource-loading) more reliable.
For a detailed list, see Playwright's [trace viewer features](https://playwright.dev/docs/trace-viewer#trace-viewer-features).
### Inspect the DOM
The trace archives the DOM for each step or action executed, allowing you to inspect the DOM at the time of capture. Use this tab to verify the DOM structure is as expected.
Check for missing elements, incorrect styles, or unexpected layout changes. If styles are missing but the CSS file has loaded, ensure the styles are applied correctly.

### Snapshot metadata
When Chromatic captures a snapshot, it includes metadata like viewport information and clip rectangle dimensions. Use this data to identify issues such as:
- **Responsive design issues**: Viewport information reveals the screen size used for the capture. Compare this with your breakpoints to ensure that the correct styles are applied.
- **Element positioning problems**: The clip rectangle shows precisely what was captured. If an element is missing from the snapshot, verify if it falls within the expected clip area.

## Fix the root cause
Instability is a signal that a test needs attention. Once the trace has helped you identify why a test is unstable, learn how to [improve test stability](/docs/unstable-tests#improve-test-stability) with fixes such as pausing animations, preloading fonts, and seeding randomness.
---
## Unstable tests debugging
URL: https://chromatic.com/docs/unstable-tests
> Learn why tests become unstable, improve test stability, and troubleshoot snapshot rendering issues.
# Unstable tests debugging
Use this guide when a test is unstable or when a snapshot is consistently wrong, incomplete, or otherwise unexpected. These are different problems, but they often share causes such as animations, resources that load late, dynamic data, or layout behavior.
## What is an unstable test?
An unstable test renders differently across repeated runs even when your code hasn't changed. For example, an animation might be caught mid-frame, a font might load late, dynamic data might change, or a network request might not finish in time.
Chromatic automatically detects and ignores unstable tests with [Flake filter](/docs/flake-filter) so they don't block your build.
## Improve test stability
Your components and stories must render stably to prevent false positives. The following practices can improve test stability:
- **Randomness in tests**: Components sometimes use random number generators to create data for complex inputs. You can hard-code the input data or use a tool such as [seedrandom](https://github.com/davidbau/seedrandom) to generate stable values.
- **Animations**: Chromatic attempts to pause all animations. However, you may need to [configure animation behavior](/docs/animations).
- **Unpredictable resource hosts**: Resources that load from unpredictable or unreliable sources may not load within the 15-second capture window. Serve resources as static files, use a [placeholder service](https://placehold.co/), and learn how to make [resource loading](/docs/resource-loading) more reliable.
- **Image CDNs and compression algorithms**: Image CDNs optimize image weight and size, which can affect how images render. Since this happens upstream of Chromatic, changes to those images are detected as visual changes. Ensure the served images are identical every time and use stable compression settings. Also consider serving images as static files or using a [placeholder service](https://placehold.co/).
- **Web font loading**: Web fonts can load at different times and make tests unstable, especially when combined with [interactions](/docs/interactions). Serve web fonts as static files and [preload](/docs/font-loading) them.
- **Iframes rendering out of the viewport**: Some browsers only visually render iframes when they are inside the viewport, even when they have loaded all their resources. If an iframe is below the viewport of a tall story, it will appear blank. You may want to [ignore the element](/docs/ignoring-elements) and test it in isolation so it fits inside the viewport.
- **Use of the current date and time**: To keep tests that use the current time stable, use a tool such as [mockdate](https://www.npmjs.com/package/mockdate) to set the `Date` object to a fixed value.
- **UI takes time to render**: UI can take extra time to settle into its final state. Add a [delay](/docs/delay) before taking a snapshot. This can make instability less obvious in snapshots, but it won't eliminate the underlying rendering issue.
- **Intentional randomness**: Some stories are intentionally dynamic. You may want to [exclude the story from UI Tests](/docs/disable-snapshots#with-storybook). If those dynamic elements are still useful during local development, use [`isChromatic()`](/docs/ischromatic) to apply these stability techniques only in Chromatic.
## Start with the trace
Each unstable test includes a [trace](/docs/trace-viewer) with network requests, console logs, DOM snapshots, and snapshot metadata. Start there to identify what changed during capture, then use the rendering issues below to find a likely cause and fix.
## Common snapshot rendering issues
### Missing or incorrect content
Where are my images and fonts?
Image and font rendering can be tricky. Resources that load from unpredictable or flaky sources may not load within the 15-second capture window. Work around this by:
- Ensure that [fonts load in Chromatic](/docs/font-loading).
- Ensure that [resources load in Chromatic](/docs/resource-loading).
- Serve resources as [static files](/docs/resource-loading) to improve test speed.
- Use a [placeholder service](https://placehold.co/).
If your resources are behind a firewall, whitelist our domain so we can load your resources.
Why is a test unstable when my component uses srcset?
The `srcset` attribute is a useful mechanism that provides the browser with a list of potential images to display, based on specified conditions such as media queries.
In most cases, Chromatic will capture the correct image from the `srcset` list. However, if multiple tests list the same image in their respective `srcset` lists, browser cache issues can result in unstable tests.
In situations like this, make the `srcset` URLs unique for each test by adding a query parameter value.
For instance, one test could use a `srcset` query parameter of `?cachebuster=1714593641616`.
```html
```
If another test uses the same images, they can alter the query parameter in the URL to `?currenttime=1714593641620`.
```html
```
You can use any query parameter name as long as its value is unique to each test and stable across runs.
Why do my emojis look different in the snapshot versus on my machine?
Emojis are handled by your operating system's emoji font. Most operating systems use different emoji fonts, and those fonts tend to change over time. For example, if you view a story on a Mac, you'll see Apple’s set of emojis.
Chromatic captures Chrome and Firefox snapshots in a Linux environment. It includes a common set of emojis used by most systems. Those emojis will likely look different from emojis on a consumer OS like Mac or Windows. Unfortunately, there's no workaround available at this time.
Where are my videos?
Videos are interactive and time-based, which can make a test unstable. Chromatic hides videos by default to prevent false positives. You'll see the poster image, if specified, or a blank space where the video is supposed to render.
Why am I getting cross-origin errors with my stories?
Most likely, you are calling into `window.parent` somewhere in your code. As we serve your test preview iframe inside our `www.chromatic.com` domain, this leads to an `x-origin` error as your code doesn't have access to our frame (with good reason!).
Generally speaking it is a good idea to wrap calls like that in a `try { } catch` in case the code is running in a context where that's not possible (e.g., Chromatic).
### Layout and capture problems
Why is my content being cut off vertically in my snapshots?
Make sure there are no elements inadvertently cutting off content through the use of overflow or height styles.
For elements that have relative height styles based on the size of the viewport (such as `height: 100vh`), all content nested under that element will appear in a snapshot unless either `overflow: hidden` or `overflow: scroll` is used to hide what is outside of that element (and therefore outside of the viewport).
When Chromatic captures a snapshot of an element that has a viewport-relative height and styling that hides or scrolls overflow, it uses a default viewport height of `900px`. This default applies only when Chromatic can't detect a natural height for the outermost DOM element (root ancestor), such as a scrollable `div`.
To set the height, you can add a decorator for stories that wraps them in a container with a fixed height:
```ts title="MyComponent.stories.js|jsx"
// Adjust this import to match your framework (e.g., nextjs, vue3-vite)
import type { Meta } from "@storybook/your-framework";
import { MyComponent } from "./MyComponent";
const meta = {
component: MyComponent,
title: "Example Story",
decorators: [
(Story) => (
),
],
} satisfies Meta;
```
How do I capture content inside scrollable divs?
Scrollable divs constrain the height of their children. Change the height of the scrollable div to ensure all content fits. It's not possible for Chromatic to infer how tall scrollable divs are intended to be.
Why don't scrollbars appear in my snapshots?
Chromatic intentionally disables scrollbars during snapshot capture to focus on testing your content rather than browser UI elements. This ensures consistent snapshots across different browsers and operating systems, since scrollbar appearance varies significantly between platforms.
Unfortunately, there are currently no workarounds available to capture scrollbars in snapshots. This applies to both default browser scrollbars and custom-styled scrollbars using CSS.
If you're testing custom scrollbar styling or need to detect overflow issues, you may need to use alternative testing approaches outside of Chromatic's visual regression testing.
Why doesn't text alignment in my snapshot match my dev environment?
Text can appear slightly misaligned in a snapshot compared to what you see locally. This is most noticeable in components that mix icons and text, such as a button with a label between two icons.
First, ensure your [fonts load consistently in Chromatic](/docs/font-loading). If the capture environment falls back to a different font than your dev environment, text metrics (and therefore alignment) will shift.
If fonts aren't the cause, check for unwrapped text in a flex layout:
```html
```
When you apply `display: flex` to a parent container (the `Why isn’t my portal component (modal, dialog, popover, tooltip, or menu) captured? Or why is its snapshot cut off?
If you use an `animateIn` effect, set a [delay](/docs/delay) so Chromatic captures the snapshot after the animation completes.
Your component might be rendering outside of the viewport. Either reposition the component or adjust the [viewport size](/docs/modes/viewports/).
### Unexpected rendering behavior
Do you support taking snapshots of a component with multiple themes?
Yes. Chromatic's [Modes](/docs/modes) simplify visual testing for stories with different global configurations, such as themes. Follow the [Themes guide](/docs/themes) to get started.
Why are stories with mocked data not being snapshotted correctly?
Chromatic snapshots sometimes show the initial or intermediate loading state of the UI, instead of the final state with the mocked data. This can lead to visual tests failing, even though the Storybook renders correctly locally. To debug this issue, follow these steps:
1. Ensure that MSW (Mock Service Worker) is correctly initialized by following the [MSW Storybook add-on setup instructions](https://github.com/mswjs/msw-storybook-addon?tab=readme-ov-file#configure-the-addon).
2. Confirm that you're not using outdated versions of `msw`, `msw-storybook-addon`, or any other community add-ons.
3. Run `npm run build-storybook` and `npx http-server storybook-static -o` locally to check the console and address any MSW warnings or errors. A setup that works locally can still fail in Chromatic.
4. Pay close attention to how you define MSW handlers, especially for API requests with query parameters. MSW recommends matching only the path in the handler URL and accessing query parameters inside the resolver function using `req.url.searchParams.get()`.
5. Ensure all necessary assets, such as CSS files, load correctly in your stories. Consider preloading them in [`.storybook/preview-head.html`](https://storybook.js.org/docs/configure/story-rendering#adding-to-head).
6. Add an [interaction test](/docs/interactions) to your story to assert that mocked data is present and the component is in the expected state before the test concludes.
7. Use [delays](/docs/delay) to ensure that mocked data is fully available before Chromatic takes a snapshot.
Why am I seeing a blank snapshot?
Blank snapshots are often caused by:
- **An `animateIn` effect**—If your component uses an `animateIn` effect, [set a delay](/docs/delay) so Chromatic captures the snapshot after the animation completes.
- **`position: fixed`**—Fixed-position elements may depend on viewport size but don't have dimensions themselves. Wrap your component in an element with defined height and width.
Learn how to [improve test stability](#improve-test-stability).
Why are ignored elements still causing diffs?
By default, Chromatic's diffing algorithm skips the DOM elements marked with either a `.chromatic-ignore` CSS class or `data-chromatic="ignore"` attribute.
If you're using this functionality but incoming changes are still captured, ensure that both the [baseline](/docs/branching-and-baselines) and new snapshots retain the same dimensions, including width, height, and relative positioning.
Why does my tab component make a test unstable?
Certain UI libraries like Material calculate the dimensions of each tab by measuring the rendered width of the tab's children using JavaScript (for example, via `getBoundingClientRect()`).
However, loading a custom font can make the test unstable. Fonts affect the dimensions of text within tabs. Because custom fonts can load before, during, or after the tab component, the dimensions calculated by the component can vary across runs.
The solution we recommend is to use a `` in your [`.storybook/preview-head.html`](https://storybook.js.org/docs/configure/story-rendering#adding-to-head) to preload the font before the story renders. This ensures that the dimensions of the contents inside of the tab component remain consistent when measured.
Why do fonts in my graph component make a test unstable?
Certain charting libraries like Highcharts measure the available space to determine where elements should be laid out.
Loading a custom font can make the test unstable. Fonts can load before, during, or after the component, and different fonts have different rendered dimensions.
The solution we recommend is to use a `` in your [`.storybook/preview-head.html`](https://storybook.js.org/docs/configure/story-rendering#adding-to-head) to preload the font before the story renders. This ensures that the dimensions and position of the fonts inside of the graph component remain consistent.
---
## Viewports
URL: https://chromatic.com/docs/viewports
> Configure Chromatic to test responsive UIs at various viewports and breakpoints.
# Viewports for responsive UIs with breakpoints
UI components respond and adapt to different device widths. Chromatic streamlines visual testing, enabling you to capture each test at multiple viewport sizes. Viewports is compatible with Storybook, Playwright, and Cypress integrations.
## Storybook
For Storybook, viewports are configured using the [Modes API](/docs/modes), which allows you to set global configurations that affect how a component renders (e.g., viewport size, theme & locale).
Chromatic also integrates with Storybook's viewport feature. You can specify viewports by the names configured in Storybook's `.storybook/preview.js|ts` file. And if a story has a `defaultViewport` set, Chromatic will automatically use that to capture the snapshot.
For detailed usage instructions, refer to the [**configure viewports for stories**](/docs/modes/viewports) page.

## Playwright
Chromatic will capture the DOM and take snapshots at the viewport size in which a test is configured to run.
[Viewports in Playwright](https://playwright.dev/docs/emulation#viewport) can be configured globally in your main Playwright configuration file as follows:
```ts title="playwright.config.js|ts"
import { defineConfig } from '@playwright/test';
export default defineConfig({
projects: [
{
name: 'chromium',
use: {
...devices['Desktop Chrome'],
viewport: { width: 1280, height: 720 },
},
},
{
name: 'Mobile',
use: {
...devices['Desktop Chrome'],
viewport: { width: 500, height: 600 },
},
},
],
});
```
Or at the test level:
```ts title="Viewports.spec.js|ts"
test.describe('Page display on medium size screen', () => {
// 👇 Overrides the option in the test.
test.use({
viewport: { width: 1600, height: 1200 },
});
test('Does not display sidebar', async ({ page }) => {
await page.goto('/');
});
});
```
## Cypress
Chromatic will capture the DOM and take snapshots at the viewport size in which a test is configured to run.
[Viewports in Cypress](https://docs.cypress.io/api/commands/viewport) can be configured [globally in your main Cypress configuration file](https://docs.cypress.io/api/commands/viewport#Default-sizing) as follows:
```ts title="cypress.config.js|ts"
import { defineConfig } from 'cypress';
export default defineConfig({
viewportWidth: 1000,
viewportHeight: 660,
});
```
Or using [configuration at the test level](https://docs.cypress.io/api/commands/viewport#Set-viewport-in-the-test-configuration):
```ts title="cypress/e2e/Viewports.cy.js|ts"
describe(
'Page display on medium size screen',
{
// 👇 Overrides the option in the test.
viewportHeight: 1000,
viewportWidth: 400,
},
() => {
it('Does not display sidebar', () => {
cy.visit('/');
});
}
);
```
ℹ️ Currently, setting the viewport using `cy.viewport()` is not supported.
---
## Introduction to TurboSnap
URL: https://chromatic.com/docs/turbosnap
> Speed up tests by detecting file changes with Git
# Introduction to TurboSnap
TurboSnap is an advanced Chromatic feature that speeds up [UI Tests](/docs#test-how-uis-look--function). It analyzes your project's Git history and builder's [dependency graph](https://webpack.js.org/concepts/dependency-graph/) to identify which components and their dependencies have changed. It intelligently captures snapshots only of the stories associated with those changes. For the rest, it copies over the snapshots from baselines that didn't change.
## How it works
1. Chromatic determines the [ancestor builds](/docs/branching-and-baselines#find-the-ancestor-builds) associated with your commit.
2. TurboSnap considers the git changes between the current commit and the ancestor build's commit. If more than one ancestor build is found, TurboSnap considers the union of the git changes.
3. Using the dependency graph generated by Webpack or Vite, TurboSnap identifies the individual story files affected by those git-identified changes.
4. Chromatic utilizes this information to selectively capture a new snapshot of the stories defined in those specific story files. It also snapshots any tests that were denied on the ancestor build.
Chromatic will _not_ capture a new snapshot for stories that do not have associated code changes. This results in faster test runs and reduces the number of billed snapshots. The copied or bypassed snapshots are referred to as **turbosnaps**.
If you denied any [UI Tests](/docs/quickstart#4-review-changes) on the ancestor build, Chromatic will always recapture those stories even if TurboSnap would otherwise skip them. This is particularly useful for diagnosing [unstable tests](/docs/unstable-tests#improve-test-stability).
### Full rebuilds
Certain code changes have the potential to impact all stories. To avoid false positives, we re-capture everything in the following situations:
- Changes to dependency versions in `package.json`, if no valid lockfile is available
- Changes to your Storybook's configuration
- Changes in files that are imported by your [`preview.js`](https://storybook.js.org/docs/configure#configure-story-rendering) (as this could affect any story)
- Changes in your static folder (if specified using `--static-dir` / `-s`)
- Changes to files specified by the `--externals` option (see below)
- Re-run of the same build (commit and branch match the ancestor build) using the `--force-rebuild` with the CLI
- [Infrastructure upgrades](/docs/infrastructure-upgrades)
- [UI Test in a new browser](/docs/browsers)
How can I reduce the frequency of full rebuilds?
1. Check your `preview.js` file: you may have a global decorator configured that's [imported from an index or barrel file](/docs/turbosnap/troubleshooting#why-are-changes-not-being-detected-correctly), which itself imports a bunch of other files. This can lead to _all_ stories depending on a large swath of seemingly unrelated files.
Whenever a global Storybook file changes, we run a complete build because global Storybook files can change how _any_ story renders. If any of those files or their imports change, we will trace them as dependent changes. If the file changes are frequent, you can utilize `--untraced` on these files to help ensure you're not triggering a complete rebuild each time the file changes.
Learn more about [how to avoid re-testing for certain files](/docs/turbosnap/setup#avoid-re-testing-dependent-stories-when-certain-files-changed).
2. Make sure you have a valid lockfile(s) available and that it's in sync with your `package.json`. If a lockfile is missing or out ouf sync with `package.json`, we'll have to re-test all stories when there are any changes to either file.
Learn more about how to [avoid re-testing on changes to package control files](/docs/turbosnap/setup#avoid-re-testing-on-changes-to-package-control-files).
### Merge commits
Ordinarily, TurboSnap uses git to find all files that have changed since the [ancestor build](/docs/branching-and-baselines#find-the-ancestor-builds) to determine which stories to snapshot. The changed file behavior is more complex with merge commits because there are two “ancestor builds”.
When you have a merge commit, we look at both ancestors tied to a build and pull any changes from either build. Chromatic considers **any file that has changed since either ancestor's commit** to decide if a story's snapshot needs to be recaptured. In other words, we take the _union_ of the git changes and not an intersection of them.
The reason for this behavior relates to what Chromatic does when it chooses not to recapture the snapshot for a story. In such case, it “copies” the snapshot for the story from one of the ancestor builds, knowing (due to the git check) that the story cannot have changed in the meantime.
For merge commits, TurboSnap can't know in advance which side of the merge a snapshot should be copied from, because that requires running the [full baseline selection process](/docs/branching-and-baselines#calculate-a-snapshot-baseline-from-the-ancestor-builds).
Since baseline selection happens after TurboSnap, we need to be conservative and allow for changes on either branch. Otherwise, we may miss snapshot comparisons by copying from the wrong branch.
Why is my rebase/squash/merge commit triggering a full rebuild or listing changes from previous commits?
When there is more than one ancestor, TurboSnap needs to consider the possible changes triggered by either ancestor. This can lead to situations where we need to retest everything or more stories than you were expecting, even if your branch itself is simple.
Let's take a look at an example to understand how a merge impacts the changes TurboSnap considers.

Suppose an update was made to `preview.js` on the `feature-2` branch, causing TurboSnap to trigger a full rebuild on build `F2.1`. This is expected, since changes to `preview.js` require us to retest everything.
The changes from `feature-2` are then merged into the `main` branch in build `M.2`, which now has ancestors from both sides of the merge - `M.1` from `main` and `F2.1` from `feature-2`. The diff between both these ancestors and `M.2` contains the changes to `preview.js`, triggering a full rebuild.
Let's say we want to update `feature-1` to merge in the changes that were made on `feature-2`. When we merge the changes from `main` into `feature-1` on build `F1.2`, we trigger another full rebuild. Similarly to the previous build, the diff between `F1.2` and the ancestor builds (`F1.1` and `M.2`) includes the change to `preview.js` that was introduced on `feature-2` and merged in build `M.2`.
Since we don't know if the baseline that gets calculated will be taken from `F1.1` or `M.2`, we take from both sides which can lead to merges involving more updates than expected. For example, if it's taken from `F1.1`, the baseline won't have the changes from `preview.js`, and so could be affected. For this reason, we retest all stories in the union of git changes from both sides of a merge, and will do a full rebuild if the change triggers one.
This same logic applies even if the change doesn't trigger a rebuild. If we were to imagine the change in `F2.1` was a change to `MyComponent.jsx`, we can assume that `MyComponent.stories.jsx` would be tested in builds `F2.1`, `M.2`, and `F1.2`. While this is less impactful, it's worth noting since this can make a noticeable difference if a lot of files were changed.
### Missing commits (rebasing)
Under the hood, TurboSnap works by calculating the difference between the current commit and its ancestors. We get the ancestor builds for the current Chromatic build using the git history related to a current commit `SHA1`. We calculate the ancestor builds by utilizing various `git rev-list` commands to determine the ancestor builds related to your current commit.
There are certain cases (i.e., rebasing, squashing, force pushing) where the commit linked to the previous build for the branch no longer exists in the repository, which prevents TurboSnap from doing this computation accurately. In these cases, TurboSnap will traverse your repository's git history until a "replacement build" is found with valid commit history.
Once found, it uses the replacement build to approximate the difference between the two commits alongside any UI changes. This can lead to a story being re-tested if one of the following requirements is met:
- Git indicates code changes detected between the current and replacement commit
- Chromatic detects visual changes identified between the ancestor build and the replacement commit's build
Why do I end up with more than one ancestor build when I rebase?
We treat rebases like merges in this regard, since we want to bring baselines across from both sides of the "merge". This way, we don't lose baselines that you've accepted.
Let's take a look at an example to illustrate the logic behind why Chromatic takes an ancestor from each side of your rebase.

Suppose you were to make and accept some changes on `Build F.1`.
After you're done making changes to your `feature` branch, you rebase the changes onto your `main` branch - essentially, rebasing `Build F.2`'s commit onto `Build M.2`'s commit. When you do this, those changes from `Build F.1` are going to come over, so you likely want to bring the new baselines over, too. Otherwise, you'll need to re-accept the changes every time you rebase a branch.
Since we take baselines from ancestor builds, this means that we need to use `Build F.2` as an ancestor for `Build M.2` in order to track the baseline correctly.
Since most folks want to preserve their branch's baseline history, we do this as the default and have a flag available for anyone who wants to ignore the baselines for the last build on a branch (`ignoreLastBuildOnBranch`). Usually, you would only use this option in rare cases where you were doing the rebase in order to _delete_ the baseline changes for the branch.
How does Chromatic determine the ancestor builds for squash/rebase when commits are no longer in the repo?
We use information about the branch from git, along with the last Chromatic build on the rebased/squashed branch, to determine the ancestor build for the missing commit.
- When you are rebasing a branch off your `main` branch, we can find the last build that ran on the branch before the rebase and use that as an ancestor build.
- When you're squash/rebase merging, we can query GitHub, GitLab, or Bitbucket to find out the branch that was just merged, and again use the last build on the branch as an ancestor build.
How does TurboSnap operate when a commit tied to an ancestor build is no longer in the repo?
TurboSnap traverses your git history in order to identify what files have been changed between commits. When you squash/rebase, TurboSnap is prevented from accurately computing the difference between the current commit and its ancestor builds.
This is because the last Chromatic build on your rebased/squashed branch will not have a matching commit in your git history. The previous commit is removed from your git history, leading TurboSnap to being unable to find the commit.
TurboSnap will search for a "replacement build" on the branch with a valid commit in the repo, and use the replacement to approximate the difference between the two commits alongside any visual changes.
Let's take a look at an example to understand the ancestor selection logic TurboSnap uses when the commit tied to the previous build on the branch is no longer in your git history.

In this example, let's say you're working on `feature-1`. There are changes from `feature-2` that were merged into `main`, so you rebase those changes onto your `feature-1` branch on `Build F1.3`.
TurboSnap is attempting to find an ancestor build for each side of your rebase on `Build F1.3`. For the `main` branch, TurboSnap is able to find the commit belonging to `Build M.2` since it is the commit rebased onto `Build F1.3`.
Things get a little more complicated when TurboSnap tries to locate the commit for the last build on `feature` branch (`Build F1.2`) - the commit no longer exists in your git history. TurboSnap then traverses your git history until a replacement build is found with a valid commit, which is `Build M.1` in our example.
## Pricing
Each snapshot incurs billed snapshots: captured snapshots cost 1 billed snapshot and turbosnaps cost 0.2 billed snapshots. The billed snapshot count is used to calculate your monthly bill.
### How turbosnaps are billed
By enabling TurboSnap, Chromatic checks for stories with no associated code changes. Instead of capturing new snapshots, it copies snapshots from existing baselines. This uses fewer infrastructure resources, and we pass these savings on to you by billing each turbosnap at 1/5th the cost of a captured snapshot (`0.2`).
The remaining stories on that build are captured as usual and cost 1 billed snapshot each.
For example, consider a Storybook with 50 stories. If your code changes impact 10 stories, Chromatic will capture new snapshots for those 10 stories. The cost of that build will be 18 billed snapshots:
- 10 captured snapshots (1 x 10 = 10 billed snapshots)
- 40 turbosnaps (.2 x 40 = 8 billed snapshots)
Check out the [billing docs](/docs/billing#with-turbosnap-enabled) for more details.
Note, stories excluded by [`OnlyStoryNames`](/docs/configure#onlystorynames) and [`OnlyStoryFiles`](/docs/configure#onlystoryfiles) are also billed at the turbosnap rate.
---
## TurboSnap best practices
URL: https://chromatic.com/docs/turbosnap/best-practices
> TurboSnap best practices to optimize your builds for faster testing
# TurboSnap best practices
Most everyone agrees it's important to test your UI, but it's even more important to make sure you're testing the _right parts_ of your UI at the _right time_. Meet TurboSnap: one of Chromatic's most powerful tools for accelerating UI testing in CI. By using your git history and dependency graph to intelligently detect what's changed in your Storybook project so that Chromatic only tests components affected by your updates, saving time and CI resources while maintaining the value of your tests.
Whether you're working in a single-project repository or have a more complex setup (such as a monorepo), following best practices ensures TurboSnap works efficiently to help surface _meaningful_ visual regressions. Here are some essential tips to keep your TurboSnap running fast, reliably, and accurately.
## Confirm TurboSnap is enabled
Once you've met the [prerequisites](/docs/turbosnap/setup#prerequisites) and started using TurboSnap, it should show as enabled when you visit the "Manage" page of your project. TurboSnap is enabled through the `onlyChanged` option. You can make sure it's enabled for your builds by verifying it's listed within your Chromatic script:
```json title="package.json"
{
"scripts": {
"chromatic": "chromatic --only-changed"
}
}
```
If you have a Chromatic configuration file (ex. `chromatic.config.json`), check the file to make sure `onlyChanged` is set to `true`:
```json title="chromatic.config.json"
{
"$schema": "https://www.chromatic.com/config-file.schema.json",
"projectId": "Project:...",
"onlyChanged": true
}
```
Alternatively, it may be in your CI workflow directly:
```yaml title=".github/workflows/chromatic.yml"
jobs:
chromatic:
steps:
# ... other steps
- name: Run Chromatic
uses: chromaui/action@latest
with:
projectToken: ${{ secrets.CHROMATIC_PROJECT_TOKEN }}
onlyChanged: true # 👈 Required option to enable TurboSnap
```
## Use accurate directory configuration
If your Storybook config or preview files don't live in the default `./.storybook` location, you'll need to explicitly tell Chromatic where to find them. Whether in a single-project repo or a monorepo, ensuring your directory configuration is accurate can prevent TurboSnap from tracing unnecessary files.
- `storybookBaseDir` sets the root for dependency tracing (what source files are considered part of the Storybook project)
- `storybookConfigDir` tells Chromatic where to find your Storybook configuration (the path where your `main.js|ts` and `preview.js|ts` live)
If your directories are not properly configured, changes to unrelated files—like your root `package.json` or backend utilities—can trigger full rebuilds.
✨ Use the TurboSnap Helper to set your config!
Run `npx @chromatic-com/turbosnap-helper` from the root of your repo to have the helper provide you with the accurate directories and even automatically update your config file—no more guess work!
## Run with caution when using the `pull_request` event
TurboSnap is not compatible with the `pull_request` event trigger. This is because the workflow runs against an ephemeral merge commit, which can result in issues with being able to properly track baselines and find earlier builds.
We recommend running Chromatic on `push` events. However, if you wish to trigger Chromatic with TurboSnap on `pull_request` events, we've had success with an alternative strategy outlined below.
Create a separate workflow for Chromatic using the following strategy for the checkout step:
```yaml
- uses: actions/checkout@v6
with:
# 👇 Ensures Chromatic can read your full git history
fetch-depth: 0
# 👇 Tells the checkout which commit hash to reference
ref: ${{ github.event.pull_request.head.ref }}
```
In your workflow, how much of your git history is downloaded when you check out a repo is determined by `fetch-depth`. By default, it's set to `1`, which fetches only the latest commit. It's best to set this to `0` (or a very high number) to ensure Chromatic has access to your full git history. This is crucial for TurboSnap, as it relies on comparing the current commit to the base branch or previous commits. Without the full history, Chromatic may not be able to determine what's changed and could miscalculate what to test.
Setting `ref` is one of the most critical parts to using the `pull_request` event, as the `ref` parameter defines what gets checked out into the workspace, which in turn impacts how Chromatic analyses your build. By setting `ref` to `${{ github.event.pull_request.head.ref }}` ensures that GitHub checks out the correct branch and that Chromatic automatically detects accurate git information.
There are edge cases where it may be beneficial to include the git environment variables (`CHROMATIC_BRANCH`, `CHROMATIC_SHA`, `CHROMATIC_SLUG`) in your Chromatic step, for example:
- If you're using a monorepo with multiple projects and find that you need tighter control across builds.
- If you use `actions/checkout` in detached mode (not recommended), or with custom scripts that mutate the git state, and you want to guarantee that Chromatic receives a stable SHA.
Otherwise, if you're using `ref` correctly, Chromatic will pick up the right commit via git and optimize with TurboSnap as expected.
If you find yourself needing more fine-tuned control over your git environment variables, set all three of the git environment variables using the following env block strategy:
```yaml
- name: Publish to Chromatic
uses: chromaui/action@latest
with:
projectToken: ${{ secrets.CHROMATIC_PROJECT_TOKEN}}
onlyChanged: true
env:
# 👇 Set to the PR branch if it's a PR; otherwise, falls back to the pushed branch name
CHROMATIC_BRANCH: ${{ github.event.pull_request.head.ref || github.ref_name }}
# 👇 Set to the PR head commit if it's a PR; otherwise to the ref (which typically resolves to the latest commit SHA)
CHROMATIC_SHA: ${{ github.event.pull_request.head.sha || github.ref }}
# 👇 Makes sure this is always set to the corect owner/repo
CHROMATIC_SLUG: ${{ github.repository }}
```
These values match what you'd want TurboSnap and Chromatic to see, but _only if the correct code is checked out_. If you're not using `ref` to ensure the correct commit is checked out, setting your git environment variables _will not help_. Without `ref`, your env variables could describle one commit, while the git workspace contains another, causing TurboSnap to have unpredictable results.
## Avoid excessive dynamic imports
Dynamic imports, such as `import()` or `require()` with variables or conditions, within your stories, decorators, preview files, or any files they import, can disrupt the chain TurboSnap uses to identify affected stories. This can lead to missed visual changes or unexpected rebuilds. To maintain full traceability, consider minimizing dynamic imports. If dynamic behavior is necessary, incorporate the logic into story-level decorators or within the component itself, and avoid using dynamic imports in the preview file.
When it's possible, convert dynamic imports to static imports:
- ❌ `const ThemeProvider = require('../themes/default/ThemeProvider');`
- ✅ `import { ThemeProvider } from '../themes/default/ThemeProvider';`
## Mind your package control files
TurboSnap relies on lockfiles to get actual version numbers rather than semver ranges to attempt to determine an exact set of changed dependencies for more accurate tracing. If your lockfile is missing or out of sync with `package.json`, this prevents TurboSnap from being able to compute the changes and results in a full rebuild.
Package file tips:
- Make sure you have a valid lockfile checked in and that it's not out of sync with your `package.json`
- Avoid unnecessary version bumps in unrelated dependencies
- Help reduce noise in lockfile changes by using exact versions
## Optimize shared configs and theming
Your Storybook preview file (`.storybook/preview.js|ts`), where you define global decorators, parameters, and theming, is crucial for TurboSnap rebuilds. Any change to this file or its imports can affect the rendering of stories in your project, even if only a single component is impacted. This means changes to theme object definitions, global decorators, context providers, mock setups, and global parameters will trigger a full rebuild.
While you **can’t avoid full rebuilds** when changing anything imported by `.storybook/preview.js|ts` (or changing the file itself), here are some best practices to reduce the impact of the preview file changes:
- Minimize imports in your preview file. Avoid importing large libraries or full theme objects, and move large objects (like your full theme config) to separate files that don't change often.
- Use stable, versioned theme objects. If your project has a design system or uses a component library with theming, import the theme object from a package or file that rarely changes. Importing the theme from a package means changes to the theme require a package release, encouraging discipline and reducing change noise.
- Split decorators and providers by scope. If all stories don't need the same decorators, consider moving the logic into story-level decorators when feasible.
## Catch changes that don't pass through your bundler with `externals`
TurboSnap depends on the files processed by your bundler. Therefore, it's crucial that files not processed by your bundler also trigger tests. This helps prevent accidental regressions that could have been caught during testing.
The `externals` feature was designed specifically for this purpose. It directs TurboSnap to monitor specified files or globs patterns for changes, triggering a rebuild whenever they are modified.
Follow these tips to help keep your testing meaningful:
- Be selective when using wild glob patterns unless you've audited all files that match the pattern. Having too many files listed in `externals` can lead to noisy or frequent rebuilds.
- Make sure the paths you specify are relative to your repository root (which may not be your project root).
- Ensure the files are tracked in version control. If the file is ignored by `.gitignore`, it won't trigger a rebuild even if it's listed in `externals`.
## Trace what matters, untrace what doesn't, and scope when possible
TurboSnap works by tracing all files that a story depends on, starting from that story's code and walking the import graph. You may find yourself in a situation where some files or folders are frequently updated, causing widespread rebuilds when changed, and not truly impactful to story behavior
In these cases, you can tell TurboSnap to exclude paths from being traced using the `untraced` option. You can safely untrace files that:
- Don't affect the rendering or logic of your components or stories.
- Are never imported (directly or indirectly) by your stories.
- Exist solely for documentation, CI scripts, metadata, or non-runtime assets.
That said, in some scenarios untracing is dangerous as it compromises your test coverage. You should avoid adding any files to `untraced` that:
- Are imported by story files, component files, or decorators.
- Contain theme definitions, configuration, or wrapper logic.
- Affect how components are rendered—whether directly or indirectly.
If a file or folder is frequently updated and has a broad but legitimate impact on your stories, consider scoping it into a dedicated package or a separate Storybook project to reduce its impact radius. This allows TurboSnap to trace only stories affected by the package, which can be tested through Storybook and Chromatic in isolation. Here are few basic guidelines to help you decide when to split:
- Theme file changing daily? Move it to it's own package and project.
- Global wrapper being used across stories? Extract and import only where needed.
- Have a provider that affects all stories? Modularize and apply via story-level decorators if possible.
- Preview file importing volatile code? Move it out of preview and apply it in stories or wrappers to keep preview stable.
## Use the `preview-stats.json` to analyze a file's blast radius
If you're unsure why a change to a file caused a full rebuild, analyzing your `preview-stats.json` file can help you trace the changes in your dependency graph. This gives you a better visualization of the rebuild scope and helps you determine which stories are affected by your changes. The file is generated locally during Storybook builds, so you can easily inspect it to debug before sending anything through CI.
Chromatic provides a [trace utility](/docs/turbosnap/troubleshooting#why-are-no-changes-being-detected) that reads your `preview-stats.json` file to trace changed file paths to their dependent story files. This can help you determine things like:
- Whether a small change to a theme file will trigger rebuilds in all stories.
- Whether changes to another package will impact your stories.
- The actual dependency footprint of a given file.
## How to know what to expect from performance
With TurboSnap configured appropriately, you should expect around 80-90% of your Chromatic builds to skip a full rebuild and test only what's changed. For large projects, this often translates to hundreds of files skipped per build, saving both time and snapshots. If you're still seeing 50% or more of your builds trigger a full rebuild of all stories, it's a sign that your configuration may need adjustments or you have shared code that's being modified too often.
| Optimization level | Example | Expected full rebuilds (%) |
| -------------------- | ------------------------------------------------------------------------------------------------------ | -------------------------- |
| No optimization | Default config, shared preview file, barrel files, dynamic imports | **~60-100%** |
| Partial optimization | `baseDir` set but noisy preview file | **~30-60%** |
| Well-optimized | Scoped preview file, proper externals & modular stories | **5-25%** |
| Gold standard | Monorepo with isolated apps, per-package Storybook projects, clean preview files & optimized externals | **1-5%** |
## Conclusion
TurboSnap can significantly reduce build times and snapshot volumes, but small configuration choices can greatly impact its performance. It's an advanced feature that requires proper setup and configuration.
The best practices outlined above will help you achieve consistent and fast builds with minimal overhead and without sacrificing test coverage.
In summary, limit changes to only necessary updates. Modularize global code, declare externals for non-bundled assets, and audit your `preview-stats.json` file using the [trace utility](/docs/turbosnap/troubleshooting#why-are-no-changes-being-detected).
---
## TurboSnap dependency tracing
URL: https://chromatic.com/docs/turbosnap/dependency-tracing
> Speed up tests by detecting file changes with Git
# TurboSnap dependency tracing
TurboSnap examines your project's Git history and Webpack's dependency graph to determine which stories might be affected by changes. If you're new to these concepts, then this guide is for you.
It'll help you better understand dependency tracing, enabling you to use TurboSnap more effectively. You'll also learn how to trace dependencies in projects using Vite.
## Tracing dependencies with Webpack
To start, let's visit [Webpack's dependency graph concept](https://webpack.js.org/concepts/dependency-graph/):
> ❝ Any time one file depends on another, webpack treats this as a dependency. This allows webpack to take non-code assets, such as images or web fonts, and also provide them as dependencies for your application.
>
> When webpack processes your application, it starts from a list of modules defined on the command line or in its configuration file. Starting from these [entry points](https://webpack.js.org/concepts/entry-points/), webpack recursively builds a dependency graph that includes every module your application needs, then bundles all of those modules into a small number of bundles - often, only one - to be loaded by the browser. ❞
TurboSnap leverages [Webpack's Stats Data API](https://webpack.js.org/api/stats) to generate a JSON file with detailed statistics about a project's modules. These statistics allow TurboSnap to analyze a project's dependency graph by providing information on asset objects, related chunks (or grouped modules), and module dependencies linked to the assets.
If Chromatic builds your Storybook, it will automatically generate the stats file. But if you provide Chromatic with a prebuilt Storybook, you must add the `--stats-json` (or `--webpack` for Storybook versions 7 and lower) flag to the `build-storybook` command.
The stats file can be a bit challenging to read. Therefore, the Chromatic CLI offers a [`trim-stats-file`](/docs/configure/) option to make the file more human-readable. Use it like so:
```shell
npx chromatic trim-stats-file
```
Or, if you're using a custom build directory:
```shell
npx chromatic trim-stats-file ./path/to/preview-stats.json
```
### Reading the trimmed stats file
After running the `trim-stats-file` command, Chromatic will output a `preview-stats.trimmed.json` file. While this file is more readable, it can still be a bit daunting, so let's break it down with an example.
```json title="preview-stats.trimmed"
{
"id": "./src/inputs/PinInput/PinInput.tsx",
"name": "./src/inputs/PinInput/PinInput.tsx + 4 modules",
"modules": [
{ "name": "./src/inputs/PinInput/PinInput.tsx" },
{ "name": "./src/inputs/PinInput/SeparatedPinInput.tsx" },
{ "name": "./src/inputs/PinInput/SinglePinInput.tsx" },
{ "name": "./src/inputs/utils.ts" },
{ "name": "./src/inputs/PinInput/PinCaret.tsx" }
],
"reasons": [
{ "moduleName": "./src/data/DataGrid/cells/EditablePinInput.tsx" },
{ "moduleName": "./src/inputs/PinInput/index.ts" }
]
}
```
In this example, we have an asset with the `chunkName` of `./src/inputs/PinInput/PinInput.tsx + 4 modules`. There's a total of five modules within this chunk:
```
./src/inputs/PinInput/PinInput.tsx
./src/inputs/PinInput/SeparatedPinInput.tsx
./src/inputs/PinInput/SinglePinInput.tsx
./src/inputs/utils.ts
./src/inputs/PinInput/PinCaret.tsx
```
The `"reasons"` key provides information about the asset's dependency graph. In other words, modules that depend on this asset. Any changes to the asset chunk's modules may have an impact on its dependent modules:
```
./src/data/DataGrid/cells/EditablePinInput.tsx
./src/inputs/PinInput/index.ts
```
### Asset object for a story file
The asset object for a story file usually looks a bit different:
```json title="preview-stats.trimmed"
{
"id": "./src/inputs/PinInput/stories/PinInput.stories.tsx",
"name": "./src/inputs/PinInput/stories/PinInput.stories.tsx + 4 modules",
"modules": [
{ "name": "./src/inputs/PinInput/stories/PinInput.stories.tsx" },
{
"name": "./src/inputs/PinInput/stories/PinInputWithNoCopyPaste.storyfile.tsx"
},
{
"name": "./src/inputs/PinInput/stories/PinInputWithNoCopyPaste.storyfile.tsx?raw"
},
{
"name": "./src/inputs/PinInput/stories/PinInputWithValidation.storyfile.tsx"
},
{
"name": "./src/inputs/PinInput/stories/PinInputWithValidation.storyfile.tsx?raw"
}
],
"reasons": [
{
"moduleName": "./src/ lazy ^\\.\\/.*$ include: (?%21.*node_modules)(?:\\/src(?:\\/(?%21\\.)(?:(?:(?%21(?:^%7C\\/)\\.).)*?)\\/%7C\\/%7C$)(?%21\\.)(?=.)[^/]*?\\.stories\\.(js%7Cjsx%7Cts%7Ctsx))$ chunkName: [request] namespace object"
}
]
}
```
Under "reasons," you'll notice a `moduleName` resembling a path pattern. In the full, untrimmed file, the `issuerPath`'s are `"./storybook-config-entry.js"` and `"./storybook-stories.js"`. That's because the dependency is related to this project's Storybook configuration:
```ts title=".storybook/main.ts"
import type { StorybookConfig } from '@storybook/react-webpack5';
const config: StorybookConfig = {
stories: [
{
directory: '../',
files: '**/*.@(mdx|stories.@(js|jsx|ts|tsx))',
},
],
// ...
};
export default config;
```
## Tracing dependencies with Vite
Vite support for TurboSnap is available out of the box, starting with Storybook 8.0 and later, and does not require any additional configuration. However, if you're using an older version of Storybook, you must install the [vite-plugin-turbosnap](https://github.com/IanVS/vite-plugin-turbosnap) plugin to enable TurboSnap support with Vite.
Similar to Webpack, when you run the `build-storybook` command, the `preview-stats.json` file is automatically generated. It contains information about each module being built and a mapping between each file and all the imported files. This structure mirrors that used by Wepack but only includes the information TurboSnap needs to perform dependency checks.
## Next: Use the stats file to trace dependencies
If you're trying to understand why a story file is being detected as changed, you can search for its file path in the trimmed stats file and trace its dependencies to see which modules were affected. Chromatic has a trace utility to simplify this process.
In this next chapter, learn how to use the trace utility to analyze your dependency graph. Identify and remove unnecessary imports, diagnose false positives from build tools, and understand the real propagation of changes for optimized bundles and confident refactoring.
Read next chapter
---
### Troubleshooting
How do circular dependencies impact tracing?
TurboSnap uses _tree-shaking_ to efficiently identify which files in your project have changed and how those changes propagate through your dependency graph. Tree-shaking may not work as intended when circular dependencies exist because the loop can obscure the true "consequences" of changes. Circular dependencies occur when two or more files depend on each other directly or indirectly, creating a loop. For example:
- `Button/index.ts` exports `Button.tsx`.
- If `Button.tsx` imports something from `Card/index.ts` (directly or indirectly), and `Card.tsx` imports something from `Button/index.ts`, a Circular Dependency is created.
When TurboSnap flags unchanged files as changed, you can use the [`--untraced`](/docs/turbosnap/setup#avoid-re-testing-dependent-stories-when-certain-files-changed) flag to correct its behavior by excluding certain files. However, restructuring your project to avoid circular dependencies may be a better, long-lasting solution.
Why transitive dependencies are not tracked?
_Transitive dependencies_ occur when a module indirectly depends on another through other modules. Here, module `C` is a transitive dependency of module `A` because it is imported into module `B`:
```
// Module A
import B from './B';
// Module B
import C from './C';
```
Sometimes, Webpack struggles to handle transitive dependencies effectively due to standard configurations, specific project structures, or dependency patterns, making it hard to identify the root cause of dependency tracking issues.
#### Using the `sideEffects` Property
Set the `sideEffects` property in your `package.json` to prevent accidental removal of dependencies and track side effects in third files. There are two ways to set it:
1. Set `sideEffects` to `true` to track all transitive dependencies:
```
"sideEffects": true
```
2. Specify `sideEffects` as an _array_ to explicitly list files or patterns:
```
"sideEffects": [
"**/*.css",
"**/*.scss",
"./src/global.js"
]
```
#### Testing the Configuration
To verify this solution, add a specific file with transitive imports to the `sideEffects` array and observe whether it behaves as expected.
Adjusting the `sideEffects` property can cause other unexpected consequences, so we recommend reviewing the [Webpack Documentation on Tree-Shaking](https://webpack.js.org/guides/tree-shaking/).
---
## Optimizing TurboSnap for monorepos
URL: https://chromatic.com/docs/turbosnap/monorepo-usage
> Tips to optimize your TurboSnap configuration when working with a monorepo
# Optimizing TurboSnap for Monorepos
For large teams using a monorepo and managing changes across dozens of packages, it's crucial not just to run tests faster but to run the right ones. TurboSnap excels in these scenarios by accelerating test runs, executing UI tests only on what has actually changed. However, poorly structured dependencies can derail your whole setup. Constantly triggering full rebuilds or skipping coverage on affected components makes it impossible to trust the results.
In this guide, we’ll break down practical strategies for managing `dependencies`, `devDependencies`, dynamic imports, and `package.json` files in a way that keeps your TurboSnap builds snappy _and_ your coverage meaningful.
✨ **Try TurboSnap Helper!**
Run our helper utility to accurately configure TurboSnap, even in monorepos—no more guess work! [Read how you can run the utility and get instant help with your config.](/docs/turbosnap/setup#update-your-configuration-using-turbosnap-helper)
## Prefer importing from built packages over `src`
Do you have components that are part of a design system or shared library? If so, import them from the built package (ex. from `node_modules/@your-org/ui`). Avoid importing directly from `src` unless you want the story to retest when the imported file changes. This is because TurboSnap uses git tracking to detect changes. Built packages are usually excluded from git (ex. `dist` is in `.gitignore`), so they won't trigger unnecessary story rebuilds unless the _consumer_ has actually rebuilt and re-imported them.
Some teams intentionally import from `src` for faster development. If this is the case, consider the tradeoffs and whether _faster development_ or _fewer unnecessary tests_ are more important to the team.
## Use project-specific lockfiles carefully in monorepos
When using tools like Nx or pnpm workspaces with project-specific lockfiles, be aware that changes to a `package.json` file (without a valid lockfile) or modifications to lockfiles can trigger full rebuilds.
With Nx, you can mitigate this by using `implicitDependencies` in your Nx project configuration. This allows you to specify which stories are affected when a package file changes, reducing the scope of rebuilds.
Although TurboSnap doesn't have native awareness of affected files, you can use `nx affected` (or an equivalent tool) to determine the need to rebuild. This approach leads to more targeted tests and minimizes unnecessary full rebuilds.
## Avoid changes to shared or root-level package files unless necessary
Changing dependencies at the root or in shared `package.json` files will often trigger TurboSnap to retest all stories. When possible, limit root-level `package.json` changes to toolchains or devDependencies. Keep shared runtime dependencies in leaf packages (a standalone UI component or package that isn’t imported by any other internal packages) so they're not a dependency for any other package.
## Use `devDependencies` to avoid unnecessary rebuilds
TurboSnap uses your bundler's (Webpack, Vite, Rsbuild, etc.) dependency graph to determine which stories are affected by changes. That means changes to runtime dependencies (`dependencies`) can ripple into the UI, while development-only tools (`devDependencies`) often don’t, unless they’re used in your Storybook config or components.
We recommend:
- Keeping runtime dependencies (like `react`, `styled-components`, `axios`) in `dependencies`.
- Using `devDependencies` for build tools (ex. `vite`, `eslint`, `typescript`, Storybook addons).
- Avoid using dev-only packages in `preview.ts` or inside components—if they’re needed at runtime, they should be in `dependencies`.
## Group and isolate high-churn utilities
If you have shared utility functions that frequently change, you may see more retests than expected. Every change to those utility files will cascade to every component that imports from the package, which can trigger TurboSnap to retest all related stories.
Instead, isolate those utilities into a clearly scoped package and avoid re-exporting them through your UI library or core package. Import the utilities in your app code and not your shared design system unless they're directly UI-related.
## Avoid dynamic imports in preview files
Dynamic imports can disrupt TurboSnap's static analysis of your dependency graph. Since paths are resolved at runtime, it's best to avoid them in story files unless absolutely necessary. That's because it prevents TurboSnap from accurately tracing changes, and using dynamic imports in your preview file can trigger unexpected rebuilds.
To ensure full traceability, always use direct imports in your preview and shared utility files.
**Why does this happen?** Dynamic imports break the chain TurboSnap relies on to identify affected stories. This can lead to either under-testing or over-testing. Direct imports ensure that the dependency graph can follow the file, identifying which components are affected. As a result, TurboSnap only retests stories that directly or indirectly depend on the modified file.
## Avoid excessive wrapper indirection
You **can’t avoid full rebuilds** when changing anything imported by `preview.ts`, but you reduce how often it happens and improve your team’s visibility by avoiding excessive wrapper indirection.
Excessive wrapper indirection may look like `withTheme()` wrapping stories with a provider theme, then being imported by `withGlobalProvider()` which wraps the stories in locale. Flattening this structure so `withTheme()` and `withLocale()` are individually defined makes it easier to see which dependencies are responsible when retesting. It also lets you bypass the preview file for some stories by importing the providers directly in specific stories, which would ensure only those files are tested when changes are made to the providers.
When possible, use direct imports and consider moving stable wrappers into `preview.ts`. If you're using frequently changing wrappers or features, try to limit them to individual story files to minimize their impact.
## Document your dependency graph
Larger teams working out of a monorepo can benefit from clearly identifying which packages depend on which. Tools like [Nx Graph](https://nx.dev/features/explore-graph) (or similar) can help your team visualize your dependency graph and avoid unintentional coupling between packages.
## Monitor `changedPackageFiles` in Chromatic builds
If you notice frequent rebuilds due to changes in package files, keep an eye on Chromatic's CLI output for `changedPackageFiles`. TurboSnap will list all package files that triggered a rebuild. Investigate whether the changes are necessary, if there are opportunities to better isolate your packages, or if you should consider using `--untraced` to ignore the packages.
### Use caution when marking `package.json` files as untraced
Monorepos often include multiple `package.json` files, and some may trigger rebuilds unnecessarily. You can use `--untraced` to ignore these files. Use the following guidelines to determine if it's safe to mark a `package.json` file as untraced:
✅ **It’s safe to mark `package.json` as untraced when:**
- The package is not consumed by Storybook or preview files
- The file does not affect the runtime or build output (ex. purely backend or tooling packages)
- You use a shared lockfile (`pnpm-lock.yaml`, `yarn.lock`), ensuring consistent resolution
- You rely on `Nx affected` or similar tooling
❌ **Do not untrace if:**
- The package includes components, themes, or utilities used in stories
- The package influences global configuration or decorators in `preview.js|ts`
- Changes to it could result in different builds or runtime behavior
## Conclusion
Smart dependency management in a monorepo can drastically improve TurboSnap performance and confidence, making it easier and faster to test changes before pushing them to production. By being intentional with how you structure `dependencies`, avoiding dynamic imports in shared config, and tracing changes clearly, you’ll strike the perfect balance between speed and reliability in your visual testing pipeline.
Ready to optimize your builds? Start by auditing your most frequently rebuilt packages!
Looking to get more details on dependency tracing with TurboSnap? Head over to our docs to read more about [TurboSnap dependency tracing](/docs/turbosnap/dependency-tracing/).
---
## Diagnose preview rebuilds
URL: https://chromatic.com/docs/turbosnap/preview-rebuilds
> Unexpected changes in your preview file can result in more rebuilds than anticipated. Learn how to use the `trace` utility to identify the root cause of these preview rebuilds.
# Diagnose preview rebuilds
Global decorators or parameters can affect every story. Therefore, TurboSnap retests everything whenever any file imported within `.storybook/preview.(js|ts)` changes. This includes anything your preview file imports directly or transitively, such as barrels, shared utilities, and theme objects.
Depending on your project's structure, even minor changes can bubble up to your preview file, resulting in more rebuilds than anticipated. Diagnosing these rebuilds, especially when caused by transitive triggers, can be challenging. They are most commonly due to:
- **Barrel/index files** imported into your preview file. All other files within the barrel create an indirect link, so any changes within them will trigger a rebuild.
- **Global decorators or parameters** (e.g.: theme, i18n, etc.) imported by preview. All files that feed into these global configurations become part of preview's dependency scope.
- **Shared package imported from source in preview** (e.g.: `packages/ui/src/**`). When preview imports the source directly, any change in the shared package source automatically propagates through preview to all consumers.
If you notice this rebuild behavior, identify which import caused the changes to pinpoint the root cause.
## Steps to identify the root cause
Let's walk through the steps to identify the specific file change and its link to your preview file.
### 1. Confirm changes
First, confirm which files TurboSnap has detected as changed. Add Chromatic's `--debug` (or `debug: true` in GitHub Actions) option to ensure the CLI prints the files identified as changed.
```bash
npx chromatic --project-token= --only-changed --debug
```
If you need to reproduce the list locally, you can run Chromatic on the same commit as CI using `--dry-run`:
```bash
npx chromatic --project-token= --only-changed --debug --dry-run
```
In Chromatic's CLI output, all changes will be printed out:
```bash
16:31:15.920 Found 14 changed files:
.storybook/preview.tsx
chromatic.config.json
package-lock.json
package.json
src/components/Codeblock.module.css
...
```
### 2. Build the dependency graph locally
Whether you opt to manually dive in or use Chromatic's `trace` utility, you'll want to make sure you have built the graph:
```bash
npm run build-storybook -- --stats-json
```
To make the graph more human-readable, create a trimmed version:
```bash
npx chromatic trim-stats-file
```
### 3. Check for a direct match
Open your preview file and scan its top-level imports. If any file in "Files changed" matches exactly with one of those imports, that's your trigger. Common culprits include:
- `./decorators/theme`
- `./i18n`
- `.msw/init-browser`
- Broad `index.(js|ts)` barrels
### 4. Look for the barrel footprint
If there's no exact match, check whether preview imports from any barrel files (e.g.: `./decorators/index.js`, `@org/theme/index.ts`). If the "Files changed" list includes any file under the barrel's folder, that change likely bubbled up through the barrel to preview.
### 5. Monorepo `src` imports
If you're in a monorepo, check to see whether preview imports package source directly (e.g.: `packages/ui/src/..`). If "Files changed" includes files under that source tree, that's the trigger.
### 6. Confirm the change impacts config
Pick your suspicious file from "Files changed" and confirm the changed file is triggering rebuilds using the [`trace` utility](/docs/turbosnap/trace-utility):
```bash
npx chromatic trace ./helpers/my-helper.jsx
```
If it is, you should see a notice in the CLI that TurboSnap is disabled due to changes found in your preview file:
```bash
⚠ TurboSnap disabled due to file change
Found a Storybook config change in .storybook/preview.tsx
A full build is required because this file cannot be linked to any specific stories.
```
You can verify whether the file change is the only trigger for the build. Use `--untraced` to remove tracing for the file and trace any other suspicious files that have changed:
```bash
npx chromatic trace ./helpers/my-truncator.jsx --untraced ./helpers/my-helper.jsx
```
### 7. Narrow to the "first hop" under preview
If you're still unsure which file linked to the preview is triggering a change, take the likely import and use `--untraced` to determine if it's pulling in the change when tracing another file.
```bash
npx chromatic trace ./src/components/Codeblock.module.css --untraced ./helpers/my-helper.jsx
```
You'll either see the same config change message confirming it's in preview, or a dependency path to each impacted story. If you no longer see the config change message, you've isolated the "first hop" that's pulling in the change.
### 8. Manually trace changed files
If you've narrowed down the culprit to a file, but you're not sure how it's linked to preview, start by opening your trimmed preview stats file. Search for the file to locate it's module dependencies, then trace the module dependencies for those files until you reach the preview file.
Learn more about [reading the trimmed stats file...](/docs/turbosnap/dependency-tracing/#reading-the-trimmed-stats-file)
## Quick read of large module arrays
If the CLI shows a long array of possible preview modules (lots of JS helpers, MSW inits, i18n, etc.), treat the list as a menu of imports under preview.
- Use steps 3-5 to find the most plausible match against the “Files changed” list.
- Use candidates from steps 3 & 4 to confirm they're truly part of the config closure for this build.
- If it's a merge build, remember you're seeing upstream changes, too. Your branch might not have touched them, but they’re still in scope.
## Conclusion
By the end of this flow, you should have both the specific file(s) that changed and the specific import under preview that pulled it into the config closure. From there, you can decide whether to keep that import global, split it, or reduce its surface (ex. separate barrels, lighter theme entry, etc.):
- If the import does not impact rendering or logic of your components or stories, it's safe to add the file to `--untraced`.
- If it impacts rendering, it's best to [consider options](/docs/turbosnap/trace-utility/#suggested-fixes) for restructuring your imports to avoid excessive dependency scoping.
---
## Setup TurboSnap
URL: https://chromatic.com/docs/turbosnap/setup
> Speed up tests by detecting file changes with Git
# Setup TurboSnap
Enable TurboSnap by running Chromatic's CLI with the `--only-changed` option. Alternatively, you can use the `onlyChanged` option for the Chromatic [GitHub action](/docs/github-actions#enable-turbosnap).
It will build and test stories that may have been affected by the Git changes since the last build. Depending on your project setup, you may need [additional configuration](#configure).
⚠️ When using TurboSnap, your builds may complete in less time using fewer snapshots. However, we
don't allow using TurboSnap immediately when starting out with Chromatic since the configuration
is more complicated and can lead to difficult to debug scenarios or UI changes being missed.
Instead, become familiar with Chromatic's out-of-the-box behavior, and once your project has been
running smoothly, consider trying out TurboSnap. TurboSnap is unlocked after ten successful builds
on CI.
## Prerequisites
- Chromatic CLI [10.0+](https://www.npmjs.com/package/chromatic)
- Storybook 6.5+ or Vitest 4+
- Git 2.28.0+
- Webpack or Vite based project (Vite is natively supported with Storybook 8+ and can be used in earlier versions with the [vite-plugin-turbosnap](https://github.com/IanVS/vite-plugin-turbosnap))
- Stories correctly [configured](https://storybook.js.org/docs/configure#configure-story-loading) in Storybook's `main.js`
- 10 successful builds on CI
- For GitHub Actions: run on `push` rather than `pull_request` ([learn more](#github-pull_request-triggers))
- UI Tests should be enabled
ℹ️ Most of this guide is for TurboSnap with Storybook. To set up TurboSnap with Vitest, follow the
[dedicated setup guide](/docs/vitest/turbosnap).
## Configure
To enable TurboSnap for your project, add the `--only-changed` flag to your `chromatic` script, or add the `onlyChanged: true` option to your GitHub workflow config.
```json title="package.json"
{
"scripts": {
"chromatic": "chromatic --only-changed"
}
}
```
Or for GitHub Actions:
```yaml title=".github/workflows/chromatic.yml"
steps:
# ...
- name: Run Chromatic
uses: chromaui/action@latest
with:
projectToken: ${{ secrets.CHROMATIC_PROJECT_TOKEN }}
onlyChanged: true
```
TurboSnap can also be enabled through your `chromatic.config.json` file:
```json title="chromatic.config.json"
{
"$schema": "https://www.chromatic.com/config-file.schema.json",
"projectId": "Project:...",
"onlyChanged": true
}
```
You may need additional config in the following situations:
- You're using `--storybook-build-dir` or `-d` to let Chromatic use a prebuilt Storybook
- You are using the `staticDirs` config in your main Storybook configuration
- You have other files outside the Webpack dependency tree which affect your stories (e.g., Sass or template files)
- You have files that should never trigger a re-test (e.g., in a monorepo)
- You want to enable or disable TurboSnap for specific branches
Jump to the [recipes](#recipes) section for more information.
### Update your configuration using TurboSnap Helper
Having TurboSnap properly configured is essential when trying to optimize build performance. If you're working in a monorepo, or even just a large project with a complex setup, setting up TurboSnap efficiently can feel overwhelming. That's where the TurboSnap helper comes in! We've introduced the `@chromatic-com/turbosnap-helper` CLI utility to simplify the process of managing your configuration.
The TurboSnap Helper utility is designed to assist with properly configuring TurboSnap for Chromatic. It's especially helpful in monorepos, where managing directories, static assets, and build optimizations across multiple projects can get tricky.
Run the utility from the root of your repo using:
```shell
npx @chromatic-com/turbosnap-helper
```
❓ **Why run the utility from the repo root rather than the project root?**
TurboSnap Helper supports monorepos. By starting from the root, it can scan across all of your projects, so you're not accidentally missing assets or settings that could cause full rebuilds. If you run the utility from your project root, not a problem. The utility will still work just fine.
#### Helper modes to give you a deeper analysis
The utility can run in three modes:
- `init` (default) - walks you through creating or updating your TurboSnap config
- `analyze` - reviews your story and component files for dynamic imports
- `preview` - analyzes your preview file for shared dependencies that could cause full rebuilds
Running `init` mode not only prints out configuration options in the CLI, but **automatically adds the correct config options** to your Chromatic config file. We've enhanced the utility to take it beyond directory config help and introduced static asset detection, allowing you to easily add static assets to your `externals` config to ensure you don't miss changes. Don't have an existing Chromatic config file? No worries—the utility will create one for you!
To help further optimize your builds, the utility has an `analyze` mode that scans both story and components files to detect and surface dynamic imports. Dynamic imports are a hidden culprit for confusing TurboSnap behavior that can result in missed regressions or unnecessary rebuilds. `analyze` mode helps you track them down early.
And last is the `preview` mode, which displays an analysis of your Storybook preview file. Use the analysis to help keep your preview file clean and efficient, as a messy preview file can turn small changes into **full rebuilds**. The analysis provides:
- Warnings if your import count is too high (the higher the imports, the more likely you'll see frequent rebuilds)
- Lists shared wrappers/themes that could trigger global rebuilds
- Prints any dynamic imports inside your preview file
### Verify that TurboSnap is working
The best way to see if TurboSnap is working is to inspect your CLI output. There are a couple of messages the CLI outputs of particular relevance:
```shell
Traversing dependencies for X files that changed since the last build
```
This message tells us how many git changes Chromatic has detected since the last Chromatic build.
Usually, that's just one or two commits' worth of files.
```shell
Found Y story files affected by recent changes
```
This message tells you the number of story files that depend on the X changes above. This message also might be replaced by a message telling you that we need to capture all stories ([see below](/docs/turbosnap#full-rebuilds) ).
```shell
Tested A stories across B components; capture C snapshots in S seconds.
```
This message tells you how many snapshots we actually took instead of the number of stories we
found in your Storybook. Usually, C would be the number of stories in the Y component files above.
Once TurboSnap is activated, all subsequent builds will display an indicator with TurboSnap's status. Find it on the Build page above your tests.

---
## Recipes
A few common scenarios require additional configuration.
### TurboSnap with prebuilt Storybook using Webpack
If you're using `--storybook-build-dir` to provide a prebuilt Storybook, adjust your `build-storybook` script to include the `--stats-json` option (or `--webpack-stats-json` option for projects that haven't migrated to Storybook 8+). If Chromatic builds your Storybook for you, this is unnecessary, and will take care of it. For example:
```json title="package.json"
{
"scripts": {
"build-storybook": "build-storybook --stats-json"
}
}
```
In Storybook 6.2, `--webpack-stats-json` must be set to the value of `--output-dir` (`storybook-static` by default). In Storybook 6.3+, the value can be omitted as it automatically uses the value of `--output-dir`. Note that `--webpack-stats-json` was not supported before Storybook 6.2 and, therefore, cannot be used with TurboSnap.
How can I pass the `--stats-json` flag when using Storybook with `nx`?
When using `nx`, you can't pass CLI flags to your `Storybook: build` script since the `nx` executor won't accept them.
You must pass `webpackStatsJson` as a [prop to options](https://nx.dev/nx-api/storybook/executors/build#options) in order to generate the stats file.
How can I fail the CI pipeline if `preview-stats.json` file is missing?
When TurboSnap is enabled and the `preview-stats.json` is missing, Chromatic doesn't fail the build. Instead, it issues a warning that TurboSnap has **bailed** and runs an un-optimized build.
You can add an explicit verification step to your CI pipeline to fail the entire job if the file is not found and you don't want to run full builds.
To achieve this, build Storybook in a previous step and place the script below before the Chromatic command:
```yml title="chromatic-ci.yml"
STATS_FILE="storybook-static/preview-stats.json" # Adjust the path
if; then
echo "✅ Success: $STATS_FILE found. Chromatic can proceed."
else
echo "❌ Error: $STATS_FILE not found. This will prevent TurboSnap from functioning."
echo "Check your build script to ensure the --stats-json (or --webpack-stats-json) flag is correctly configured."
exit 1
fi
```
### TurboSnap with prebuilt Storybook using Vite
For projects using Storybook versions prior to 8, use the [vite-plugin-turbosnap](https://github.com/IanVS/vite-plugin-turbosnap). The plugin will automatically generate a stats file when you run the `build-storybook` command.
Vite is natively supported for Storybook 8 and later. To generate the stats file, use the `--stats-json` flag with the `build-storybook` command.
```json title="package.json"
{
"scripts": {
"build-storybook": "build-storybook --stats-json"
}
}
```
How to generate the `preview-stats.json` file for Rsbuild?
Like Webpack and Vite, Rspack should generate a stats file by default. If it doesn't, try setting the `performance.profile` option to `true`.
Another method is to use the `performance.bundleAnalyze` option in your `rsbuild.config.ts` and set `generateStatsFile: true`.
```ts title="rsbuild.config.ts"
export default {
performance: {
bundleAnalyze: {
analyzerMode: 'disabled', // Optional: prevents the HTML report from opening
generateStatsFile: true,
},
},
};
```
If you are using Rspack CLI, you can use the `--json` flag to output the stats file.
```shell
npx rspack --json stats.json
```
How to generate the `preview-stats.json` file for an Angular project?
When using Angular with Storybook, directly passing a CLI flag will not generate the `preview-stats.json` file.
You must configure the Storybook builder directly within your [`angular.json` file](https://storybook.js.org/docs/get-started/frameworks/angular#how-do-i-configure-angulars-builder-for-storybook) by adding `"webpackStatsJson": true`.
```json title="angular.json"
{
"projects": {
"your-project-name": {
"architect": {
"build-storybook": {
"builder": "@storybook/angular:build-storybook",
"options": {
"outputDir": "dist/storybook/your-project-name",
"configDir": ".storybook",
"browserTarget": "your-project-name:build",
"compodoc": false,
"webpackStatsJson": true
}
}
}
}
}
}
```
### Specify a deviating Storybook base directory
If you're using a prebuilt Storybook, and your `build-storybook` script was not executed from the same directory where you're running `chromatic`, you'll have to specify the relative path to the Storybook project root (where you run `build-storybook` from). For example, when your Storybook lives at `./services/webapp` in your Git repository:
```json title="package.json"
{
"scripts": {
// This would be a different package.json than the one with `build-storybook`
"chromatic": "chromatic --only-changed --storybook-base-dir services/webapp"
}
}
```
If you're running `chromatic` from the same subdirectory as `build-storybook`, this should not be necessary, as Chromatic will auto-detect the correct base dir.
### Specify external files to trigger a full re-test when they change
TurboSnap relies on Webpack's dependency graph. That means if you're using files processed externally to Webpack, with the output consumed by Webpack, you'll need to trigger a re-test when they change. This includes static assets like fonts, images and CSS files, as well as files that compile to static assets such as Sass, so long as they are not processed through a Webpack loader.
For example, if you use an external Sass compiler (not `sass-loader`) to compile `.sass` files to `.css` files (which may then be consumed by Webpack), then a change to a `.sass` file will not match any dependencies, preventing stories from being captured (i.e., snapshotted).
To work around this, run Chromatic's CLI with the `--externals` flag to specify one or more globs of "externally processed" files. For example:
```shell
chromatic --only-changed --externals "*.sass" --externals "public/**"
```
Globs not working as you expected? Verify your pattern using this [picomatch-playground](https://tools.chromatic.support/globs/).
If you've set up TurboSnap with Chromatic's [GitHub action](/docs/github-actions#enable-turbosnap), you can extend your existing workflow and provide the `externals` option as follows:
```yml title=".github/workflows/chromatic.yml"
# Other necessary configuration
jobs:
chromatic-deployment:
steps:
# 👇 Adds Chromatic as a step in the workflow
- name: Run Chromatic
uses: chromaui/action@latest
# Options required to the GitHub chromatic action
with:
# 👇 Chromatic projectToken, refer to the manage page to obtain it.
projectToken: ${{ secrets.CHROMATIC_PROJECT_TOKEN }}
externals: |
*.sass
public/**
```
#### Add `staticDirs` to external files
If you are using the [`staticDirs`](https://storybook.js.org/docs/configure/integration/images-and-assets#serving-static-files-via-storybook-configuration) option in your main Storybook config (introduced in Storybook 6.4), you should flag those as externals as well.
Whereas, the deprecated `--static-dir` (`-s`) Storybook CLI flag is auto-detected, the config option in `main.js` is not.
### Avoid re-testing dependent stories when certain files changed
You may have certain files in your Webpack dependency graph which are (indirectly) used by a story but which you know are unlikely to cause a meaningful (visual) change. A typical example is a global decorator that imports some utility files. Since a global decorator applies to all stories, changing such a utility file would cause the entire Storybook to be re-tested. You can avoid that problem using the `--untraced` flag:
```shell
chromatic --only-changed --untraced ".storybook/decorators/*.js"
```
TurboSnap works by taking a list of changed files in your Git repository and tracing those down to a set of story files. The `--untraced` flag allows you to skip tracing dependencies for certain files. That means any file in the Webpack dependency graph matching `--untraced` will be ignored, and thus stories (indirectly) depending on it will not get marked for re-testing at that time. However, those stories still might get marked as a result of tracing another changed file (via a different dependency chain).
> Keep in mind that your tests will be less reliable when using `--untraced` because it may skip stories that actually did have meaningful changes. It's recommended to disable TurboSnap on your main branch (see below) so that you can at least catch such changes.
`--untraced` is particularly useful when you're importing "index" files that re-export a bunch of underlying modules. A change to any of these modules would cause any file that imports the index file to be considered "dirty", even if it doesn't actually use the changed module. By using `--untraced` on the index file, all of its re-exported modules are automatically untraced as well, as long as they aren't imported directly.
#### Avoid re-testing on changes to package control files
When certain files that pertain to `node_modules` (`package.json`, `package-lock.json`, `yarn.lock`) change, TurboSnap attempts to determine an exact set of changed dependencies and trace those dependencies to associated stories. We rely on lock file(s) to get actual version numbers rather than semver ranges. TurboSnap retrieves versions for both the current state of the repository and for each baseline commit. If a lockfile is missing or out of sync with package.json, TurboSnap cannot do this, and we'll have to re-test all stories.
Similar to source code changes, the `--untraced` flag can also be used to ignore dependency updates (e.g., `--untraced "services/backend/package.json"`). That way, any dependency updates in that package will not be considered when applying TurboSnap. A typical use case scenario would be to untrace the `services/backend/**/*` directory and ignore _any_ changes, including dependencies. If you need fine-grained control over what is untraced, you can also enable it for a specific lockfile, with the caveat that untracing the root-level lockfile will ignore any dependency changes in _all_ packages that rely on it (i.e., sub-packages that don't have their lockfile).
### Enable or disable for specific branches
To enable TurboSnap for specific branches, pass a glob to `--only-changed` (e.g., `chromatic --only-changed "feature/*"`). Use a negating glob (e.g. `chromatic --only-changed "!(main)"`) to enable all but certain branches. See the [globs guide] for details.
### Using TurboSnap in a monorepo
TurboSnap will make working in a monorepo more efficient. Because it detects affected stories based on the actual files changed, pushing a commit that touched only backend code will run faster in CI and use fewer snapshots. However, it will still build and publish your Storybook. To avoid that, you can [skip Chromatic entirely](/docs/monorepos#only-run-chromatic-when-changes-occur-in-a-subproject), speeding up your CI pipeline even more.
When configuring TurboSnap in a monorepo, it's important to ensure that Chromatic understands where your Storybook project is relative to where you're executing your `chromatic` script. This is particularly important because TurboSnap relies on the correct file path resolution to determine which stories have changed and which stories can be skipped. If you're running a subproject out of a monorepo, chances are that you're executing your script from the root of your repository, in which case there are extra considerations to take when configuring TurboSnap.
Chromatic's suggested best practice when executing from your repo root is to set your `--storybook-base-dir` and `--storybook-config-dir` flags. For example, when your Storybook project is located in the `packages/webapp` dir of your repo, you'd update your script to reflect the following:
```json title="package.json"
{
"scripts": {
"build-storybook": "build-storybook",
"chromatic": "chromatic --only-changed --storybook-base-dir packages/webapp --storybook-config-dir packages/webapp/.storybook"
}
}
```
If you're using a prebuilt Storybook as opposed to having Chromatic build your Storybook, ensure that you are passing the `--storybook-build-dir` option in your `chromatic` script and [adjust your `build-storybook` script to include `--stats-json`](/docs/turbosnap/setup#turbosnap-with-prebuilt-storybook-using-webpack).
This would ensure we're checking `packages/webapp` for your Storybook project instead of your root directory, which may end up detecting unexpected package control files for other subprojects. Even though the default config directory is being used, you'll want to ensure to set `--storybook-config-dir` as well since this path is relative to your current working directory.
If you're using the `--externals` or `--untraced` flags in a monorepo, you'll want to be mindful that the paths specified are relative to your repository root. For example, let's say you want to ignore some global decorators in your `packages/webapp` project:
```shell
chromatic --only-changed --untraced "packages/webapp/.storybook/decorators/*.js --storybook-base-dir packages/webapp --storybook-config-dir packages/webapp/.storybook"
```
Using the path from the project's root (`.storybook/decorators/*.js`) would result in the files still getting traced by TurboSnap. Keep in mind you can use a pattern such as `--untraced "**/.storybook/decorators/*.js"`, this would work with TurboSnap and would result in changes to the directory going untraced.
Learn more about [using --untraced in a monorepo](/docs/monorepos#with-turbosnap).
If your monorepo has stories from multiple subprojects coming together in one Storybook, you may consider [running Chromatic on a subset of your Storybook](/docs/monorepos#run-tests-on-a-subset-of-stories). With TurboSnap enabled, that happens automatically. For more fine-tuned control over the subset of stories that get considered for testing, explore using the `--only-story-files` or `--only-story-names` options.
Learn more about using [onlyStoryFiles](/docs/monorepos#with-onlystoryfiles) and [onlyStoryNames](/docs/monorepos#with-onlystorynames) in your monorepo.
[globs guide]: /docs/globs
---
## Compatibility
#### GitHub pull_request triggers
GitHub workflows have various "triggers" that a Chromatic action could run on. We recommend sticking to `push` unless you know what you're doing.
TurboSnap is _not_ compatible with the `pull_request` trigger or its variations. The reason is that `pull_request` workflows run against an ephemeral merge commit, which doesn't exist in your Git history yet, but _would_ if you were to merge the PR at that point.
If your pull requests trigger multiple builds before being merged, Chromatic would not be able to find those earlier builds because your Git history does not actually contain the commit for which you ran a Chromatic build.
Our own GitHub Action works around that by using `pull_request.head.sha` as the commit hash for the build, even though it's really running against the merge commit so that we can still track baseline history. However, this discrepancy means TurboSnap would be looking at a different set of changed files than were actually in the recorded commit (which depends on the state of your base branch), yielding unpredictable results.
---
## Mastering Chromatic's trace utility
URL: https://chromatic.com/docs/turbosnap/trace-utility
> Learn how to use the trace utility to analyze your dependency graph. Identify and remove unnecessary imports, diagnose false positives from build tools, and understand the real propagation of changes for optimized bundles and confident refactoring.
# Mastering Chromatic's trace utility
Modern applications have complex import relationships. A simple utility function might be used by dozens of components, and a change to that function could potentially affect many stories. When using TurboSnap, you might notice that changing one component triggers snapshots for multiple unrelated stories. This happens when changes propagate through your dependency graph in unexpected ways.
Chromatic's `trace` utility helps you visualize these connections and optimize your project structure by mapping these relationships so you can understand the impact of your changes. Let's review an example of how you can use the utility to see the impact of changing a component, such as a button:
```bash
npx chromatic trace ./src/stories/Atoms/Button.jsx
```
By default, the CLI will output trimmed results:
```bash
ℹ Traced 1 changed file to 5 affected story files:
— src/stories/Atoms/Button.js [changed]
∟ src/stories/Atoms/Button.stories.js
∟ [story index]
— src/stories/Atoms/Button.js [changed]
∟ src/stories/Atoms/Button.stories.js
∟ src/stories/Atoms/Composed.stories.js
∟ [story index]
— src/stories/Atoms/Button.js [changed]
∟ src/stories/Pages/SecondPage.jsx
∟ src/stories/Pages/SecondPage.stories.js
∟ [story index]
— src/stories/Atoms/Button.js [changed]
∟ src/stories/Components/UserProfile.js
∟ src/stories/Components/UserProfile.stories.js
∟ [story index]
— src/stories/Atoms/Button.js [changed]
∟ src/stories/Components/ProfileSummary.jsx
∟ src/stories/Components/ProfileSummary.stories.jsx
∟ [story index]
```
This output gives us insight into the blast radius of the file, letting you determine which stories are affected by changes to this file.
For comparison, you can run the same command for an imported CSS file and see if there's any difference:
```bash
npx chromatic trace ./src/stories/Atoms/Button.css
```
Perhaps you'll find that the Button styles have a direct impact on a component that doesn't use the Button but reuses some of the Button's styles. Reusing styles isn't recommended because it creates hidden dependencies. Changing a Button's padding could unexpectedly break a card component that happened to import those same styles. The `trace` utility exposes these architectural anti-patterns, showing you exactly how styling changes ripple through your application.
## Using the `trace` utility
### 1. Configure your Storybook to generate stats JSON
Ensure that you're generating a stats JSON file during your Storybook build. You can do this by adding the `--stats-json` flag to your build script in `package.json`:
```bash
# Build with preview-stats.json
npm run build-storybook -- --stats-json
# Optional: create a trimmed version
npx chromatic trim-stats-file
```
The `preview-stats.json` file contains your complete dependency graph, while the trimmed version removes noise like `node_modules` dependencies for clearer analysis. The `trace` utility requires a stats file in order to map dependencies.
### 2. Trace one or more files to see affected stories
Trace a single file by passing the file path:
```bash
npx chromatic trace ./src/utils/dateFormatter.js
```
Pass multiple file paths to trace multiple files at once:
```bash
npx chromatic trace ./src/components/Button.js ./src/hooks/useButton.js
# Files with different extensions
npx chromatic trace ./src/utils/helpers.js ./src/utils/constants.ts ./src/styles/main.css
```
### 3. Adjust verbosity of the output using the `--mode/-m` flag
Use `expanded` to see underlying modules:
```bash
npx chromatic trace -m expanded src/components/Button/Button.jsx
```
Results:
```bash
— src/components/Button/Button.js [changed]
∟ src/components/Button/Button.stories.js
∟ [story index]
∟ src/components/Header/Header.js
∟ src/components/Header/Header.stories.js
∟ [story index]
```
Using `compact` will show only the list of dependent story files, omitting their connections:
```bash
# See only affected story files
npx chromatic trace -m compact src/components/Button/Button.jsx
```
Results:
```bash
ℹ Traced 1 changed file to 3 affected story files:
src/components/Button/Button.stories.js
src/components/Header/Header.stories.js
src/components/App/App.stories.js
```
## Use globbing features
[Basic globbing](https://github.com/micromatch/picomatch?tab=readme-ov-file#basic-globbing) is supported when using the `trace` utility. You can use a `*` character to trace an entire directory:
```bash
# ✅ WORKS
npx chromatic trace src/components/Button/*
npx chromatic trace src/components/*
# ❌ WON'T WORK
npx chromatic trace src/components/Button/
npx chromatic trace src/components/
```
Use basic characters (`*`, `**`, `[]`, `?`) to simplify your file path:
```bash
npx chromatic trace **/[abc]tomic/*/Accordion.ts?
# trace output match
Traced files...
[ 'src/components/atomic/accordion/Accordion.tsx' ]
```
## Additional configuration options
### Custom stats file location
By default, the `trace` utility expects your stats file to be in the `storybook-static` directory as either `preview-stats.json` or `preview-stats.trimmed.json`. If you're using a custom build directory, your stats file is output to a different directory than your build directory.
You can also use the `-s/--stats-file` flag to specify the custom stats file name:
```bash
# Use a custom stats file name
npx chromatic trace -s storybook-static/custom-stats.json src/components/Button/Button.jsx
# Stats file in different directory
npx chromatic trace -s build-artifacts/preview-stats.json src/components/Modal/Modal.jsx
# With multiple files
npx chromatic trace -s my-stats.json src/components/Button/Button.jsx src/components/Modal/Modal.jsx
```
### Specify base directory in a monorepo
If you're running the `trace` utility in a monorepo with multiple Storybook projects or your project is nested, you can pass the `-b/--base-dir` option to specify the package directory:
```bash
# Storybook nested in packages/storybook directory
npx chromatic trace -b packages/storybook src/components/Button/Button.jsx
# Multiple packages structure
npx chromatic trace -b apps/web src/components/Button/Button.jsx
```
### Test impact of ignoring specific files
You can test the impact of ignoring specific files using the `-u/--untraced` option:
```bash
# Ignore a specific utility file
npx chromatic trace src/components/Button/Button.jsx -u src/utils/helpers.js
# Ignore a CSS file
npx chromatic trace src/components/Button/Button.jsx -u src/styles/shared.css
# Multiple specific files
npx chromatic trace src/components/Button/Button.jsx -u src/utils/helpers.js -u src/styles/theme.css
```
## Examples
### Barrel files
Let's say you're using a similar component structure that relies on barrel (or index) files:
```txt
src/
components/
index.js # exports * from './Button', './Modal', etc.
Button/
Modal/
```
You observe that changing one component affects many unrelated stories. For example, you identify that changing the Button affects Modal stories. Use the `trace` utility to test whether the barrel file is responsible for overly-scoping:
```bash
# Confirm that Button changes affect Modal
npx chromatic trace ./src/components/Button/Button.jsx
# Test if the barrel file is the culprit using --untraced
npx chromatic trace ./src/components/Button/Button.jsx --untraced=./src/components/index.js
```
If the second command shows fewer affected stories, you've identified the barrel file as the culprit. Barrel files commonly increase the blast radius of your changes since they may introduce unrelated files to a component's dependency graph. The solution is to skip the barrel file and use direct imports:
```js
# Replace
import { Button } from './components'
# with
import Button from './components/Button/Button'
```
Direct imports ensure the dependency graph can follow the file without tracing unrelated modules. This is essential for global configurations (such as your `.storybook/preview` file) and barrel files with wide imports.
### Shared utility dependencies
Let's say you'd like to trace a currency utility:
```bash
# You updated a formatting function
npx chromatic trace ./src/utils/formatCurrency.js
```
A change to this utility function affects multiple components unexpectedly. The output shows it affects:
```txt
- ProductPrice.jsx
- CartSummary.jsx
- InvoiceTable.jsx
- AdminDashboard.jsx (unexpected!)
```
It's necessary to review how the currency utility is being imported by the Admin Dashboard component and other components being imported into Admin Dashboard. If you discover a third file cascading the changes to `AdminDashboard.jsx`, you can try testing the impact of ignoring it:
```bash
# Trace without the third file to see if they're truly needed
npx chromatic trace ./src/utils/formatCurrency.js --untraced=./src/components/ThirdFile.jsx
```
This helps you distinguish between direct dependencies (components that actually use the utility) and transitive dependencies (components that import other components that use the utility).
### Confirm changes with Git
Utilize these Git commands along with `trace` to confirm which files have changed and their impact, based on your dependency graph:
```bash
# Trace only files changed in the most recent commit
npx chromatic trace $(git diff --name-only HEAD~1 HEAD)
# Trace files changed between two specific branches
npx chromatic trace $(git diff --name-only develop main)
# Trace uncommitted changes
npx chromatic trace $(git diff --name-only)
```
## Suggested fixes
### Unused imports in dependency graph
**Problem:** Trace utility reveals dependencies that aren't actually used.
**Solution:** Remove the unnecessary imports entirely.
**Why:** Projects accumulate unused imports over time, silently increasing bundle size and dependency complexity, making it difficult to understand how changes propagate.
### Broad import patterns
**Problem:** Components import entire libraries or barrel files (ex. `import * from 'src/components'`).
**Solution:** Replace with specific, targeted imports (ex. `import { Button } from 'src/components/Button'`).
**Why:** Broad imports create hidden dependencies — changing one part of a library can unexpectedly affect many unrelated components.
### Monolithic utility files
**Problem:** Large files combine multiple responsibilities.
**Solution:** Split into focused, single-responsibility modules.
**Why:** This allows components to import only what they actually need, reducing the impact radius of changes and making dependencies explicit.
### False positive dependencies
**Problem:** Trace shows dependencies that shouldn't logically exist.
**Solution:** Tweak project configuration and advance options.
**Why:** Misconfigured optimization settings (like `sideEffects`) prevent accurate dependency analysis. Another thing that can cause issues with the analysis is the use of wildcard exports in barrel files, as they make tree-shaking more challenging. The trace won't identify what specific option must be changed, but can help identify the issue.
### Widespread but necessary dependencies
If dependencies are genuinely used across multiple components, document them to build institutional knowledge. This enables your team to evaluate potential ripple effects before making changes.
When dependencies are part of a shared library or design system and are tested separately (or can be isolated for better scoping), importing those components from the built package can be beneficial. This approach helps prevent unnecessary changes from being detected, as built packages are generally excluded from git. For more information, see [importing those components from the built package](/docs/turbosnap/monorepo-usage#prefer-importing-from-built-packages-over-src).
## Next: Use the `trace` utility to diagnose preview file rebuilds
When unexpected changes impact your preview file, this can lead to more rebuilds than expected. Learn how to pinpoint the root cause of your preview rebuilds using the `trace` utility.
Read next chapter
---
## Troubleshooting TurboSnap
URL: https://chromatic.com/docs/turbosnap/troubleshooting
> Speed up tests by detecting file changes with Git
# Troubleshooting your TurboSnap setup
## Why are no changes being detected?
If the build output shows no story files being detected by changes, there might be an issue matching the git changes with the files in your Storybook build. Use the `--debug` flag for more information about what Chromatic is doing.
Another reason that changes may be missed is if the changed files aren't directly included in the webpack build; use the [`externals` flag](/docs/turbosnap/setup#specify-external-files-to-trigger-a-full-re-test-when-they-change) to tell Chromatic about this.
## Why are changes not being detected correctly?
Teams frequently use an index file ([barrel file](https://basarat.gitbook.io/typescript/main-1/barrel)) to simplify imports. This practice allows for easier importing, such as accessing a component from `@component-library` instead of specifying the full path like `@component-library/elements/table`. However, the usage of barrels impacts TurboSnap's ability to detect changes.
When encountering a barrel file, TurboSnap relies on Webpack's tree-shaking abilities to accurately identify changes. Otherwise, a modification in `@component-library/elements/table` would prompt changes in all files importing from the barrel file, meaning all files that import from `@component-library`.
Therefore, if you use barrel files, you'll want to ensure that Webpack tree-shaking (dead-code-elimination) is working properly. Here are some tips:
1. Use ES2015 module syntax (i.e., import and export)
2. Build using `production` mode (`NODE_ENV`) to enable [various optimizations](https://webpack.js.org/configuration/mode/#usage) including minification and tree-shaking.
3. Make sure that compilers do not automatically convert your ES2015 module syntax into CommonJS modules. This is the default behavior of the popular Babel preset `@babel/preset-env`. See the [documentation](https://babeljs.io/docs/babel-preset-env#modules) for more details.
## Why is TurboSnap testing more stories than the ones I changed?
TurboSnap identifies **updated files** to test their stories. For instance, if you modify a single story in the `Button.stories.js` file, TurboSnap will test all stories in that file because it cannot pinpoint changes to an individual story.
You can review how many stories were tested in the TurboSnap tooltip.
## Why are full rebuilds required?
Full rebuilds can be required for various reasons (see the list in [how it works](/docs/turbosnap#how-it-works)). Another scenario where a full rebuild will also be required is due to a change to a `package.json` or lock file for a subproject that doesn't affect the Storybook (we need to be very conservative as we cannot tell if a change to a lock file could affect `node_modules` imported by Storybook).
## Why is my build failing with an Out of memory error?
An `Out of Memory` error typically happens when the Node.js process runs out of allocated memory, especially if your project has a large dependency tree or TurboSnap is enabled. Here are a few steps that can help resolve this issue:
- **Increase Node.js memory allocation:** Try rerunning Chromatic’s CLI with a higher memory limit by setting `NODE_OPTIONS=--max_old_space_size=4096` (4GB) or higher. This provides more memory to Node.js, which can help with larger builds.
- **Adjust CI runner memory settings:** Make sure your CI runner has sufficient memory. Chromatic recommends a minimum of 4GB, and if needed, up to 8GB. Some CI providers may require specific configurations to allocate more memory to certain steps or to the entire runner environment.
- **Force full rebuilds on lock file changes:** Set the `MAX_LOCK_FILE_SIZE` environment variable to 1 to ensure a full rebuild occurs whenever the lock file changes. This can help prevent OOM errors.
Builds are split between your environment and Chromatic’s. Processes that require access to your code (like dependency tracing) run in your environment, while tasks like the Capture process run on Chromatic’s end.
## Why do merge commits test more changes than I expect?
Ordinarily, TurboSnap uses git to find all files that have changed since the [ancestor build](/docs/branching-and-baselines#find-the-ancestor-builds) to determine which components/stories to snapshot. The changed file behavior is more complex with merge commits because there are two "ancestor builds".
When you have a merge commit, Chromatic considers **any file that has changed since either ancestor's commit** to decide if a story needs to be re-snapshotted. In other words, the union of the git changes.
The reason for this behavior relates to what Chromatic does when it chooses not to re-snapshot a story. In such case, it "copies" the snapshot for the story from the ancestor build, knowing (due to the git check) that the story cannot have changed in the meantime.
In the case of merge commits, Chromatic does not know ahead of time which side of the merge the snapshot might be copied from because that involves running the [complete baseline selection](/docs/branching-and-baselines#calculate-a-snapshot-baseline-from-the-ancestor-builds) process, so it needs to be conservative and allow for changes on either branch.
## Does TurboSnap work with squash/rebase merge?
TurboSnap is compatible with squash and merge rebasing as of version 6.6+. Please update your package to get support.
## Why didn't TurboSnap run on my build?
The usage report shows whether TurboSnap actually ran, and if it didn’t, why.
| Bail reason column | What happened |
| --------------------------------------------------------------------------------------- | ---------------------------------------------------------------------------------------------------- |
| One of the [reasons below](#what-do-the-turbosnap-bail-reasons-in-my-usage-report-mean) | TurboSnap ran, but couldn't confirm anything was unchanged, so every test in the build was captured. |
| `unavailable` | TurboSnap isn't available for your account yet. It becomes available after 10 builds from CI. |
| Empty | Either TurboSnap ran and copied what it could, or it wasn't enabled for that build. |
An empty column doesn't distinguish those last two. To tell them apart, open the build in Chromatic and check the TurboSnap status in the test summary. Its tooltip says whether TurboSnap applied, bailed, or was disabled for that build.
## What do the TurboSnap bail reasons in my usage report mean?
Your [usage data (CSV report)](/docs/billing/usage-reports#export-usage-data-as-a-csv) can help you identify opportunities to improve your TurboSnap configuration. The **TurboSnap Bail Reason** column tells you what caused TurboSnap to bail and trigger a full rebuild. The **TurboSnap effectiveness** chart in the [Trends dashboard](/docs/usage-trends) segments bails by these same reasons.
Most reasons point to something in your setup you can change. `unavailable` and `missingStatsFile` are the exceptions, explained in their entries below.
Here's what each reason means:
### `changedExternalFiles`
TurboSnap bailed due to matching `externals`.
You may need to check your glob pattern or revisit the paths you're including with `externals` if these changes are unexpected.
### `changedPackageFiles`
TurboSnap bailed due to one or more package file changes (`package.json`, `package-lock.json`, `yarn.lock`).
This bail should be expected from time to time as dependencies are updated, but can become more of an issue if you run out of a monorepo or have dependencies in subdirectories. If you find this happening frequently, consider using `untraced` to [avoid re-testing on changes to your package control files](/docs/turbosnap/setup#avoid-re-testing-on-changes-to-package-control-files).
### `changedStaticFiles`
TurboSnap bailed due to matching static file (`--static-dir`).
This message should only present to customers using TurboSnap with older Storybook versions, since `--static-dir` was deprecated in Storybook 8. Customers on Storybook 8+ need to add their static dirs using `externals`. This error may indicate that you need to check the value you've configured for `--static-dir`.
### `changedStorybookFiles`
TurboSnap bailed due to a change in Storybook config (`.storybook` dir files, such as `main.js|ts` and `preview.js|ts`).
You may have made changes to one of the files within your Storybook configuration, or to a dependency that is being imported by your configuration. It's important to keep in mind that second part, since it's common practice to import decorators into the `preview.js` config.
Additionally, if you're utilizing barrel/index files (whether directly importing in your `preview.js` or in a file that `preview.js` is dependent on), it's likely to cause more bails since [a change to any of these modules would cause any file that imports the index file to be considered "dirty"](/docs/turbosnap/setup#avoid-re-testing-dependent-stories-when-certain-files-changed), even if it's not using the changed module.
### `invalidChangedFiles`
TurboSnap bailed due to missing git history.
TurboSnap is having issues retrieving your git history. This commonly happens when a repo is shallow cloning, which can be fixed by setting your fetch depth to `0` in your `.yml` workflow file. Another common cause of this issue is when customers use GitHub Actions with the `pull_request` event. If this is the case, you'll want to make sure you [set the correct `ref` in your checkout step](/docs/github-actions#recommended-configuration-for-build-events).
### `missingStatsFile`
TurboSnap bailed due to missing stats file.
This reason comes from Chromatic CLI versions before 10.6.0. Newer versions fail the build with an error message instead of bailing, so it only appears in usage reports covering builds that ran on an older CLI.
The fix is the same either way. Since the stats file is needed for TurboSnap to analyze your dependencies, make sure your Storybook script includes `--stats-json`.
### `noAncestorBuild`
TurboSnap bailed due to not finding an ancestor build for the commit.
This bail reason is reserved for when no ancestor build is found at all for a commit. This can be due to rebasing, squash-merging, force-pushing, or running against ephemeral merge commits. If it's happening on builds that don't fit those categories, it may indicate an issue with fetching your git history.
### `rebuild`
TurboSnap bailed because the commit is a rerun of a previous build, based on the baseline build having the same commit and branch name.
Most reruns are intentional, but if you weren't expecting the ones you're seeing, this may indicate you need to check your CI workflow to see what could be kicking off an additional build for the same commit.
### `unavailable`
TurboSnap didn't run because it isn't available for your account yet.
TurboSnap becomes available once a project has run at least 10 builds from CI, and it stays available for the whole account from then on. Until that happens, builds that ask for TurboSnap record this reason and capture every test.
This isn't a configuration problem, so there's nothing to change in your Chromatic script. Keep running builds in CI. If you've passed 10 builds from CI and TurboSnap still isn't available, check that the project has UI Tests or UI Review enabled, since it won't become available for projects that only publish Storybook.
---
## Composition
URL: https://chromatic.com/docs/composition
> Learn to combine Storybooks through composition
# Storybook Composition
Chromatic publishes your Storybook to a secure CDN. That means you can combine published Storybooks with your local Storybook using [Composition](https://storybook.js.org/docs/sharing/storybook-composition).
Chromatic does not snapshot externally composed Storybooks for UI Tests or UI Review.
## Compose published Storybooks
Chromatic generates a [permalink](/docs/permalinks) for published Storybooks to use with Composition that includes:
- Versioned endpoints, URLs that resolve to different published Storybooks depending on a version=x.y.z query parameter (where x.y.z is the released version of the package).
- Support for /stories.json
- Support for /metadata.json and the releases field.
### Setup
In your local Storybook, add a `refs` key to [`.storybook/main.js|ts`](https://storybook.js.org/docs/configure#configure-story-rendering). Paste the permalink in the `url` field.
```js title="storybook/main.ts"
// Replace your-framework with the framework you are using, e.g. react-vite, nextjs, vue3-vite, etc.
import type { StorybookConfig } from "@storybook/your-framework";
const config: StorybookConfig = {
framework: '@storybook/your-framework',
stories: ["../src/**/*.stories.@(js|jsx|ts|tsx)"],
refs: {
// 👇 Upper-case characters not supported in the refs key
"chromatic-published-storybook": {
// The title of your Storybook
title: "Design System",
// The url provided by Chromatic when it was published
url: "https://your-published-url.chromatic.com",
},
},
};
export default config;
```
When your local Storybook starts, it will auto detect the `refs` and compose your published Storybook. You'll see both sets of stories side-by-side.

### Compose Storybook by branch or commit
Depending on your use case, you may want to compose Storybook using a [permalink](/docs/permalinks) to a branch or a commit.
#### Branch: `https://--.chromatic.com`
If you want your local Storybook to compose the latest Storybook on `main`, use the branch permalink. This is useful for folks who work on multiple Storybooks simultaneously.
- Building a component library in React and Vue at the same time
- Monorepos with multiple inter-connected Storybook projects
#### Commit: `https://--.chromatic.com`
If you want your local Storybook to compose a specific version of Storybook, use the commit permalink. This is useful for folks who depend on a fixed version of a component library package.
### Access control
Published Storybooks follow the [access rules](/docs/access) of your project. If you have a private project, you'll need sign in to Chromatic (via Storybook's UI) to load the private Storybook.
---
## Package Composition
Design system and component library authors can automatically compose their Storybook inside their consumer’s Storybooks.
Add a `storybook` property in the `package.json`. Use the [permalink to a commit](#compose-storybook-by-branch-or-commit) in the `url` field.
```json
{
"storybook": {
"url": "https://your-published-url.chromatic.com"
}
}
```
Once the package is installed and Storybook starts, it scans for external Storybooks referenced by your packages and loads them into the UI.
### Versioning
Chromatic supports automatic versioning for the following Git providers.
| Git provider | Support |
| --------------------------------------------------- | ---------------------------------------- |
| GitHub | Public projects only via GitHub Releases |
| GitLab | Public and private projects |
| Bitbucket | Not supported |
| [Unlinked projects](/docs/access#unlinked-projects) | Not supported |
How to manually query for versions?
If automatic versioning isn't supported for your Git provider, you can still get version information by manually updating your `package.json` with the permalink of the current published Storybook (e.g. `https://--.chromatic.com`).
Use the `/metadata.json` endpoint to get additional information about the deployed Storybook version. It will output a response similar to the example below:
```json
{
"versions": {
"v0.1.1": "https://your-published-url.chromatic.com"
}
}
```
---
### Resources
- [Storybook composition](https://storybook.js.org/docs/sharing/storybook-composition)
- [Package composition with Storybook](https://storybook.js.org/docs/sharing/package-composition)
---
## Embed stories
URL: https://chromatic.com/docs/embed
> Embed your Storybook on Medium, Notion, and other platforms
# Embed stories
Embed stories published to Chromatic in Medium articles, Notion pages, and countless other platforms.
Before we begin, you'll need to figure out which embed format your platform supports: oEmbed or standard `
```
## Embed a plain story
Embed a plain story without the toolbar by replacing the ``, ``, and `` with the details for your story.
```shell
// oEmbed
https://-.chromatic.com/iframe.html?&viewMode=story
// iframe embed
```
## Embed a docs page
You can also embed a docs page by replacing the ``, ``, and `` with the details for your story.
```shell
// oEmbed
https://-.chromatic.com/iframe.html?&viewMode=docs
// iframe embed
```
---
### How to embed stories on popular platforms
How to embed stories in Medium
Paste the Storybook URL into your Medium article, then press Enter. The embed will automatically resize to fit the height of your story.
While editing an article, Medium renders all embeds non-interactive. Once you publish, the embed will be interactive. [View live demo on Medium »](https://medium.com/@ghengeveld/embedding-storybook-on-medium-ce8a280c03ad)
How to embed stories in Notion
In your Notion doc type `/embed`, press Enter, then paste the Storybook URL as the embed link. You can manually resize the embed as needed.

How to embed stories in Ghost
In your Ghost post type `/html`, press Enter, then paste the `




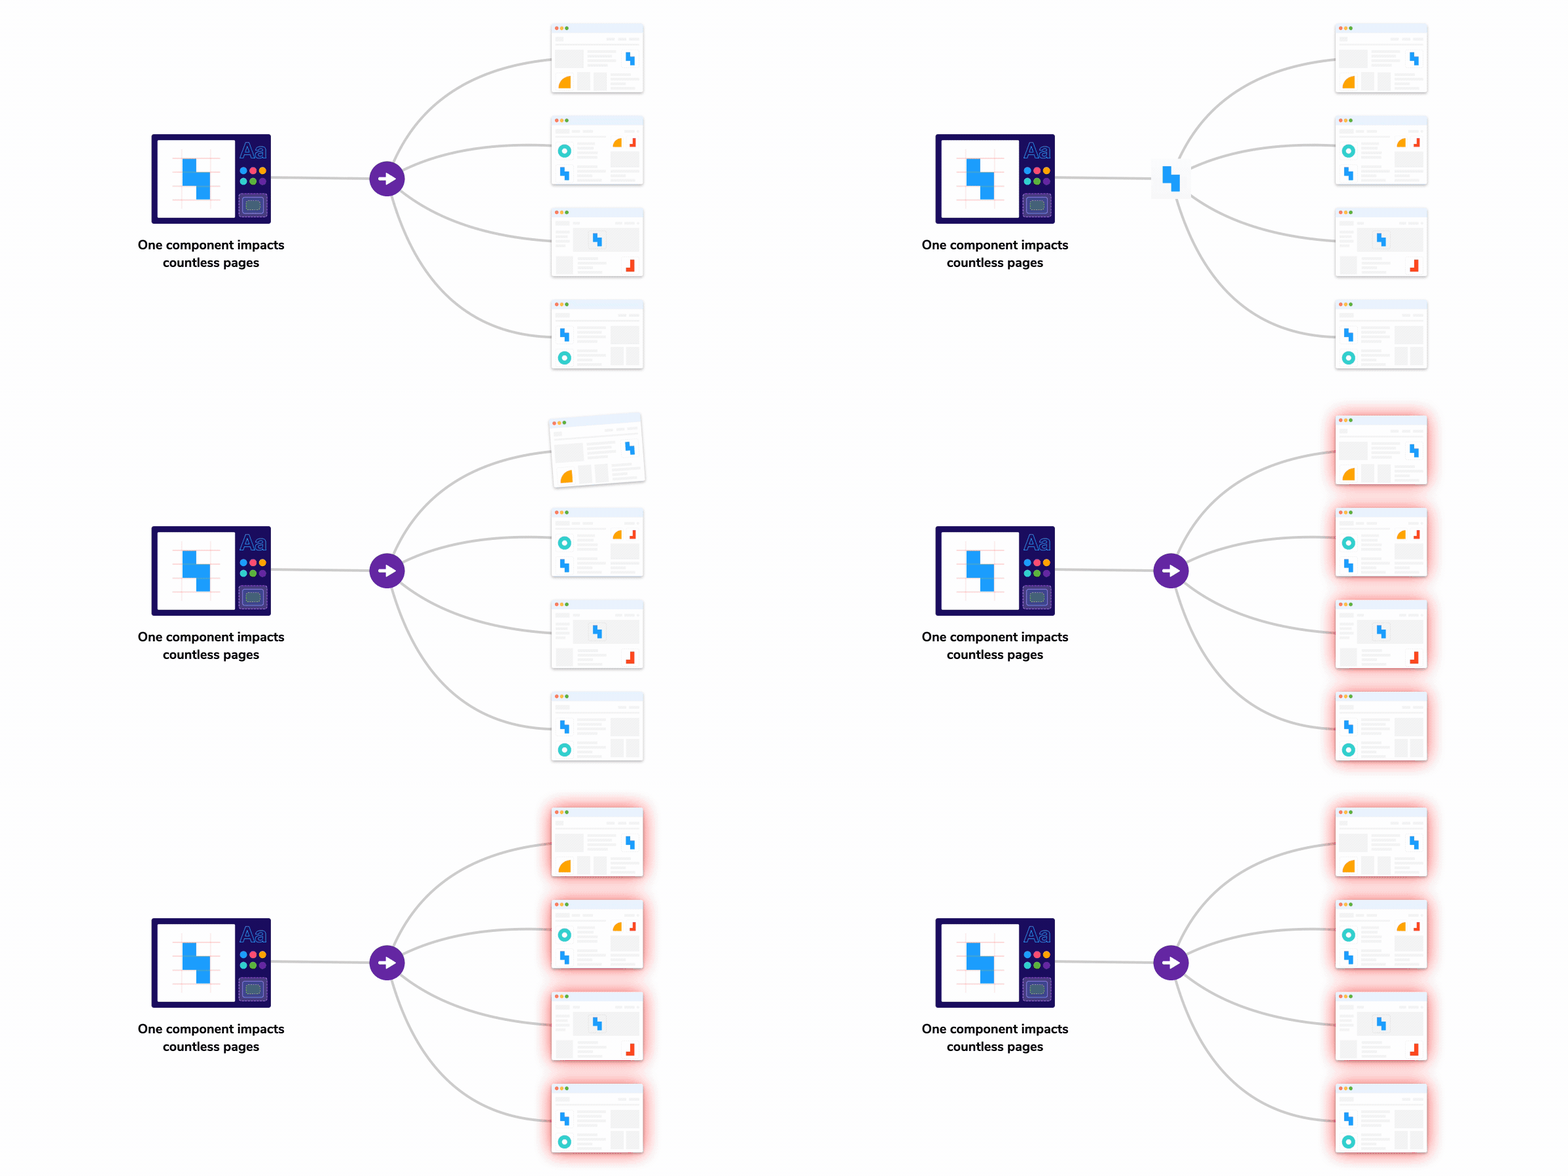 What’s more, page-level tests occur too late in the development cycle. Developers first build components and then assemble them into pages. One flawed component can spread issues throughout your app, making problems harder to identify and more time-consuming to fix.
Chromatic runs accessibility tests at the component-level, where issues are easier to identify and fix. By integrating accessibility testing into your development workflow, Chromatic helps you catch violations early, before they multiply across pages.
## Why use regression-based accessibility testing?
Axe has long been the industry standard for running automated accessibility tests on HTML-based interfaces. These tests audit the rendered DOM against a set of heuristics based on [WCAG](https://www.w3.org/WAI/standards-guidelines/wcag/) rules and widely accepted best practices. They act as the first line of QA to catch blatant accessibility violations.
When you run axe, it gives you a list of _all_ violations detected across the UI being tested. While this is incredibly helpful, it's unlikely you'll address all issues immediately. Teams often inherit accessibility debt that can't be resolved overnight. They want to address these issues incrementally while releasing new features without adding more debt.
By tracking violations against a story's baseline, Chromatic helps prevent regressions in pull requests while tracking debt so you can fix it separately at your own pace.
## Accessibility testing workflow
By combining Chromatic and Storybook, you get instant accessibility feedback at every phase, from development to running checks on CI. Here’s how it works:
### During development: Fast feedback in Storybook
Storybook’s [Accessibility addon](https://storybook.js.org/docs/writing-tests/accessibility-testing) simplifies running axe on individual components. You can run accessibility tests for all your stories in the background. If there are any violations, the test will fail, and you will see a summary in the sidebar. Violating elements are highlighted in Storybook’s canvas, allowing you to pinpoint the exact problem areas. You also get detailed error descriptions and guidance to help resolve issues quickly.

### In CI: Regression-checks with Chromatic
When you run Chromatic, it creates a static build of your Storybook and uploads it to our Capture Cloud. From there, Chromatic spins up a fleet of standardized browsers to load all your stories in parallel and run accessibility tests.
Chromatic tracks accessibility violations over time, establishing a baseline for each story. This helps separate pre-existing issues from new ones.
What’s more, page-level tests occur too late in the development cycle. Developers first build components and then assemble them into pages. One flawed component can spread issues throughout your app, making problems harder to identify and more time-consuming to fix.
Chromatic runs accessibility tests at the component-level, where issues are easier to identify and fix. By integrating accessibility testing into your development workflow, Chromatic helps you catch violations early, before they multiply across pages.
## Why use regression-based accessibility testing?
Axe has long been the industry standard for running automated accessibility tests on HTML-based interfaces. These tests audit the rendered DOM against a set of heuristics based on [WCAG](https://www.w3.org/WAI/standards-guidelines/wcag/) rules and widely accepted best practices. They act as the first line of QA to catch blatant accessibility violations.
When you run axe, it gives you a list of _all_ violations detected across the UI being tested. While this is incredibly helpful, it's unlikely you'll address all issues immediately. Teams often inherit accessibility debt that can't be resolved overnight. They want to address these issues incrementally while releasing new features without adding more debt.
By tracking violations against a story's baseline, Chromatic helps prevent regressions in pull requests while tracking debt so you can fix it separately at your own pace.
## Accessibility testing workflow
By combining Chromatic and Storybook, you get instant accessibility feedback at every phase, from development to running checks on CI. Here’s how it works:
### During development: Fast feedback in Storybook
Storybook’s [Accessibility addon](https://storybook.js.org/docs/writing-tests/accessibility-testing) simplifies running axe on individual components. You can run accessibility tests for all your stories in the background. If there are any violations, the test will fail, and you will see a summary in the sidebar. Violating elements are highlighted in Storybook’s canvas, allowing you to pinpoint the exact problem areas. You also get detailed error descriptions and guidance to help resolve issues quickly.

### In CI: Regression-checks with Chromatic
When you run Chromatic, it creates a static build of your Storybook and uploads it to our Capture Cloud. From there, Chromatic spins up a fleet of standardized browsers to load all your stories in parallel and run accessibility tests.
Chromatic tracks accessibility violations over time, establishing a baseline for each story. This helps separate pre-existing issues from new ones.
